Easily set up your dedicated Space on Proggio and start creating your project structure. It is important to have a well set up environment so that work can be managed in a productive and more intuitive manner – Setting it up takes only a couple of minutes. Throughout this section, we’ll share insights and best practices to eventually help you drive adoption within your organization. Here’s what you’ll be able to achieve in just a few simple steps:
- Define your own task stages and project workflow.
- Invite members to your team and define roles & permissions.
- Manage a shared customized Space dedicated for your team’s project related (and not related) assignments.
How to create a shared customized Space?
Define your own task stages
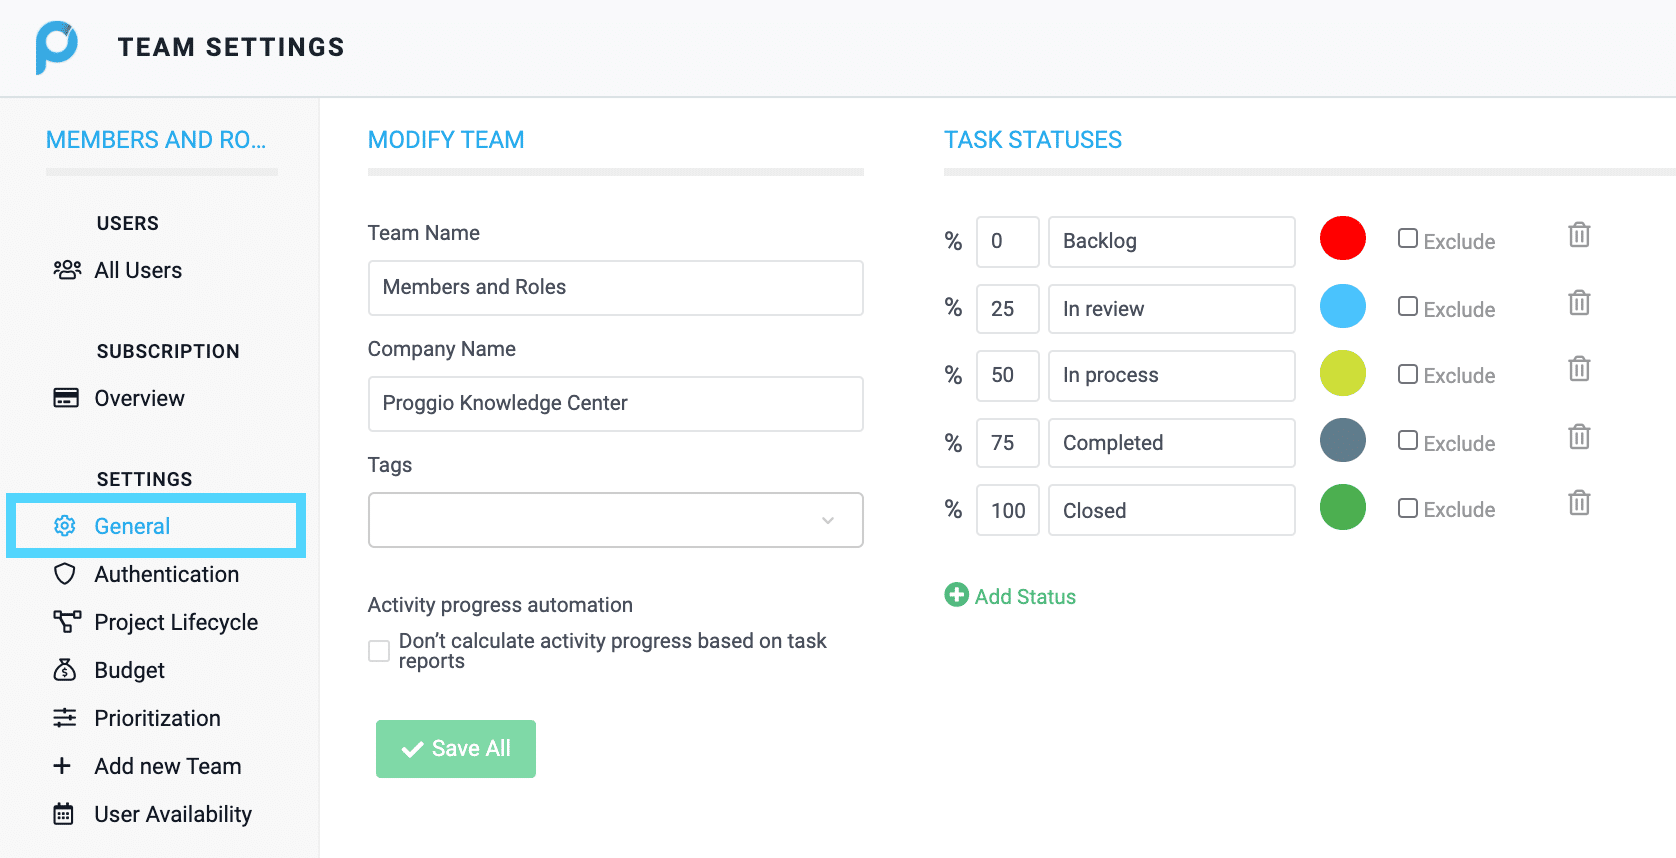
Before you get started with creating assignments and requesting for status updates from your team, let’s define first what are your progress definitions. The default stages in Proggio are – ‘To Do’ (0%), ‘In Review’ (25%), ‘In progress’ (50%), ‘Done’ (75%), ‘Closed’ (100%).
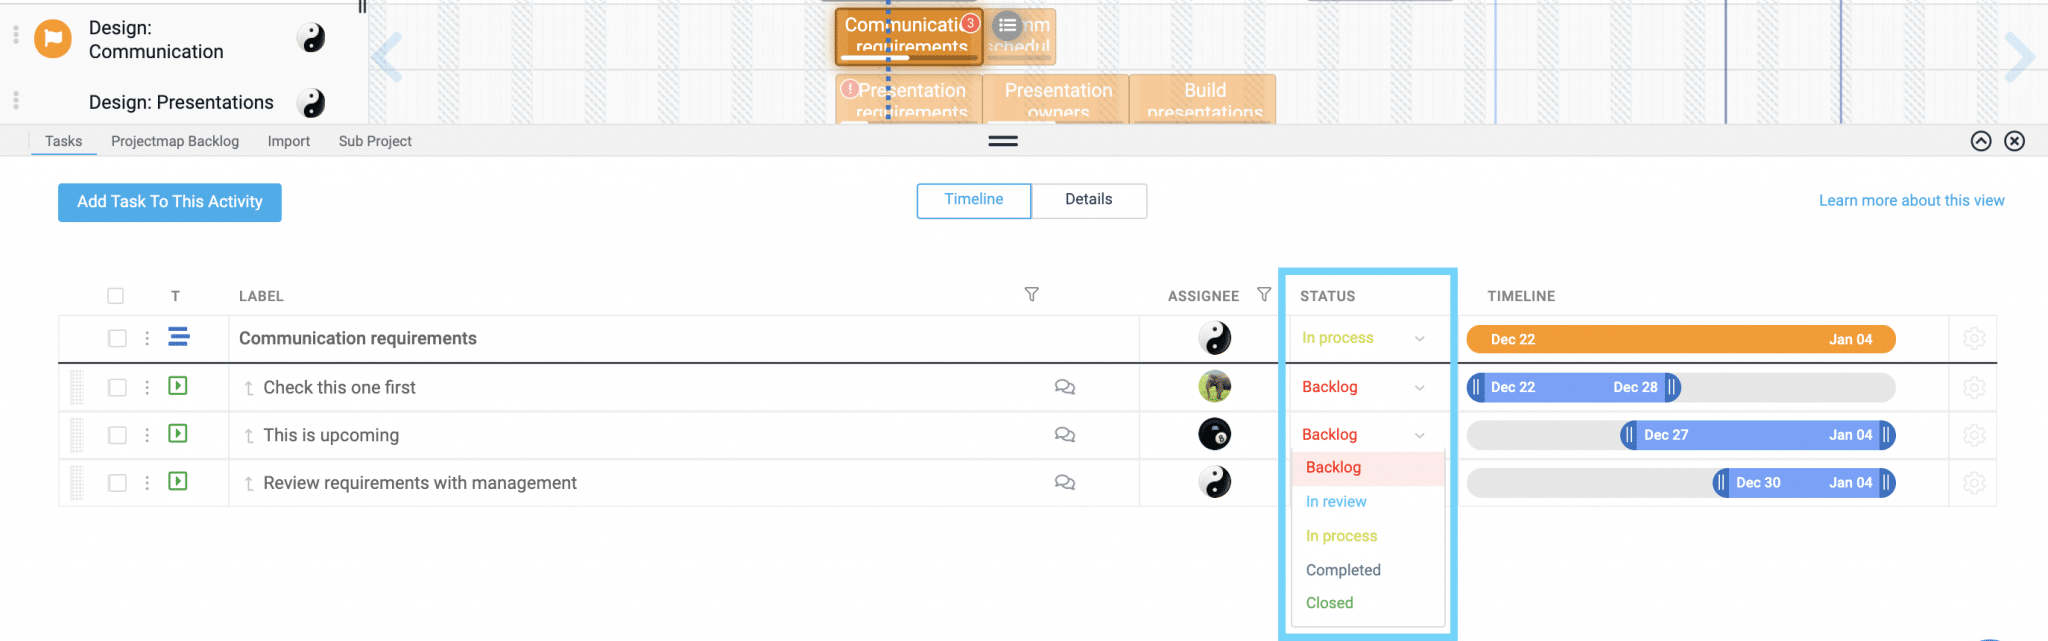
You can choose to have different criteria names, percentages and even colour scheme to fit your personal requirements. Note that (‘Excluding’ a status is mostly used when syncing a 3rd party application. If you’re using Proggio as a stand alone tool, you can ignore this option). To access, click Settings > General
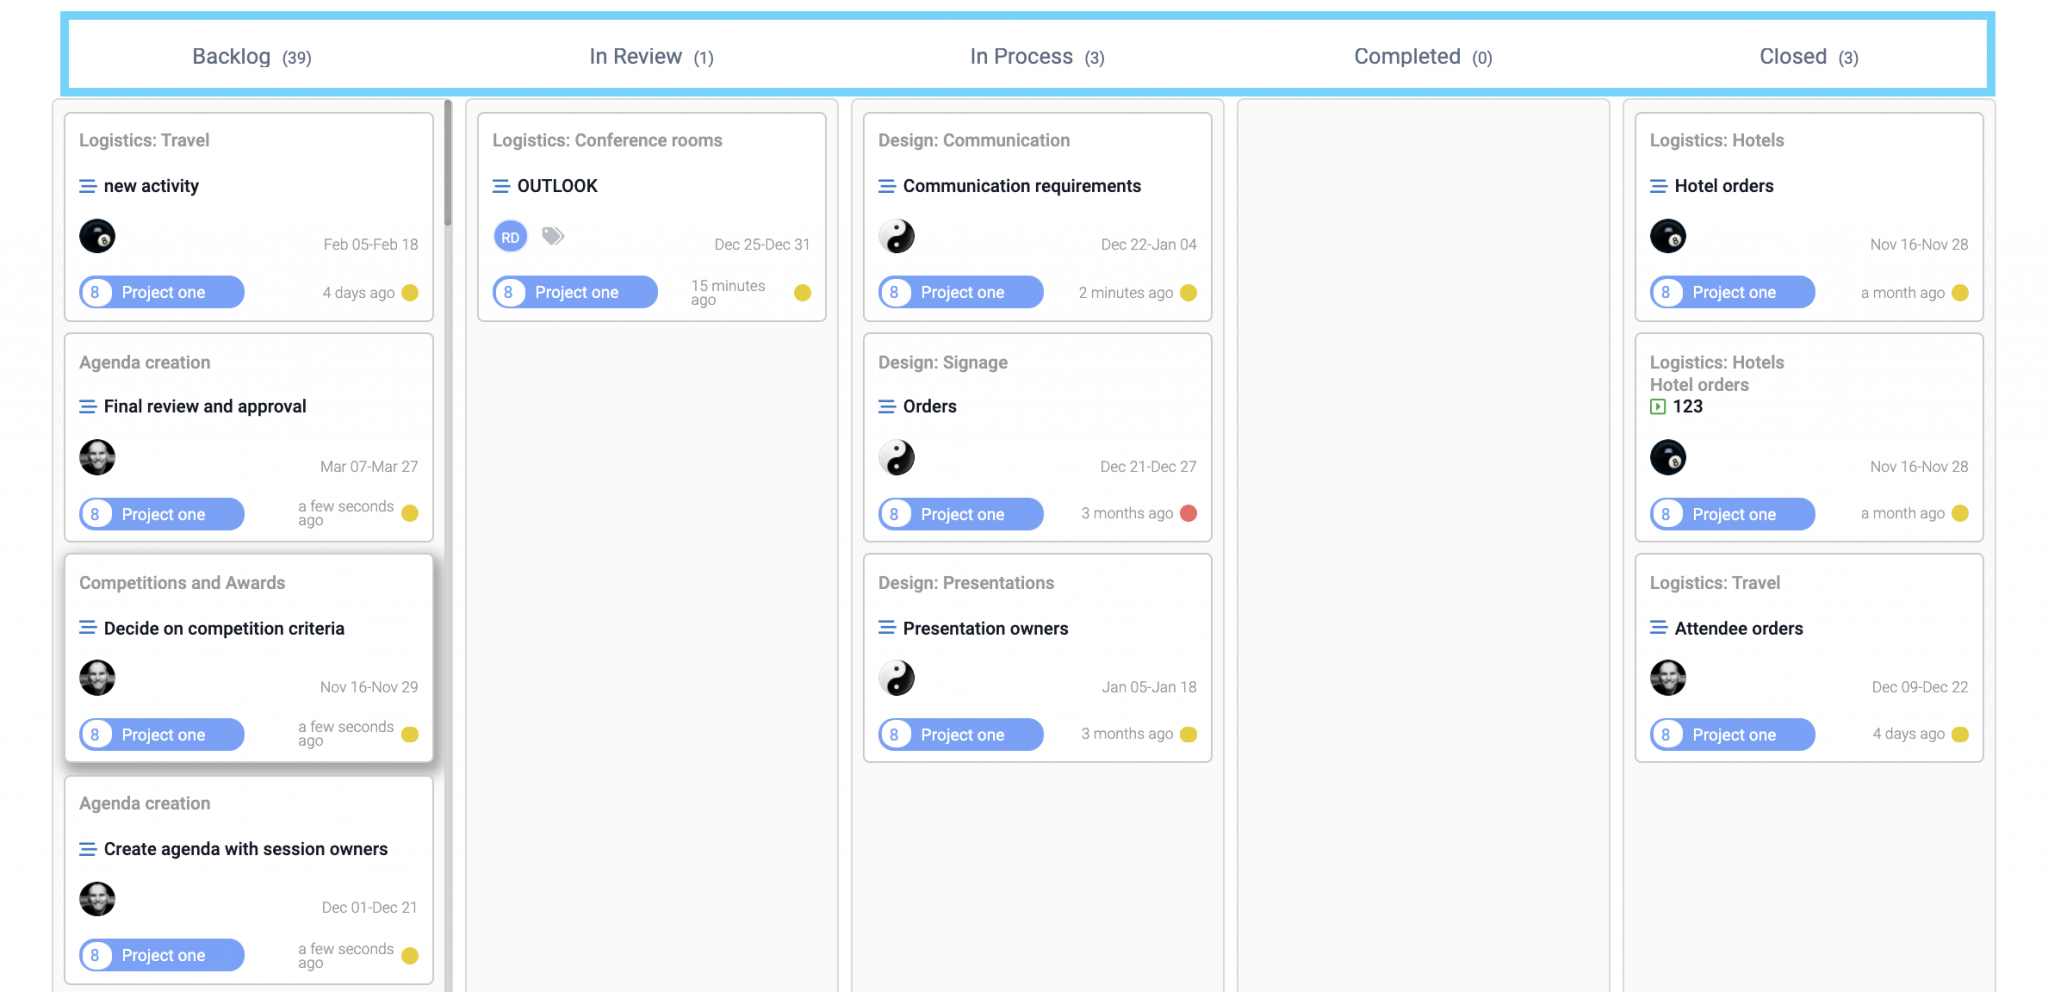
Status stages will also define the number of columns in your Tasks Board (Kanban view).
Define your Project Workflow
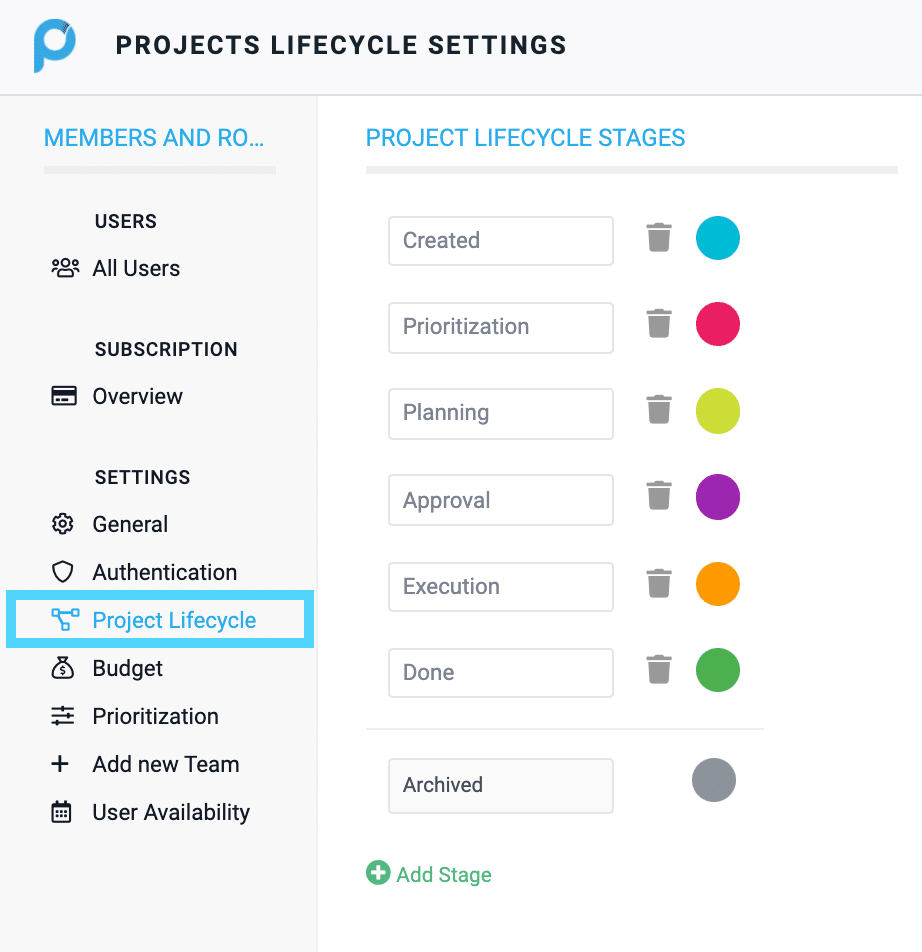
Going one level up, Projects can also have status states. This is usually referred to as ‘Project Lifecycle Stage’. You can define your project lifecycle stages to better reflect where your focus should be, mostly in terms of prioritization. The default stages in Proggio are ‘Created’, ‘Prioritization’, ‘Planning’, ‘Approval’, ‘Execution’, ‘Done’.
You can choose to have different lifecycle names and even colour schemes to fit your personal requirements. To access, click Settings > Project Lifecycle
Where can I see an indication of the project Lifecycle?
- Most commonly used view in the ‘All Projects’ page, selecting ‘Tile’ view, will show the Project Lifecycle Stage on a coloured label. To edit the stage, Right Click the project tile and select ‘Project Settings’.

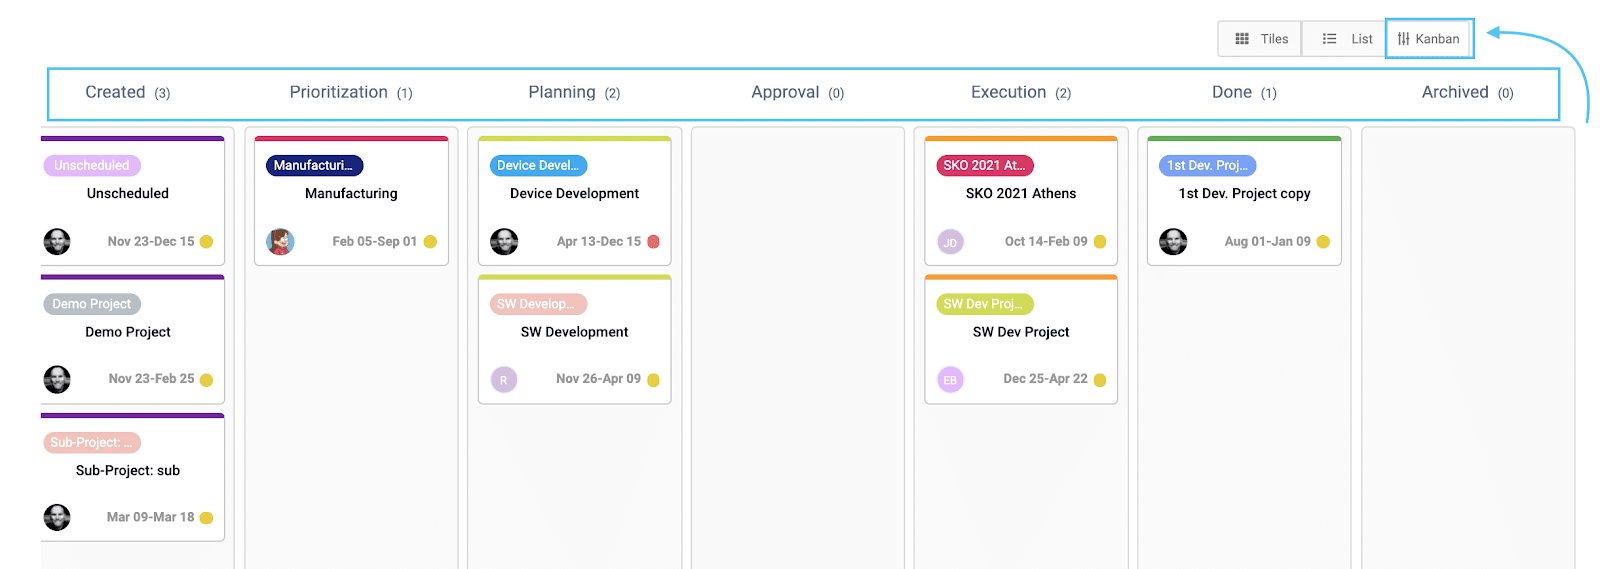
- Selecting ‘Kanban’ view, will display your Project Kanban view and place each project in its current stage. You can drag and drop across to different stages. This view is ideal when managing a large scope of projects that are in different lifecycle stages or projects that are not timeline related. You can read more about that here.
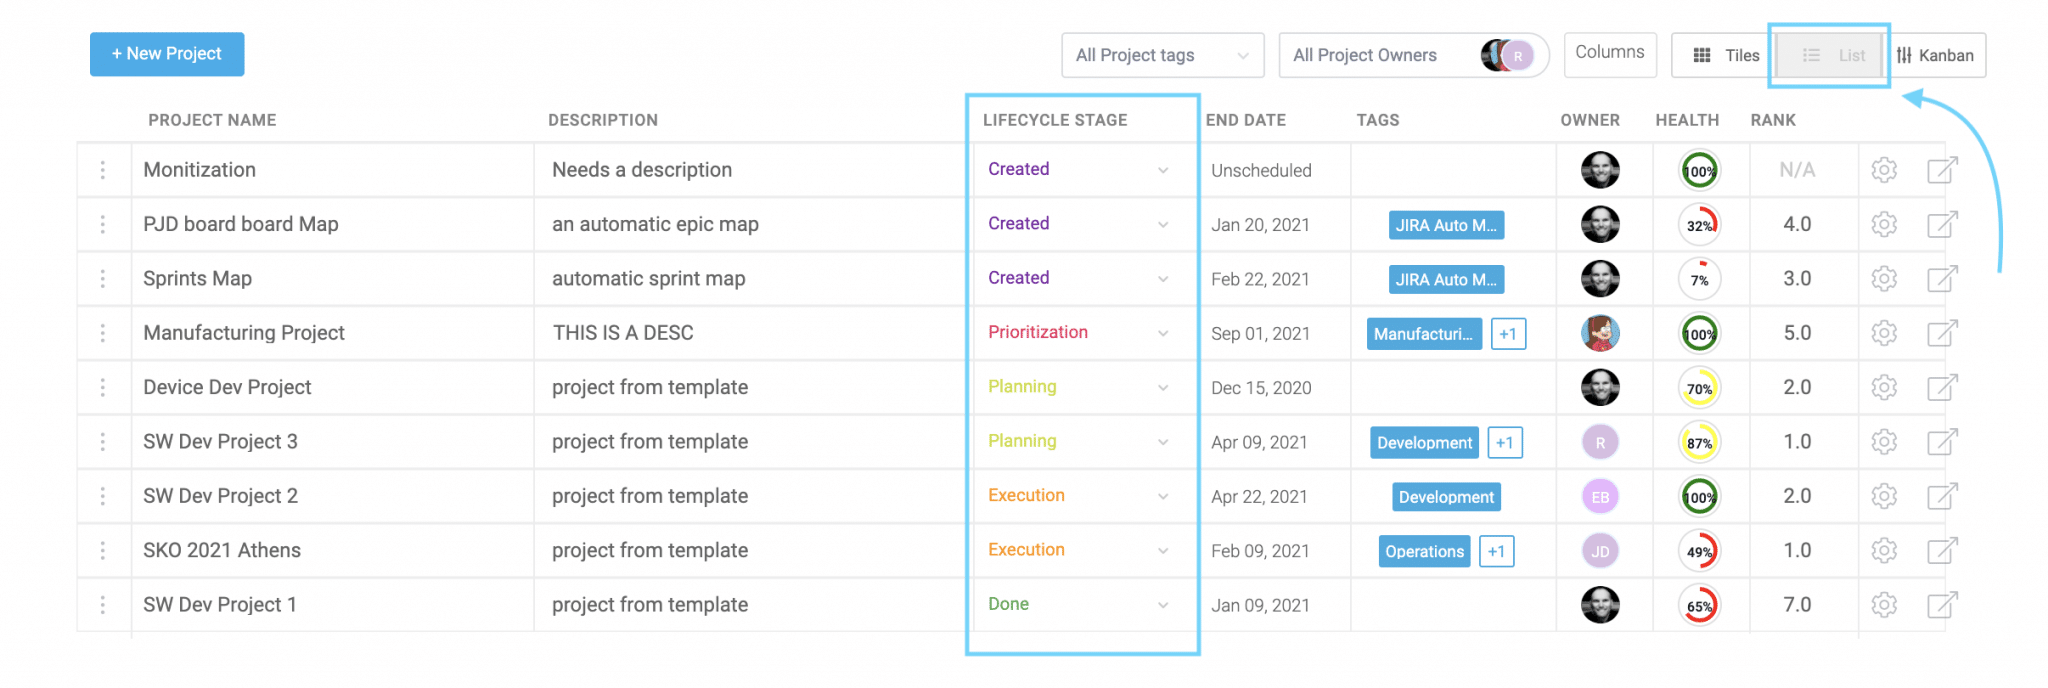
- From your ‘All Projects’ page, selecting ‘List’ view, will show the Project Lifecycle Stage in a separate column, allowing you to sort / filter your projects according to their lifecycle stage and also move them into different stages using the ‘Lifecycle Stage’ dropdown list.
Invite members to your team and define roles & permissions.
Left Side Navigation Panel > Settings > All Users
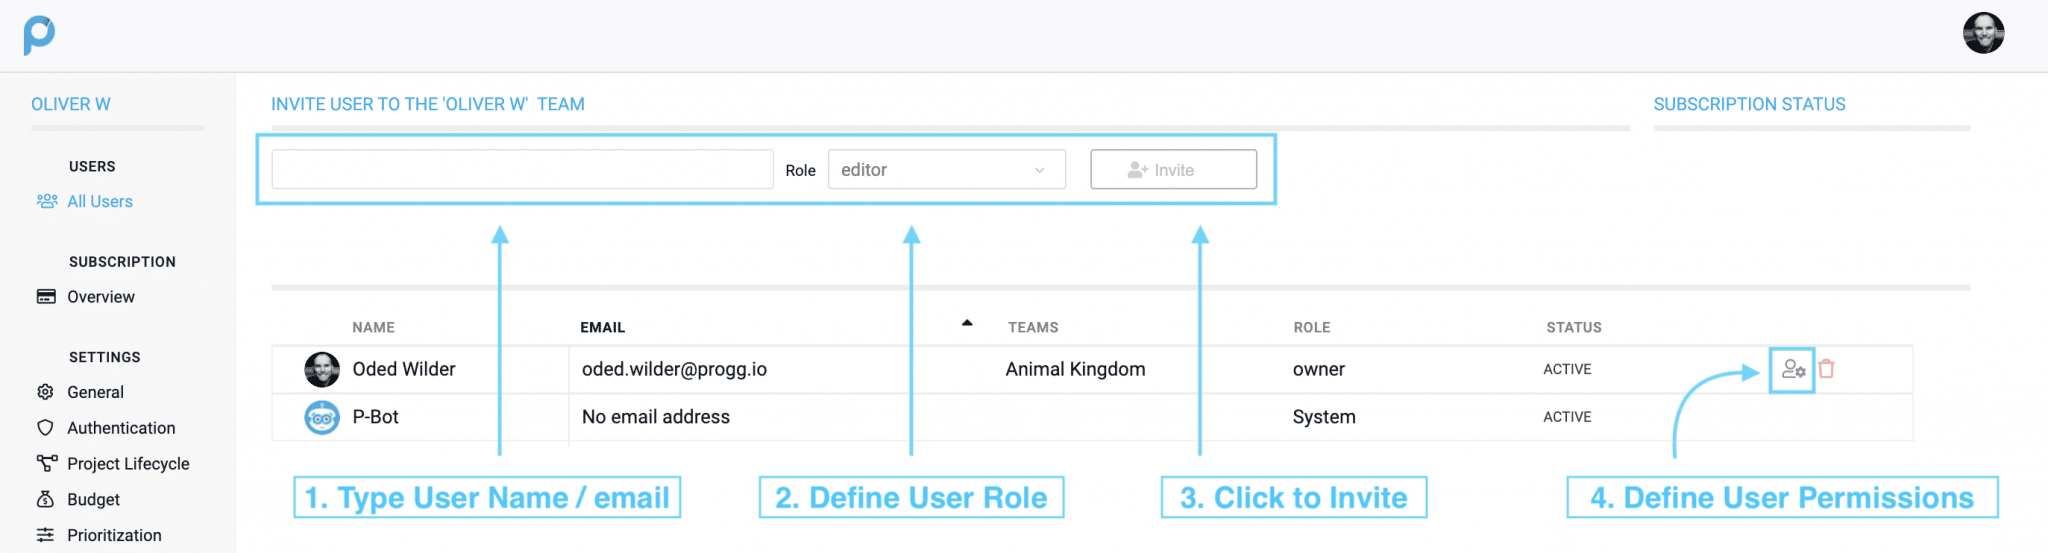
- Enter user name:
To get started, you can choose to invite users by their First + Last names. At this stage don’t worry about getting them all into the application. You should first create the assignments and load your project content.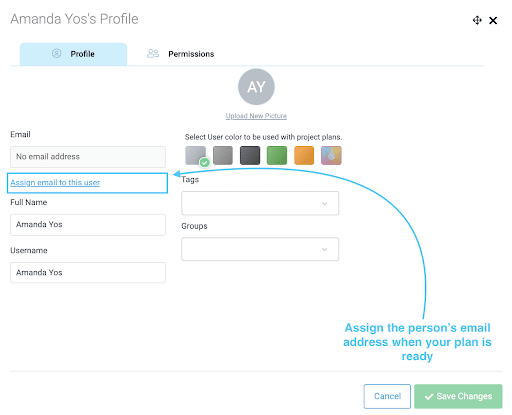
ProTip: Start working on your project plan without interrupting other contributors in your team. Using first / last name will not trigger an email invitation to them just yet, but will still add these members to your team, so you can assign work to them. Once you’re ready with a basic plan, you can assign the person’s email address, which will automatically allocate all the relevant items to that team member. - Select user role:
Depending on this member’s involvement in the Space, you can appoint a role that will fit their requirement. Here’s an overview of the different roles in Proggio. - Click to Invite:
Once you click to invite, you’ll be prompted to select how the invitee should enter the application on his/her first visit. To make it easier on their orientation, you can choose to redirect users to the area that is most relevant to them in Proggio. For instance, Choose ‘Task management’ if this user’s main use of Proggio is to update progress or choose ‘Portfolio and portfolio Management’ if this is someone who’s involved with the high level structure of your project plans.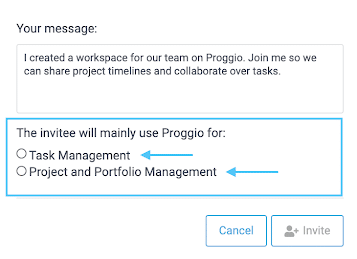
- Define User Permissions:
Switch over to the ‘Permissions’ tab, where user permissions can be set. Here, you can select to exclude specific views such as portfolio view or budget management module by unchecking the boxes. You can also exclude specific projects by disabling the ‘Access’ toggle.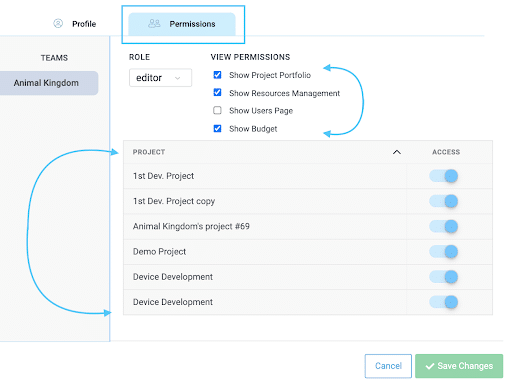
Important: Once a user was revoked access to a project, every new project created from that point on, will be restricted to this user by default. So, whenever a new project is created, always make sure the right members are allowed in.
Are you a seasoned Project Manager?
Learn more about Project Management here