As every project manager knows, the key to making sure a project goes without a hitch is forward-thinking. Risk Management in particular plays a vital role in ensuring that, in the likely event that a problem arises, its effect is minimized and both time and money are saved. This post sets out to give you a deeper understanding of how the ‘Risk Management’ section of Proggio works, and also serves as a step-by-step guide of how to apply it to your business projects.
Detailed Description
Proggio is designed to be accessible, easy to use and intuitive. Users can simply assign scores to activities considered as risky, these values are then automatically applied and a risk assessment can be determined and quantified. You and your team will then have access to visual and comprehensible graphics that indicate which activities and workstreams are at risk, and highlights potential setbacks that otherwise, may have gone unseen. Setting it up is easy when following this guide. In total, there are the following 4 sections to cover:
- Settings
- Activity properties
- Project-level Risk Management
- Portfolio-level Risk management
So, let’s begin with the first section which is ‘Settings’.
Settings
Firstly, a new setting area for Risks is added, this allows for configuration of the Risks module.
Out of the box settings are available but can be configured as you please.
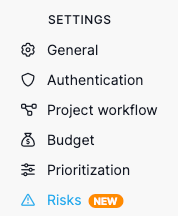
After entering Risks in the Settings column, you will see there are the following 4 sections:
- Probability
In this section, users estimate how likely the risk is to materialize. Values are entered as a percentage (%). These values can be adapted at any time during the project. The category can be renamed by simply double-clicking on the ‘name’ field and typing in a suitable name. New categories can be added to the section by clicking on the appropriate field.
- Severity
Users will then enter a score to the activity. This score should be determined by quantifying the magnitude of the risk, should it materialize. Severity values and new categories can be altered or created at any time throughout the project in the same way as in the ‘Probability’ section.
- Impact
When both the Probability and Severity sections are successfully completed, the scale of the impact will be automatically calculated. Logically, higher Impact scores are achieved when both Probability and Severity are scored as high. Users have the option to assign a color scale in order to provide clear visibility to projects or workstreams that are in need of attention. In most cases, users choose green as low risk and red as high risk.
- Risk Impact Summary (Matrix)
In the final section, the Risk Impact chart is automatically calculated and displayed as an effective and coherent graphic. Here it becomes clear how the “Severity Score” multiplied by the “Probability Score” results in the “Impact Score”. This chart is dynamic and updated in real-time.
Activity Properties
In order to assign a risk status to your projects, the first thing you need to do is identify which activities are considered risks. To do this, double-click on the activity, then select the “At risk” tab. The activity is now marked as risky, and you can access and input the following fields:
- Impact – This field is automatically calculated and is not editable.
- Risk comment – This field allows for one line of text (it will also appear on the Risk Management Project level)
- Risk settings – Under this section you will be able to define and monitor the following values and statuses:
- Risk status – Select which lifecycle phase is most accurately defines the risk from the following dropdown menu:
- Identified
- Active
- Mitigated
- Resolved
- Rejected
- Probability – Select a relevant value from the dropdown menu.
- Severity – Select a relevant value from the dropdown menu.
- Prevention tasks – Shows a summary of total tasks marked as prevention and the number of completed ones.
- Mitigation task – This shows a summary of total tasks marked as Mitigation and the number of completed ones.
- Risk notes – In this field you can include comments to be added and edited.
- Risk status – Select which lifecycle phase is most accurately defines the risk from the following dropdown menu:
At the button of the into tab, or on the left-hand side of this view, you will see the option to add new tasks and assign the following statuses:
- Mitigation
- Prevention
- Non-risky task (a task which is not considered an activity risk)
- Risky task.
Project-level Risk Management
The Project-level Risk Management section is designed to give you clearer visibility over risk levels at the project level. It serves to keep you updated in real-time and highlight any causes for concern.
In the Project Management view, click on the Risks icon to access a new table which includes the following columns:
- Risky Activity – This is the name of the activity, you can rename it by double-clicking on it.
- Risk Status – the risk status allows indication of the risk “lifecycle”, as the risk evolves the status should be aligned with its progress.
- Impact – This column will indicate (using the color scheme defined in the settings) the “Impact Label” and the score number in brackets.
- Workstream – shows the workstream of an activity.
- Probability – This column shows the probability value defined to an activity and its actual value in brackets.
- Severity – This column shows the probability value defined on an activity and its actual value in brackets.
- Prevention – Here you will see an aggregated status of tasks inside an activity. You can also monitor the number of tasks currently defined as prevention tasks and how many have been completed. Clicking on the value inside the cell will open the activity properties and show all tasks that are marked as ‘Prevention’.
- Mitigation – This field shows an aggregated status of tasks inside an activity. The number of tasks defined as ‘Prevention’ is displayed, as well as how many have been completed.
- Owner – the owner of the activity.
- Risk comments – In this column, users are free to leave comments to allow for greater communication amongst teams. This comment will also appear inside the activity.
Portfolio-level Risk Management
The Portfolio-level Risk Management section provides you with autogenerated views of a project’s risk levels at the portfolio level, prompting you to take action when necessary.
You can also review the progress of risk management plans and the preventative measures taken, as well as identify which risks are currently being mitigated and who is responsible for each risk management plan – all in one view. Click on the Risks icon in the Portfolio Risk map, the following fields can then be altered, and the project’s progression can be monitored in real-time:
- Project name – reflects the project name and allows drill down into the ProjectMap™ when clicked.
- Risk Level – This will show the highest Impact risk within the project.
- Risks – In this field you are provided with a summary of the amount of active risks / summary of the total risks (includes completed/resolved cases). Hover the cursor over it to indicate the list of open risks and level of severity. By clicking on the cell of this column, you can drill down into the project risk management module to reveal further details.
- Prevention – This column shows an aggregated status of total prevention tasks and the total number completed.
- Mitigation – Here you can see the aggregated status of total mitigation tasks and the total number completed.
- Owner – The column shows the owner of the project. Click on the settings icon to the right in order to access their user profile.