Introduction
Why Add Users to Your Proggio Workspace?
Adding users to your workspace enables seamless collaboration across your organization.
Whether you’re managing tasks, projects, or entire portfolios, inviting your team allows you to assign responsibilities, monitor progress, and streamline communication.
With flexible role and access level settings, you can ensure each user has the right permissions — giving stakeholders the visibility they need, and team members the tools to get things done efficiently.
To get started, follow the simple steps below to invite users into your workspace.
Step 1: Click the Invite Icon
In the top-right corner of your screen, click the person with a plus (+) icon.

Step 2: Choose How to Invite
A window will open to invite users.
- Important: If you’re inviting from within a specific project, you can restrict the invitation to just that project by checking the box in the top-left corner of the window.
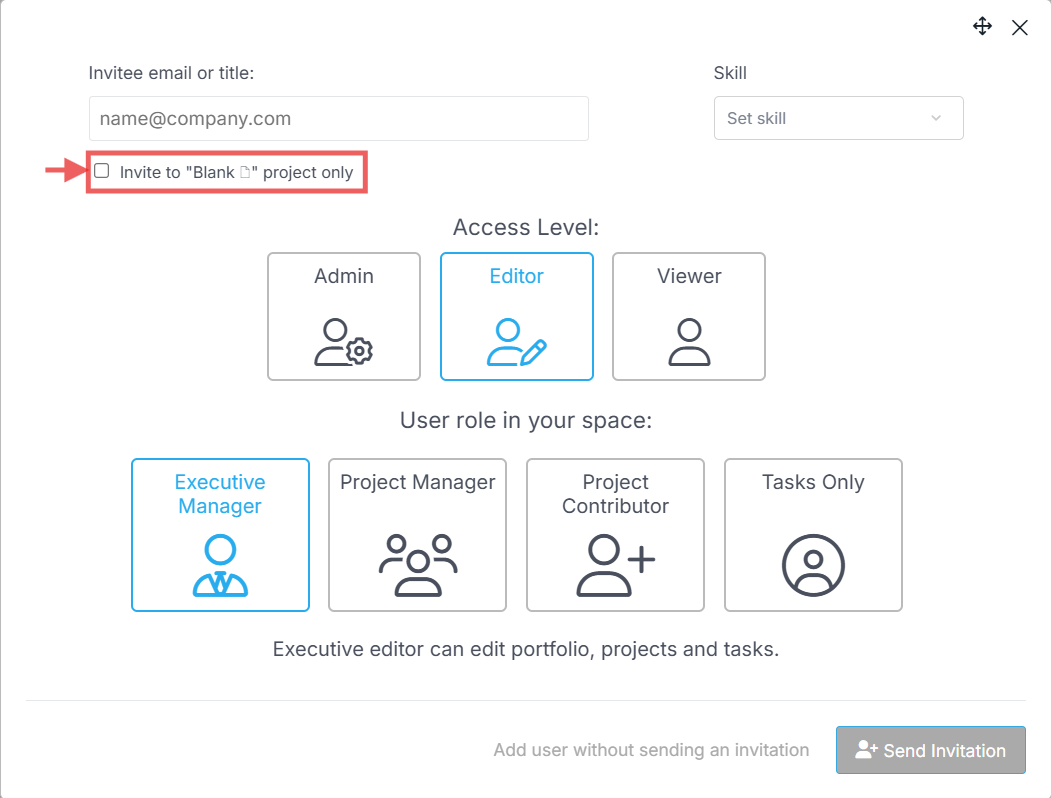
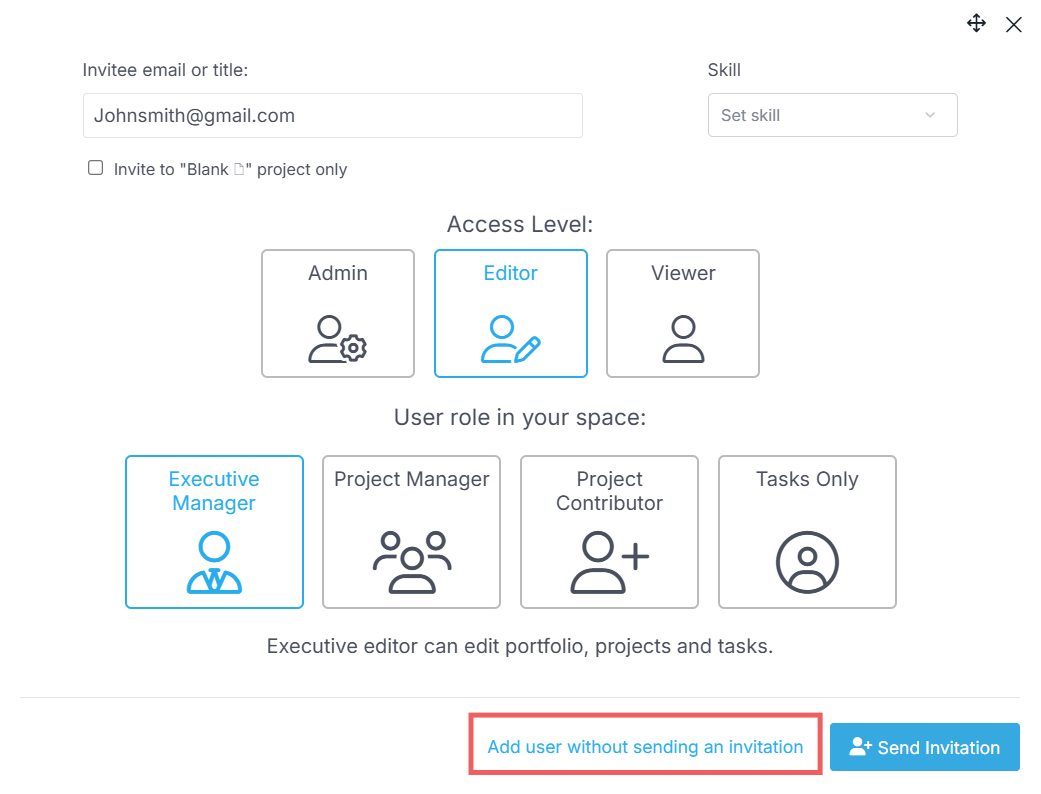
You can create new users in two ways:
- By Email: Enter the user’s email address.
- By Title: Enter a title (e.g., Designer, Analyst, John Smith) without an email, and, after selecting the required user access and role — select “Add user without sending an invitation.”
This will create a placeholder user (with no access). If needed — you can later assign an email address to this user and activate them .
Step 3: Choose User's Role and Access Level
Select the appropriate role and permission level for the new user.
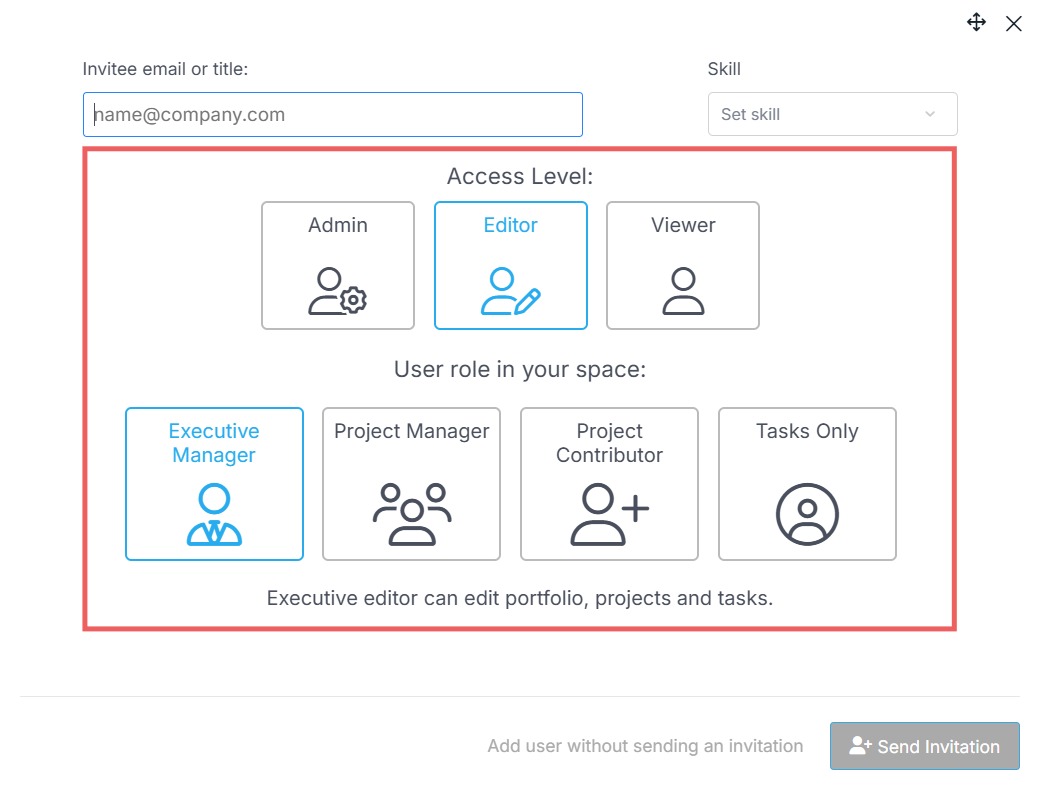
Each role/access level combination will grant the user different access rights in the workspace.
These combinations are shown in the matrix table below:
| Access Level 🡒 / Role 🡓 | Viewer | Editor | Admin |
|---|---|---|---|
| Executive Manager | Can view projects and tasks, no editing rights. | Can edit portfolio, projects, and tasks. | Full access, including space settings. |
| Project Manager | Can view projects and tasks, no editing rights. | Can edit own projects and tasks. | Full access, including space settings. |
| Project Contributor | Can view projects and tasks, no editing rights. | can view projects and tasks, and edit their own tasks | – |
| Tasks Only | Can view their own tasks only. | Can view and edit their own tasks. | – |
3.1 Fine-Tune User Permissions
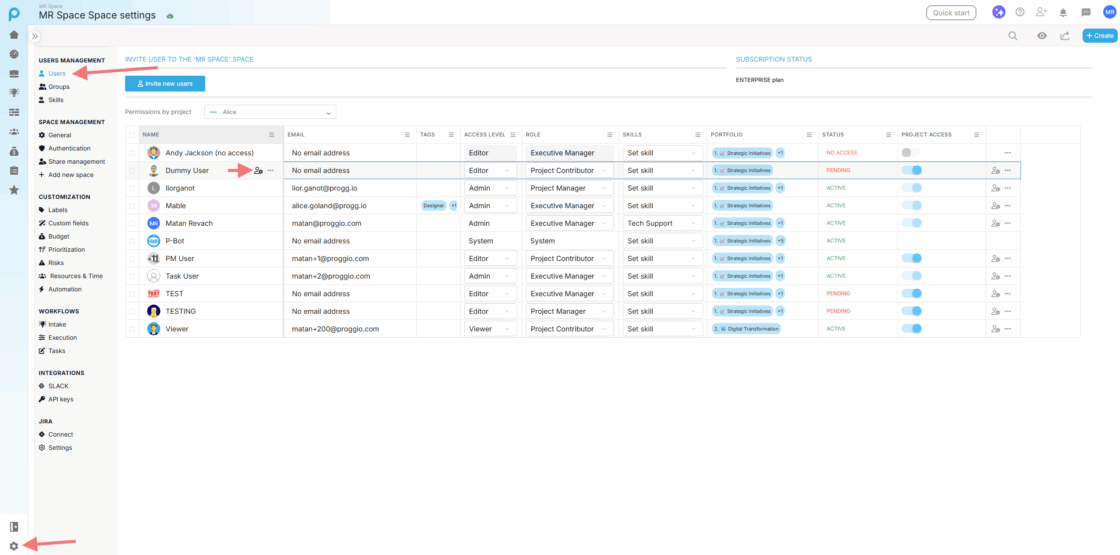
After adding the user, you can fine-tune which pages and modules they can access. Navigate to the user’s settings: Settings > Users > click the cogwheel icon next to the user’s name and switch to the Permissions tab.
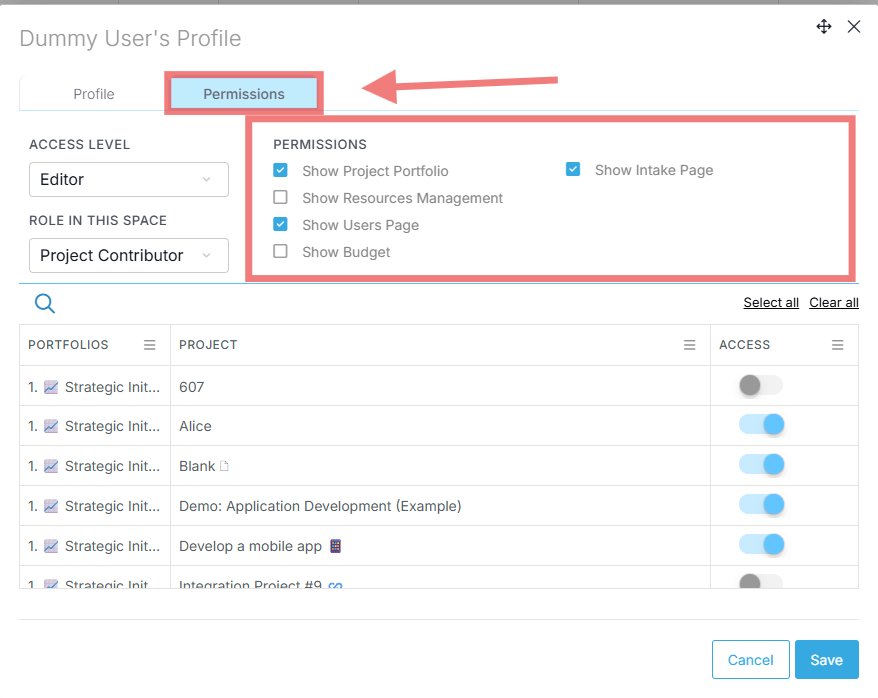
- Project Portfolio – when selected, the user can see the entire project portfolio. If unselected, they can only navigate to projects via the Projects button.
- Resource Management – when enabled, the user can access the Resource Management module.
- Users Page – when enabled, the user can view all users in the space via Settings.
- Budget – when enabled, the user can view the entire portfolio budget and each project’s budget settings. When disabled, the user cannot see this overview but can still create budget items for individual projects.
- Intake Page – when enabled, the user can access the Intake Projects module to see all intake projects added to the system. Note that these users can still create new intake projects but cannot view all intake projects in the module.
Step 4: Send the Invitation
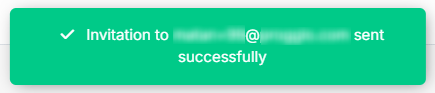
Click “Send Invitation” at the bottom right of the window.
![]()
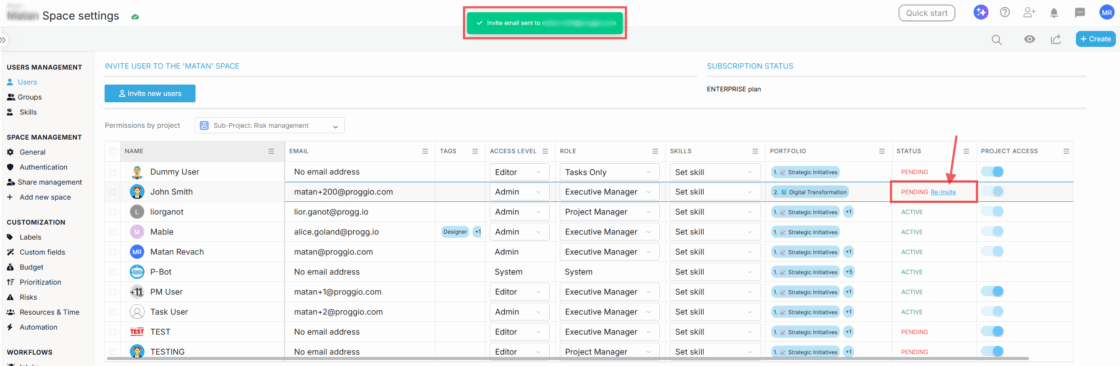
A confirmation will popup at the top of the screen notifying you that the invitation was sent.
The invitee will receive the following email with a link to accept the invitation.
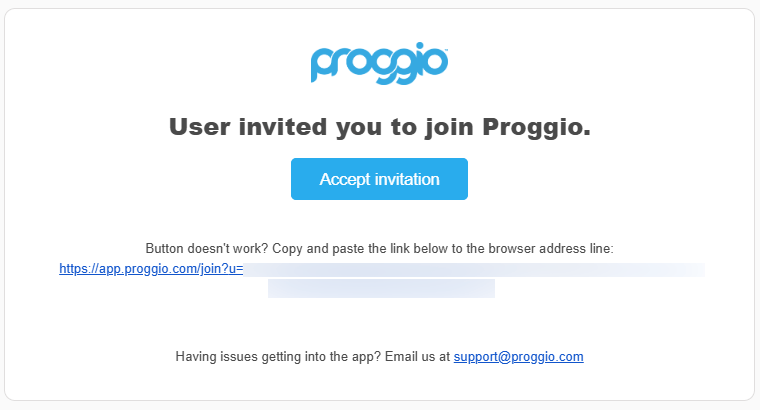
Once they accept and set up their account, they’ll be able to sign in and collaborate with your team in Proggio.
Optional: Add Placeholder Users (No Invitation Sent)
Adding a User Without Granting Access
To add a user without granting access yet:
- In the invite window, enter the user’s details (Title, Access Level, Role, and Skill if needed), then click “Add User Without Sending an Invitation.”
- This creates a placeholder user who can be assigned to tasks and projects.
- They won’t receive an invitation email or be able to access the workspace.
Activating a Placeholder User
To activate a placeholder user:
- Go to Settings (cogwheel icon) > Users.
- Locate the user in the list, hover over their name, and click the cogwheel icon that appears to open the user’s profile.
- Click Assign email to this user.
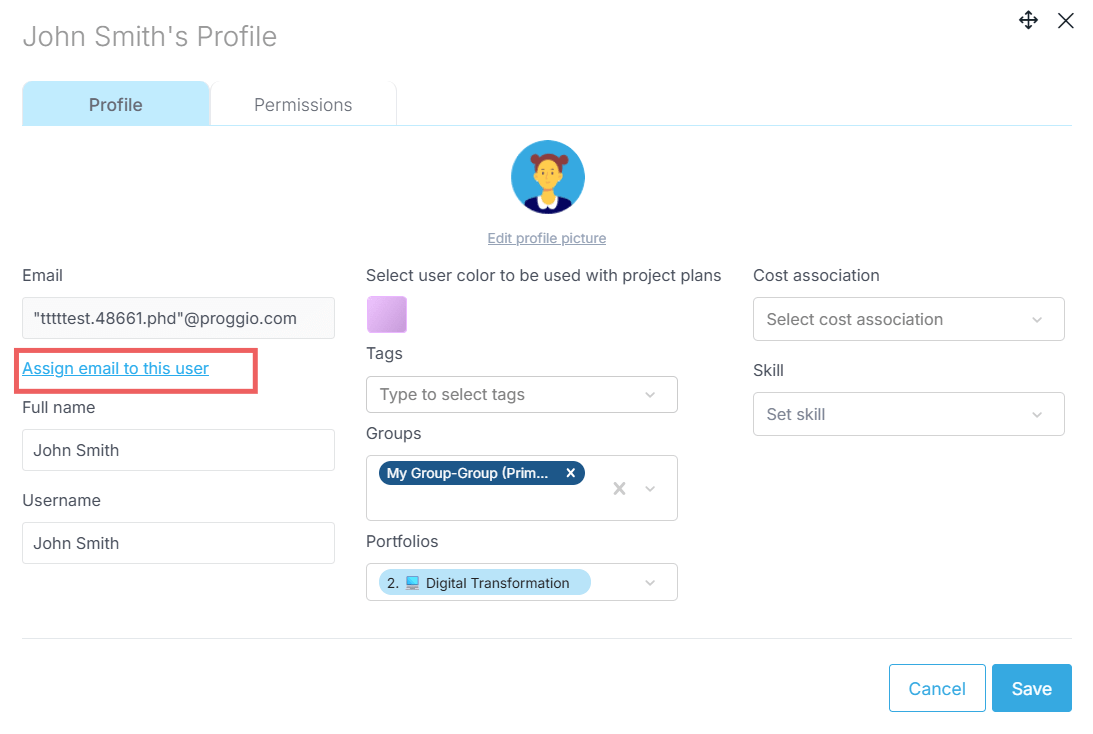
- The Email section in the properties panel will become editable. Enter the user’s email and click **Save** at the bottom-right corner.
- Back in the user’s list, click “Re-Invite” in the Status column to send the invitation.
The invitee will receive an email with a link to accept the invitation and activate the user.
Need Help?
For more help, feel free to contact us anytime at [email protected].