Introduction
As the Project Manager, you hold ownership on setting up your dedicated Space on Proggio. It is important to have a well set up environment so that all your projects can be managed intuitively and productively.
 Throughout this guide, we’ll share insights and best practices to eventually help you drive adoption within your organization. Here’s what you’ll be able to achieve in just a few simple steps:
- Define project task stages for reporting and monitoring progress.
- Define project lifecycle stages and workflows for better prioritizing efforts.
- Define user settings & permissions within the portfolio Space.
Defining Project Task Stages
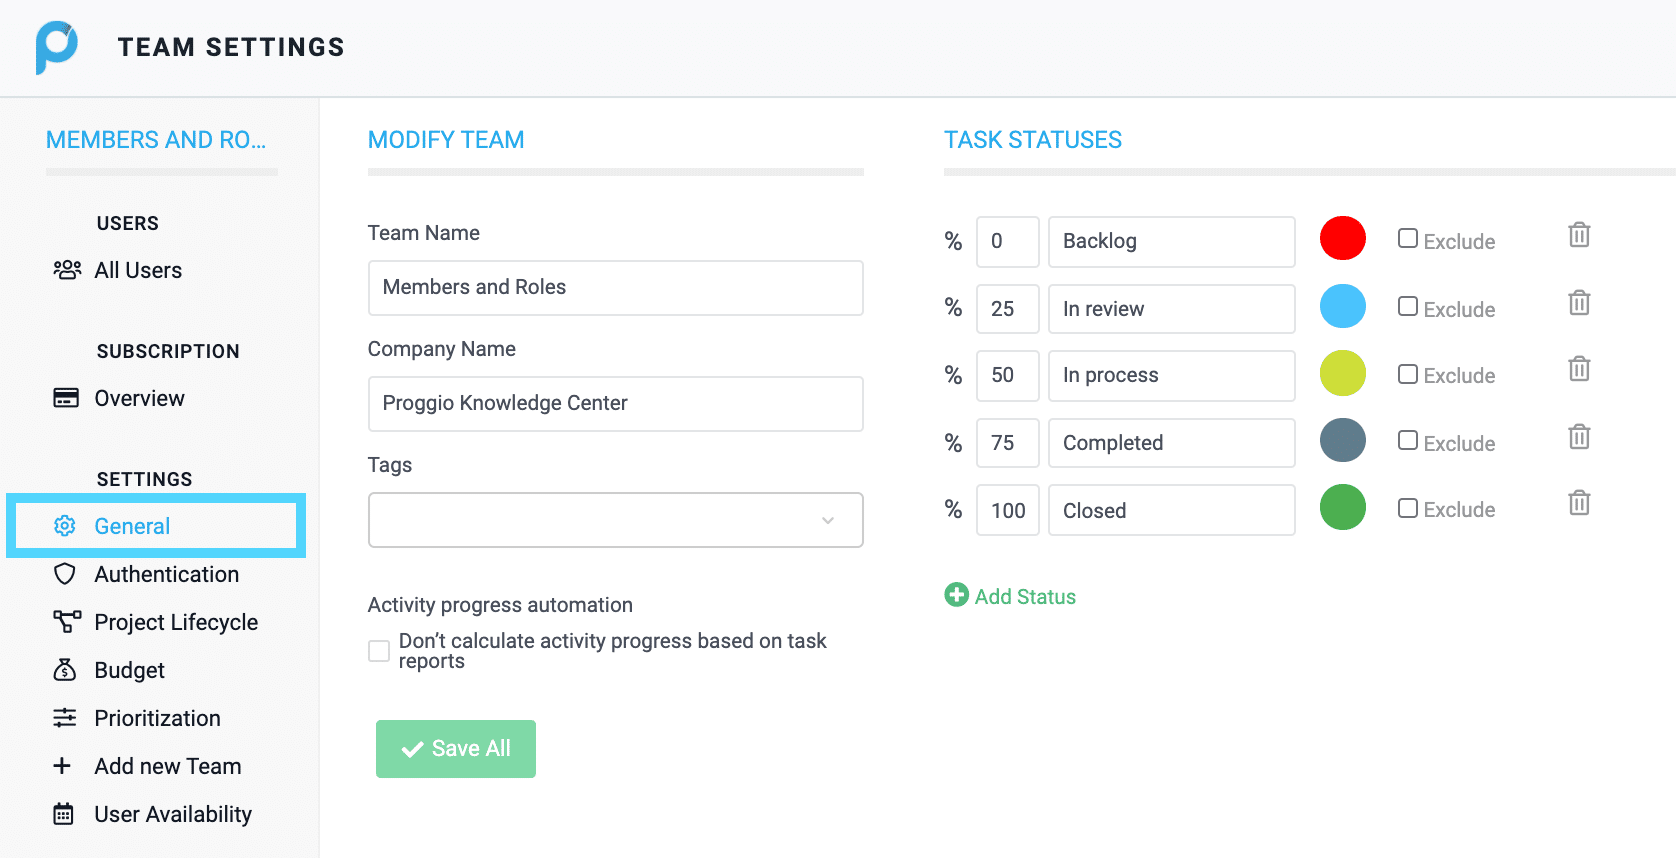
Before you get started with creating assignments and requesting for status updates from your team, let’s define first what are your progress definitions. The default stages in Proggio are – ‘To Do’ (0%), ‘In Review’ (25%), ‘In progress’ (50%), ‘Done’ (75%), ‘Closed’ (100%).
 You can choose to have different criteria names, percentages and even color scheme to fit your personal requirements. Note that (‘Excluding’ a status is mostly used when syncing a 3rd party application. If you’re using Proggio as a stand alone tool, you can ignore this option). To access, click Settings > General
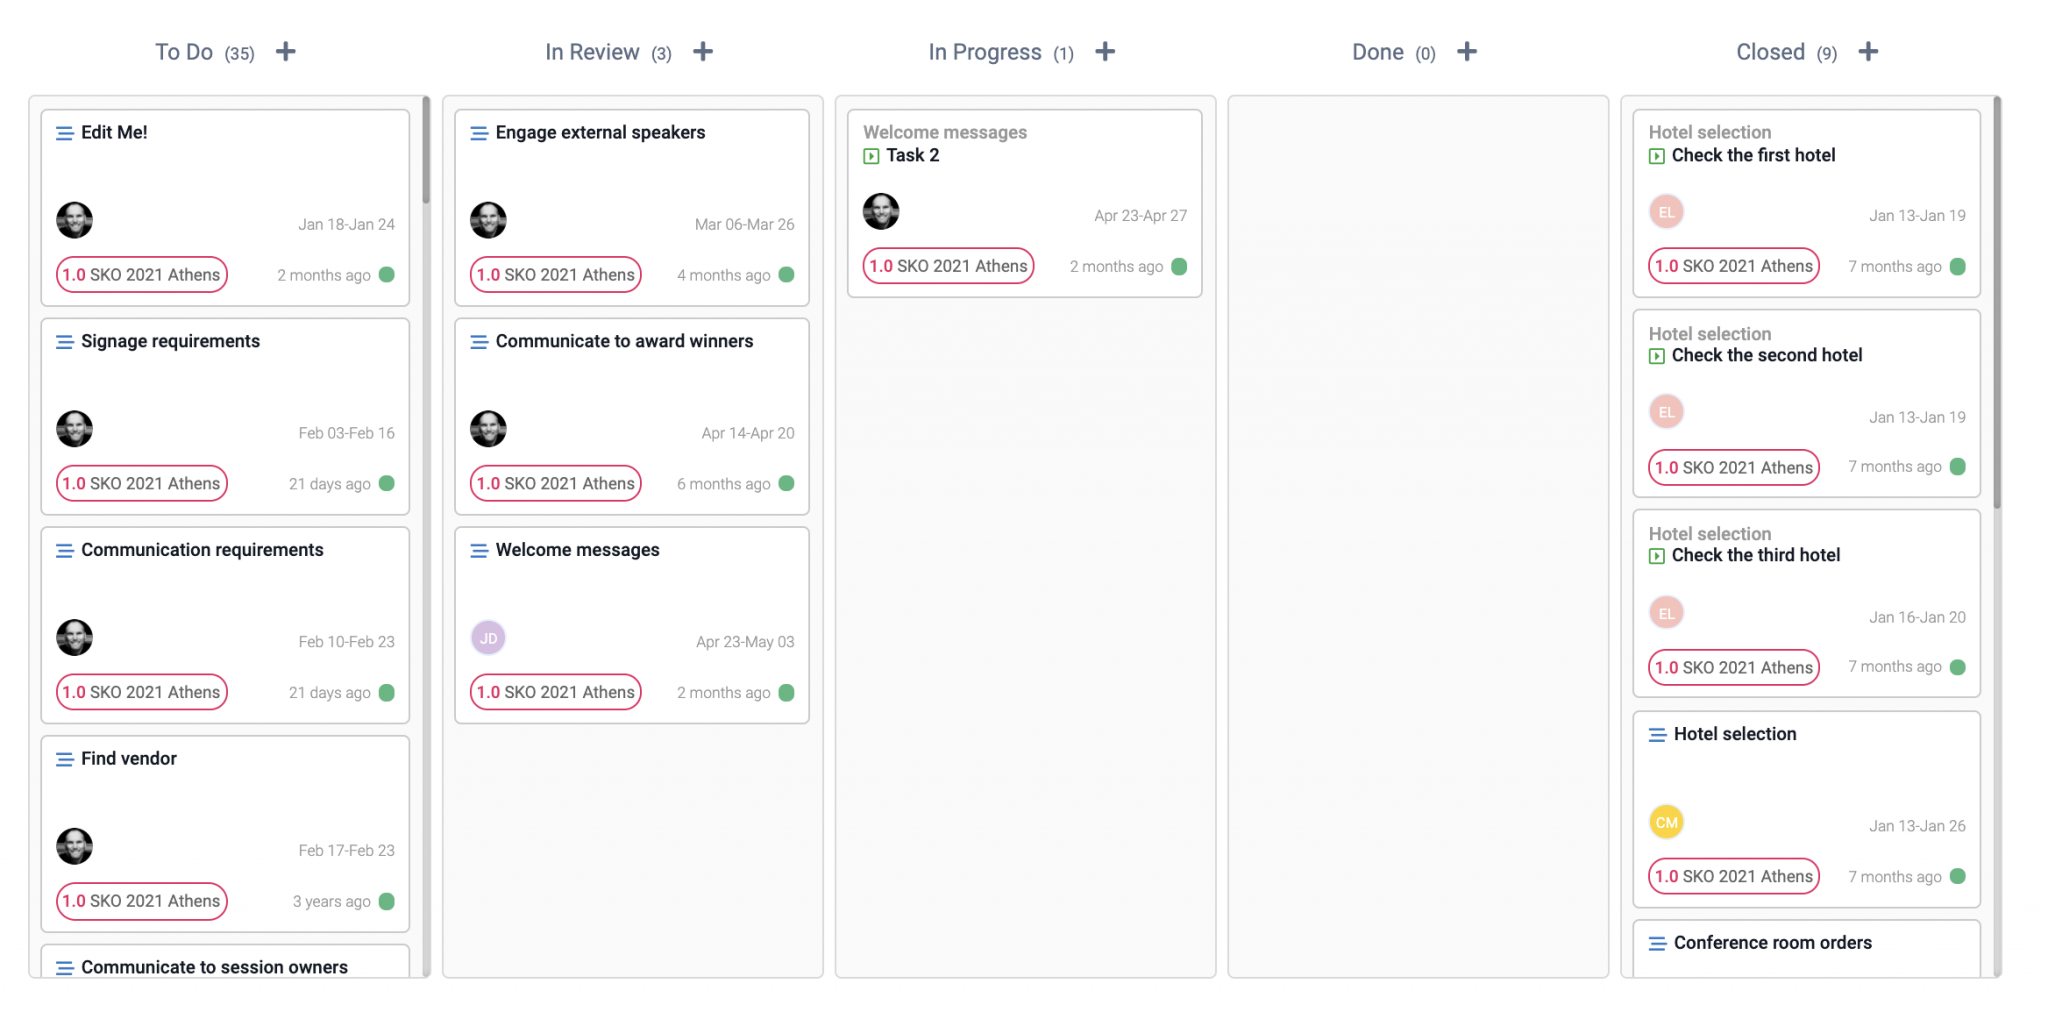
 Status stages will also define the number of columns in your Tasks Board (Kanban view).
Define Project Lifecycles & Workflows
The more we think about projects in Proggio, the more we realize the importance of taking a wider view on their life cycles. Most projects will eventually reach their execution stage of task assignment and tracking, but there is actually so much happening before that, and so many critical processes to manage in order to ensure successful delivery.
You can define your project lifecycle stages along with the specific deliverables needed in order to move on to the next stage. This will reflect where your focus should be, mostly in terms of prioritization. The default stages in Proggio are ‘Created’, ‘Prioritization’, ‘Planning’, ‘Approval’, ‘Execution’, ‘Done’.
Managing a project life cycle from start to finish, from it’s creation to archiving, carries great value to the organization. It ensures a proper justification process, and it standardizes the way project execution is approached. It uses the organization’s knowledge to make sure the next project will be better than the previous project. It is about controlling the project end-to-end, and growing it to success.
You can customize lifecycle names, their color schemes and workflows to fit your personal requirements. To access, click Settings > Project Lifecycle
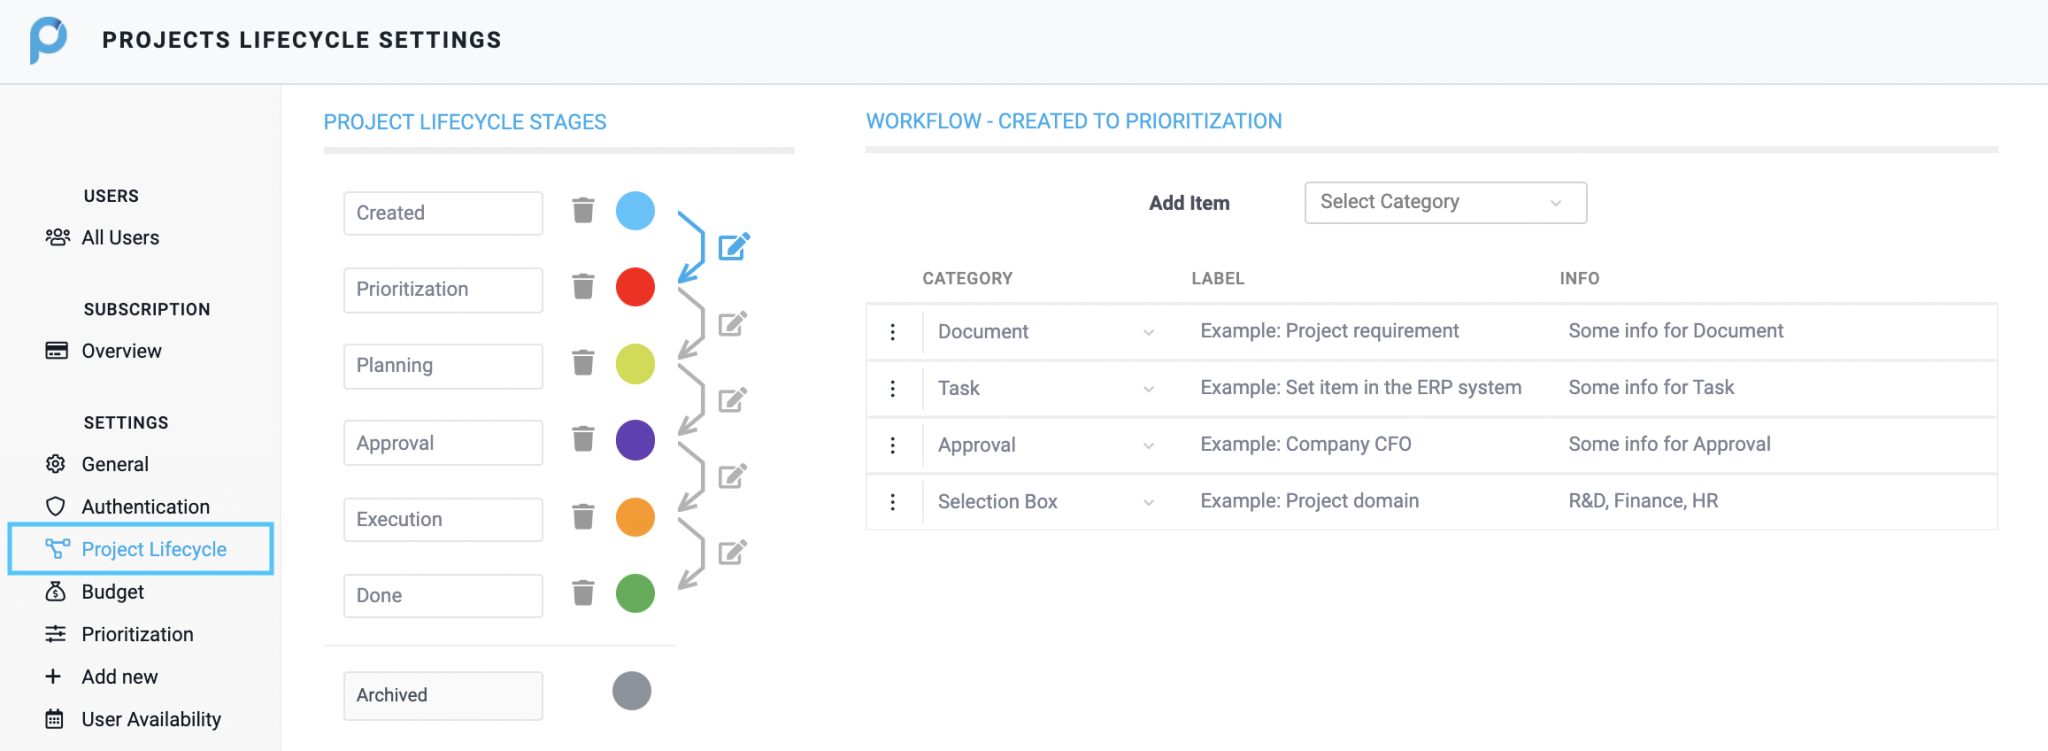
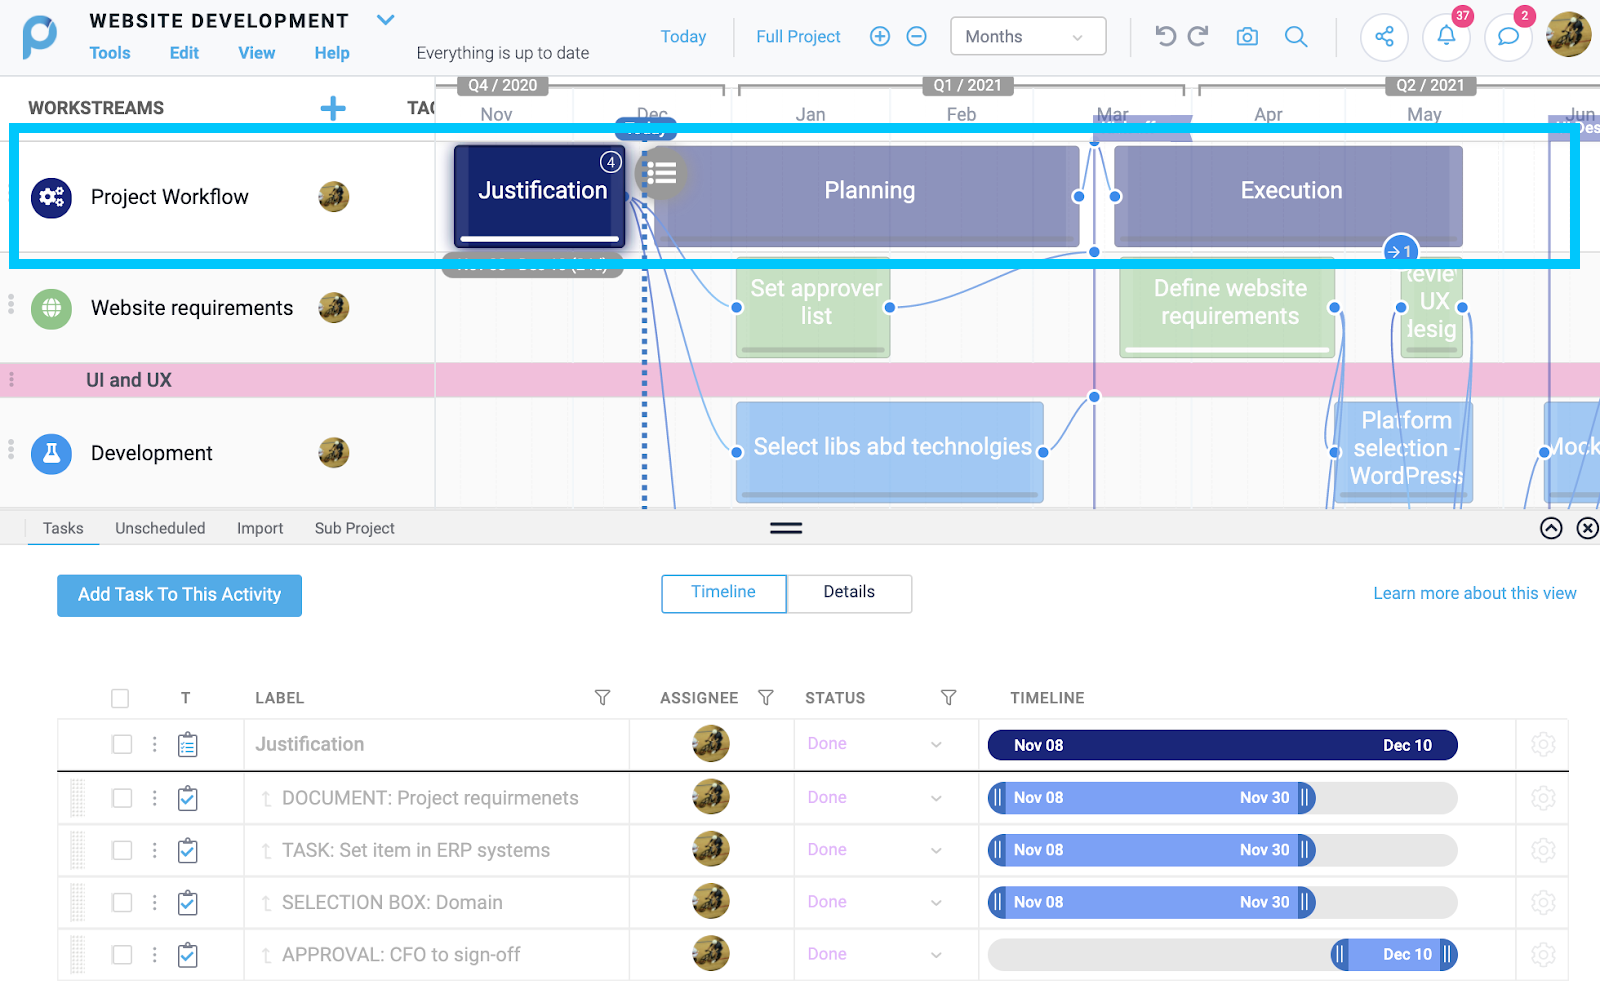
When added to a project, the workflow will be presented as a single workstream, and will include the multiple actions defined as part of the organization workflow. The project owner can add actions to each step, so the workflow can be customized in project level, beyond the organization definition.
Where can I see an indication of the project Lifecycle?
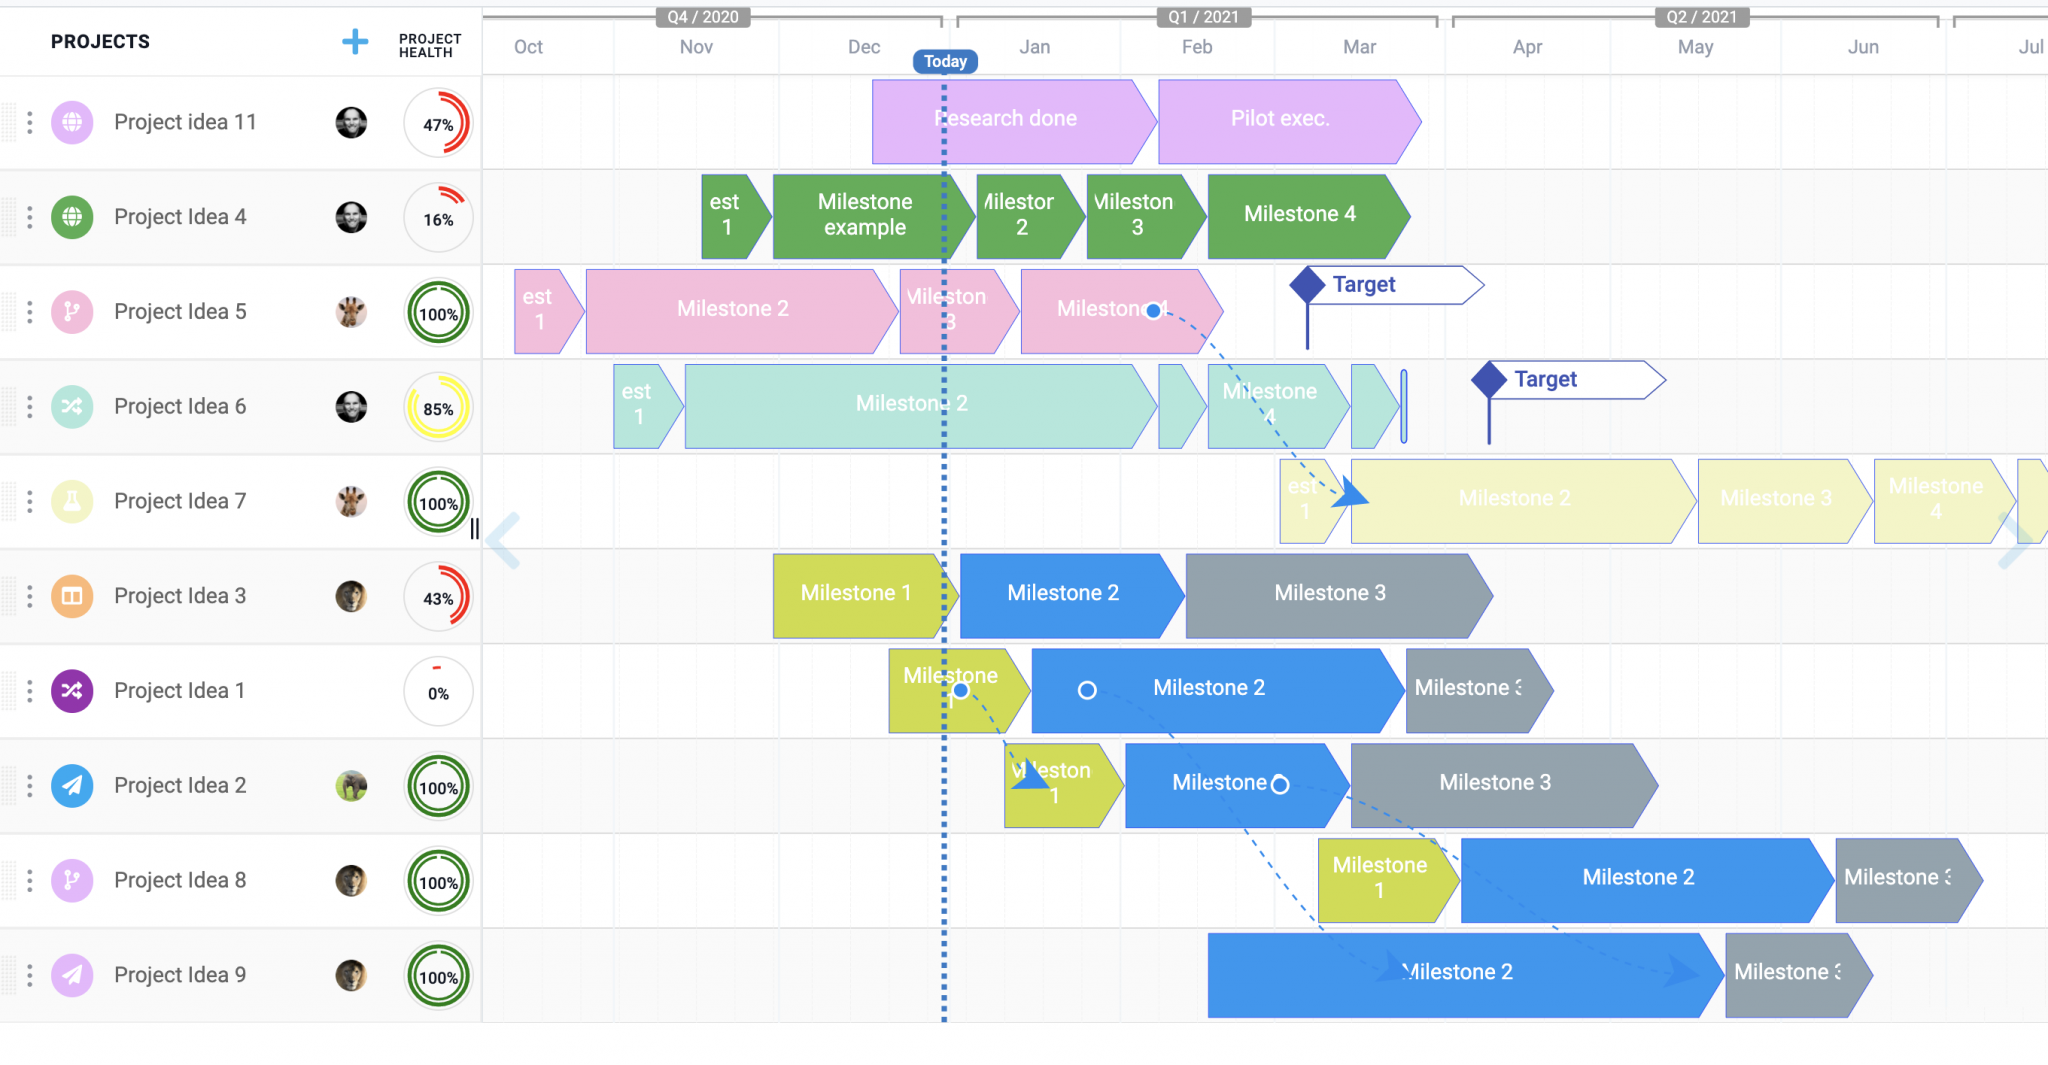
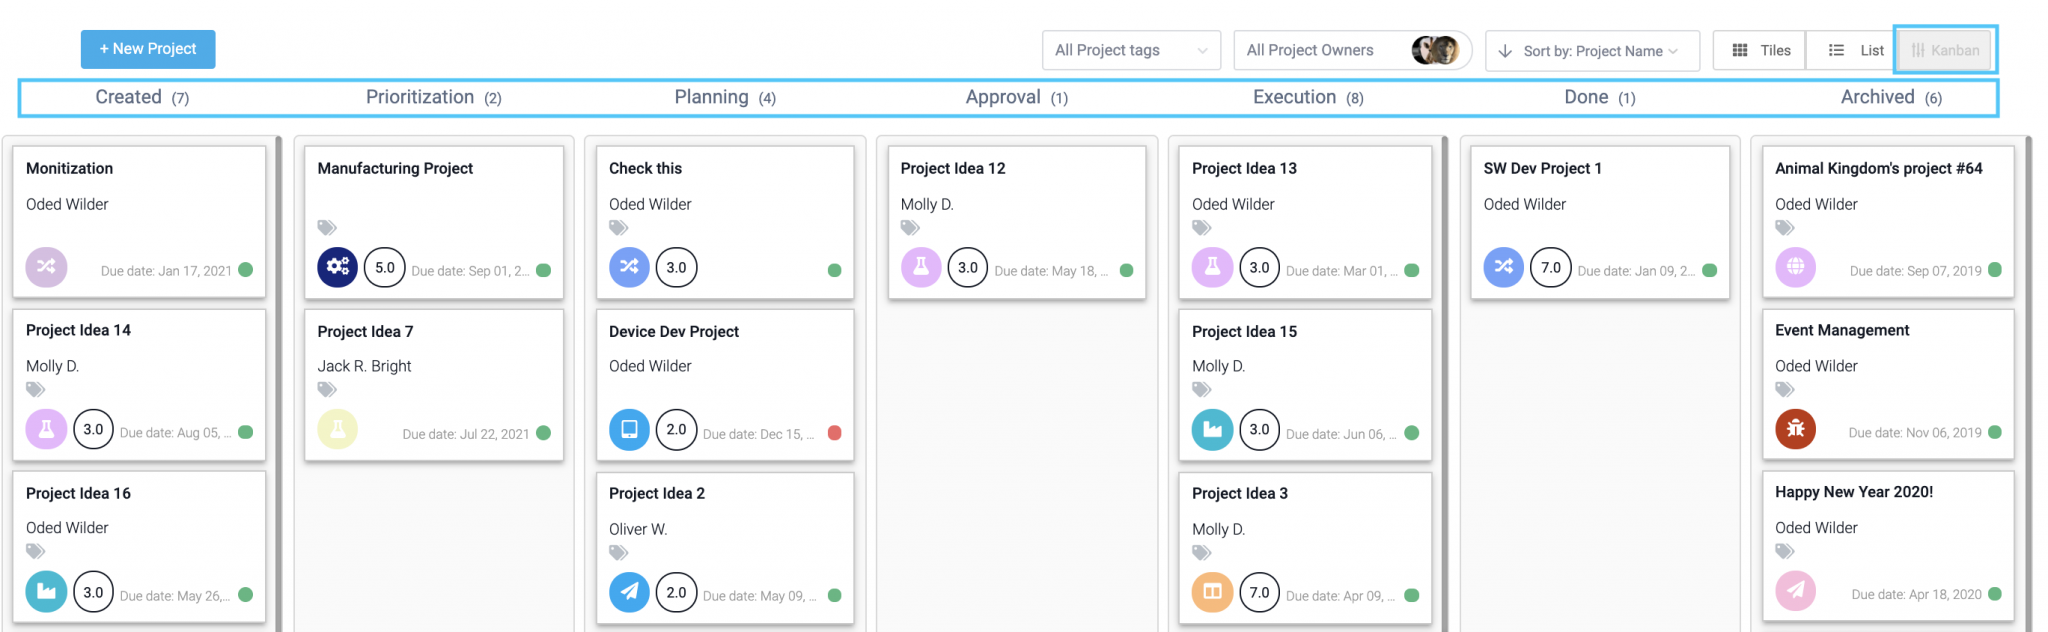
- From your ‘All Projects’ page, selecting ‘Kanban’ view, will display your Project Kanban view and place each project in its current stage. You can drag and drop across to different stages.
- From your ‘All Projects’ page, selecting ‘Tile’ view, will show the Project Lifecycle Stage on a colored label. To edit the stage, Right Click the project tile and select ‘Project Settings’.

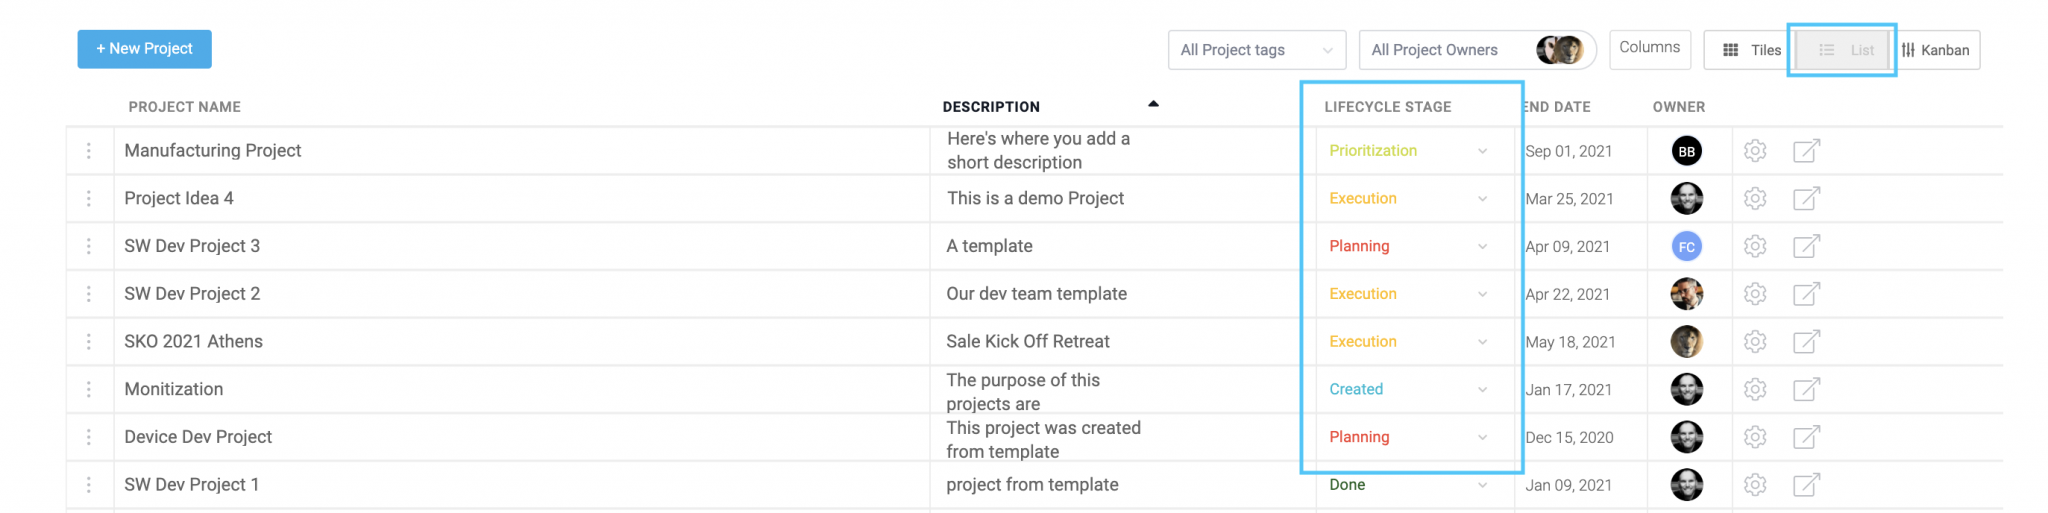
- From your ‘All Projects’ page, selecting ‘List’ view, will show the Project Lifecycle Stage in a separate column, allowing you to sort / filter your projects according to their lifecycle stage and also move them into different stages using the ‘Lifecycle Stage’ dropdown list.
User Settings and Permissions
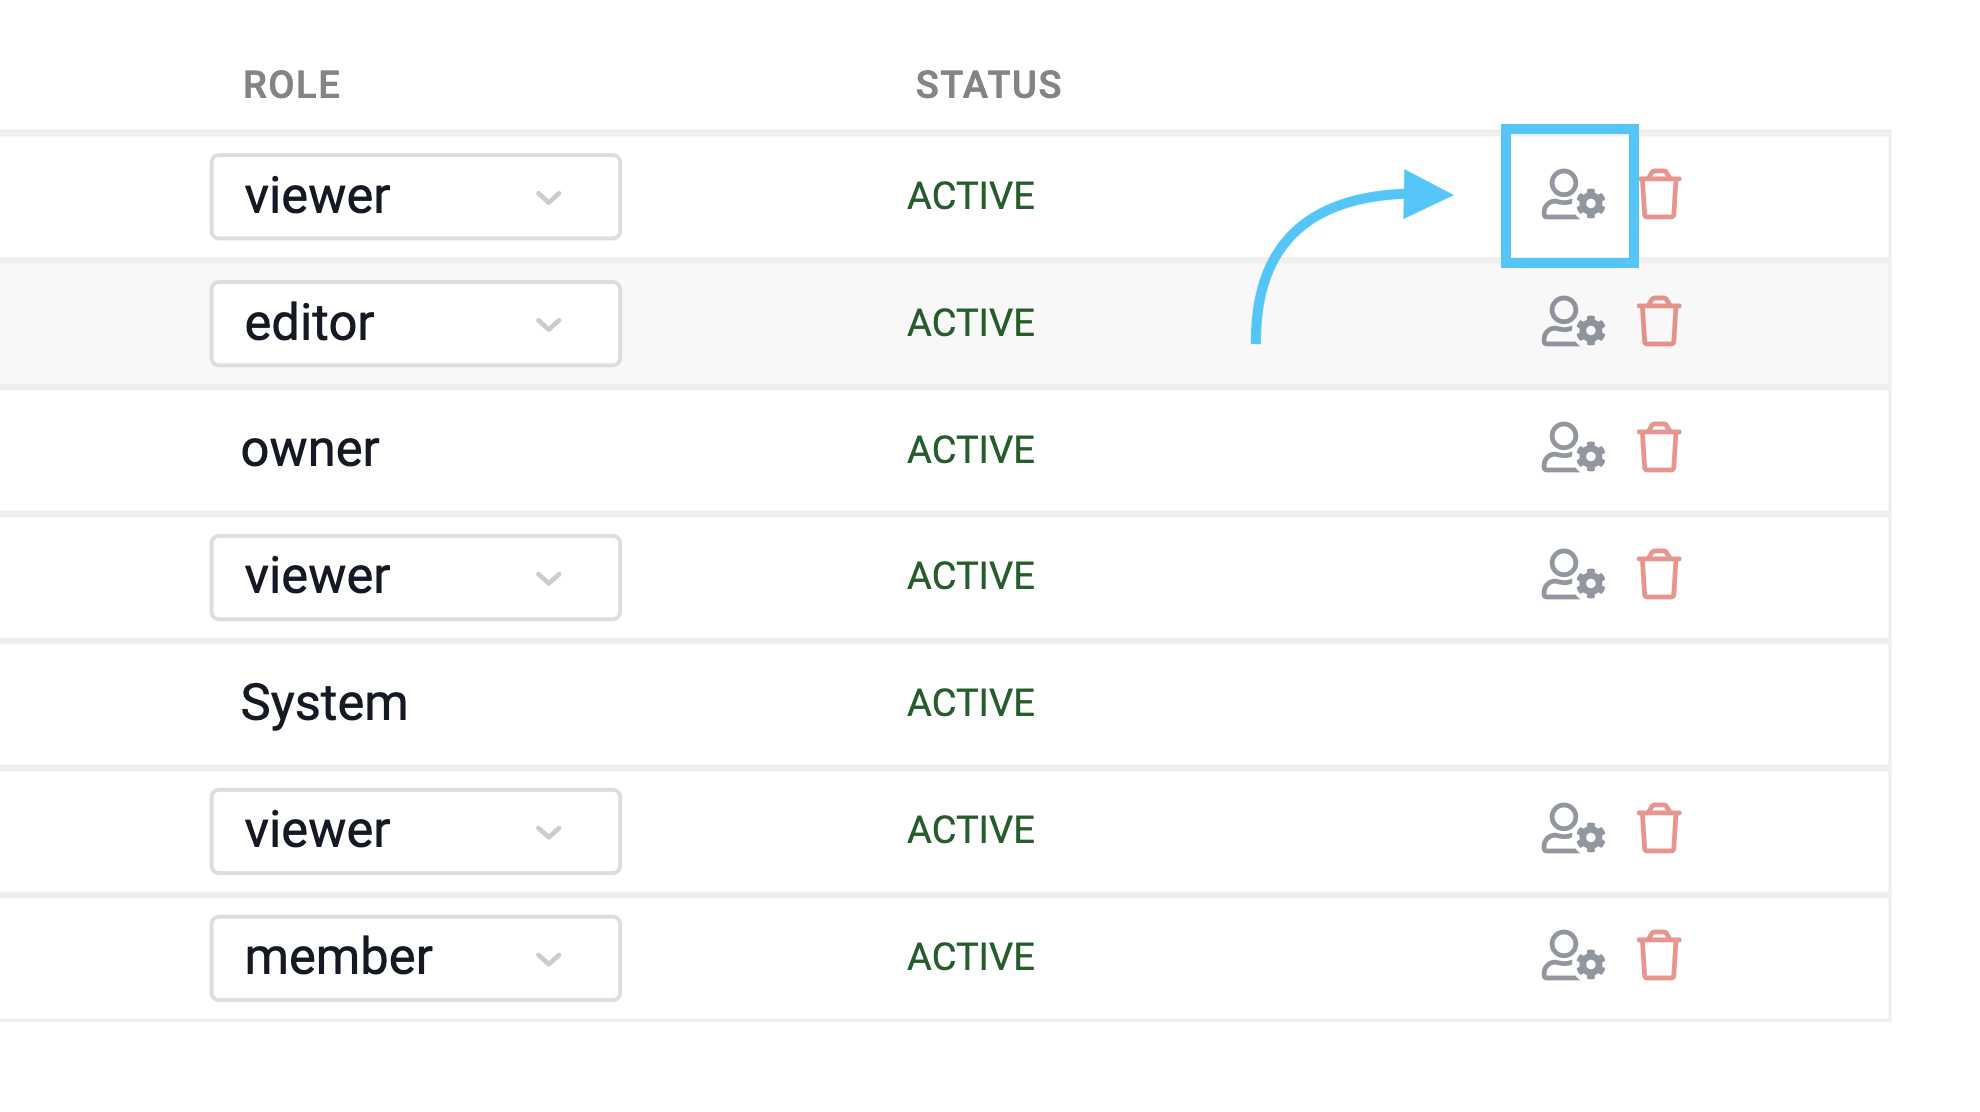
From the Left Side Navigation Panel > Settings > All Users > User Profile Icon
Update general settings for each member in your Space.
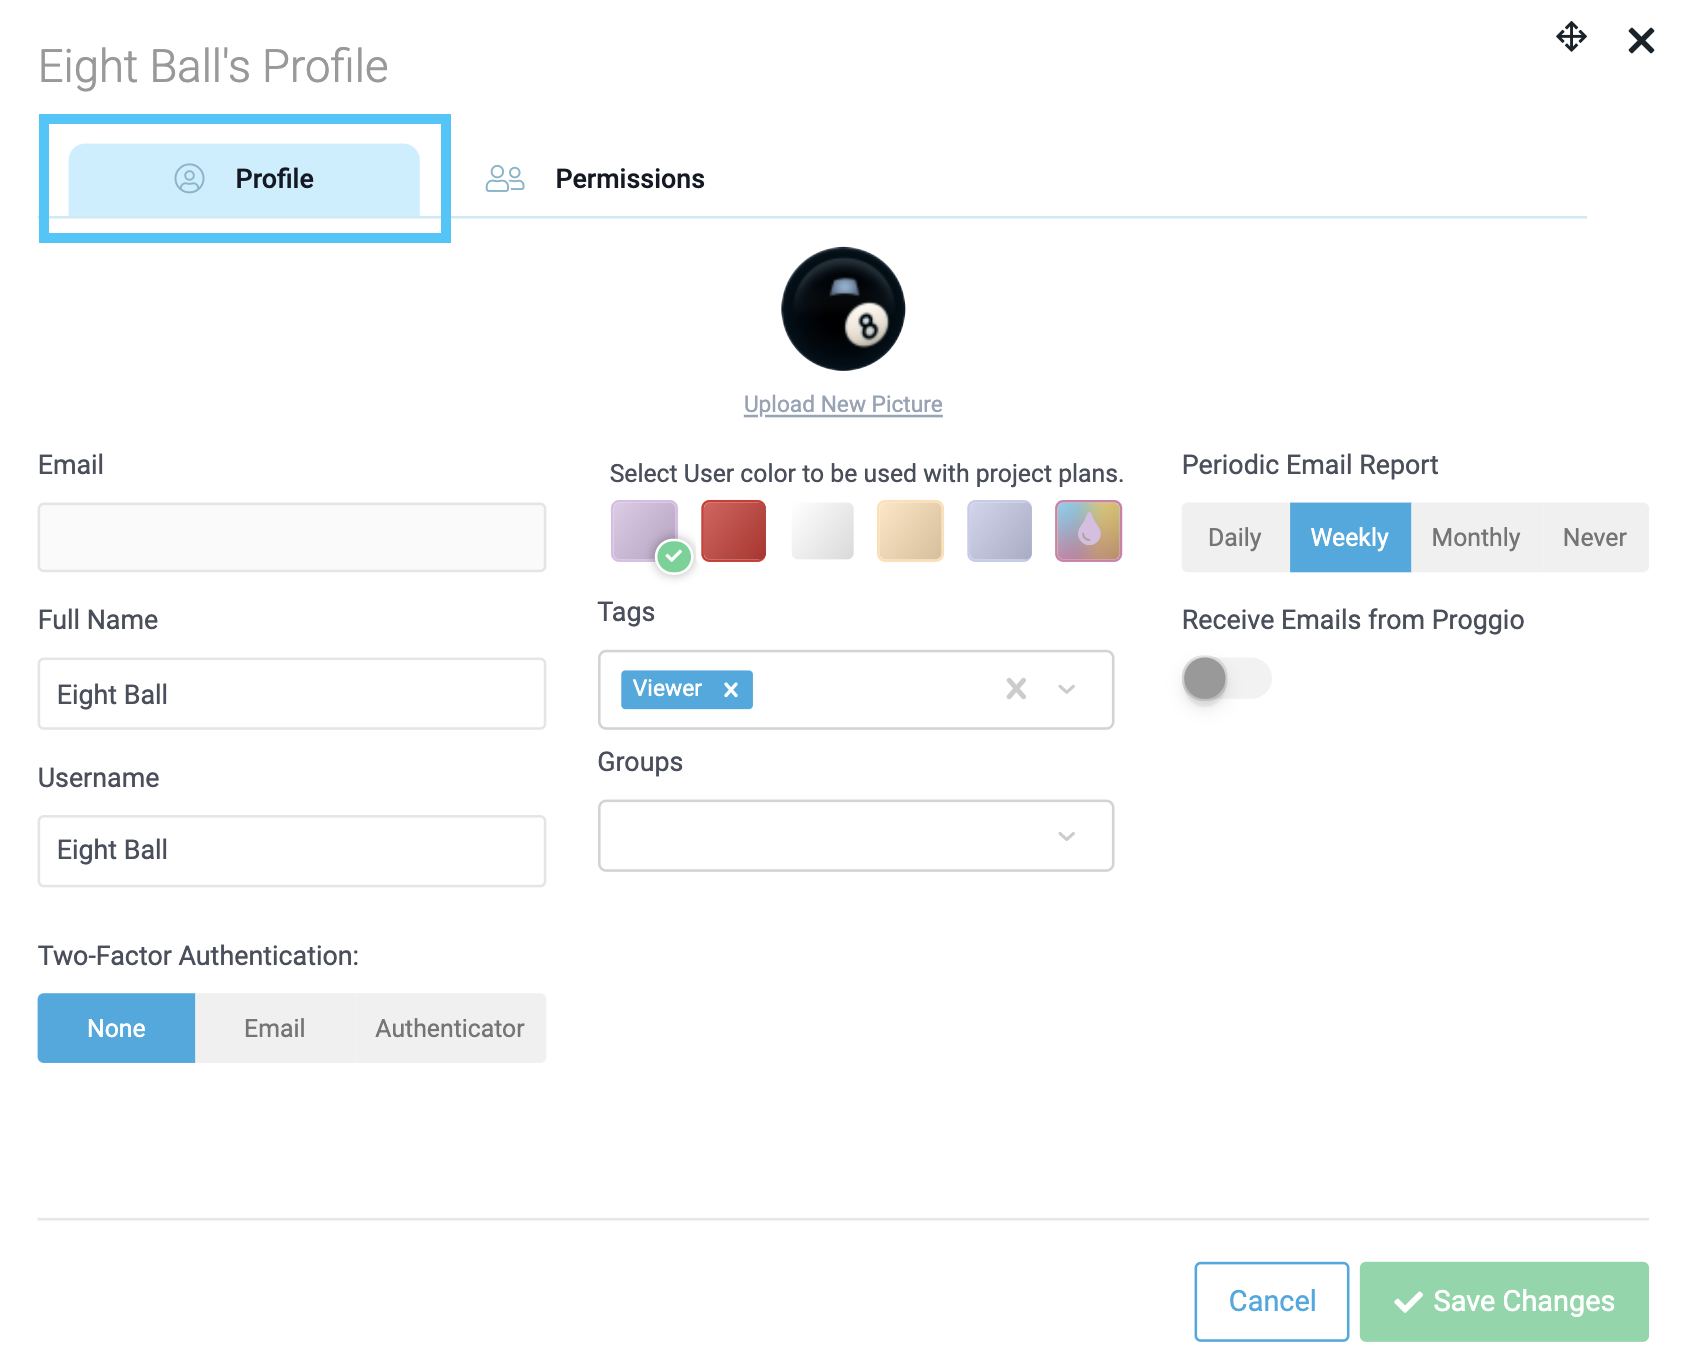
Personal Info: Edit the person’s name and user name as it’s displayed on Proggio.
Color: Each user can have a defined color in your project portfolio that will highlight their assigned activities across all projects. Utilizing this feature helps members of a Space follow their assignments across the ProjectMap™.
Tags: Members of the same Space can have dedicated Tags for categorizing their skill, geographic location, organic group within the organization (i.e. Web Design, Front-End Developers, etc.). Initial creation of a Tag should be done by typing it in the text box, followed by selecting to create it. Once a tag was created, simply select it from the drop down. User Tags are very useful for managing, monitoring or reporting throughout project execution. Tags can be used to filter information in Task Management, Dashboard and Resource Management.
Groups: Categorize members of your Space into groups as needed. These groups can refer to organic groups who operate under the same common ground in the organization or project scope. Initial creation of a Group name is done by typing it in the text box, followed by selecting to create it. Once a Group was created, simply select it from the drop down. Groups are mostly used in Resource Management.
Periodic Email Report: These are auto-generated emails sent from Proggio, notifying users of their delayed, active and upcoming assignments. Can be send on a Daily / Weekly or Monthly basis summarizing all the information per each member in the Space. Though users can define this preference on their own, a project owner has the authority to choose otherwise.
Receive emails from Proggio: This preference refers to notification emails (not marketing emails). An example of such email can be a notification sent to the users’ inbox letting them know about a new assignment that was assigned to them.
Two Factor Authentication: Can also be dome from the main Settings page for the entire Space rather than individually per member.
Define User Permissions:
Switch over to the ‘Permissions’ tab, where user permissions can be set. Here, you can select to exclude specific views such as portfolio view or budget management module by unchecking the boxes. You can also exclude specific projects by disabling the ‘Access’ toggle.
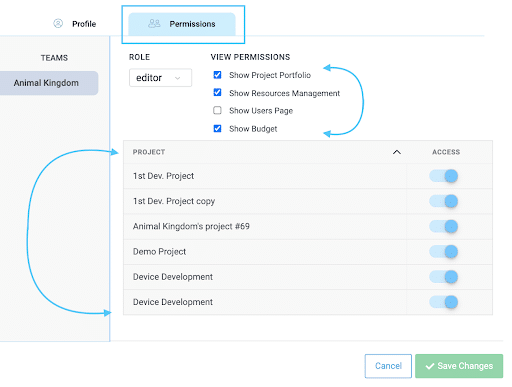
Important: Once a user was revoked access to a project, every new project created from that point on, will be restricted to this user by default. So, whenever a new project is created, always make sure the right members are allowed in.
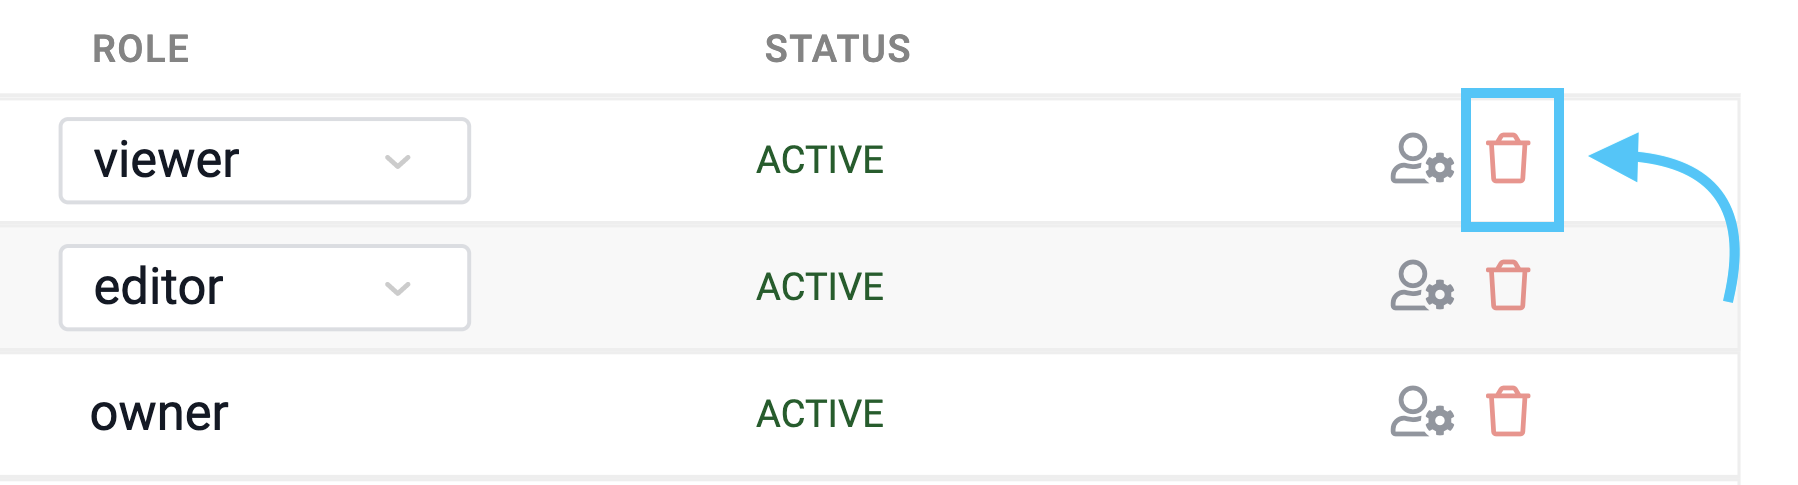
To remove someone from the Space, click the Trash bin icon next to the user’s profile settings.