Introduction
Custom fields let you tailor Proggio to your team’s unique workflows by capturing data beyond the default system fields.
Whether you’re tracking effort estimates, internal IDs, or task types, custom fields enhance visibility, filtering, and reporting — making it easier to manage and sort key information across all tasks and projects.
📌 Where to Add Custom Fields
1. From the Settings Menu
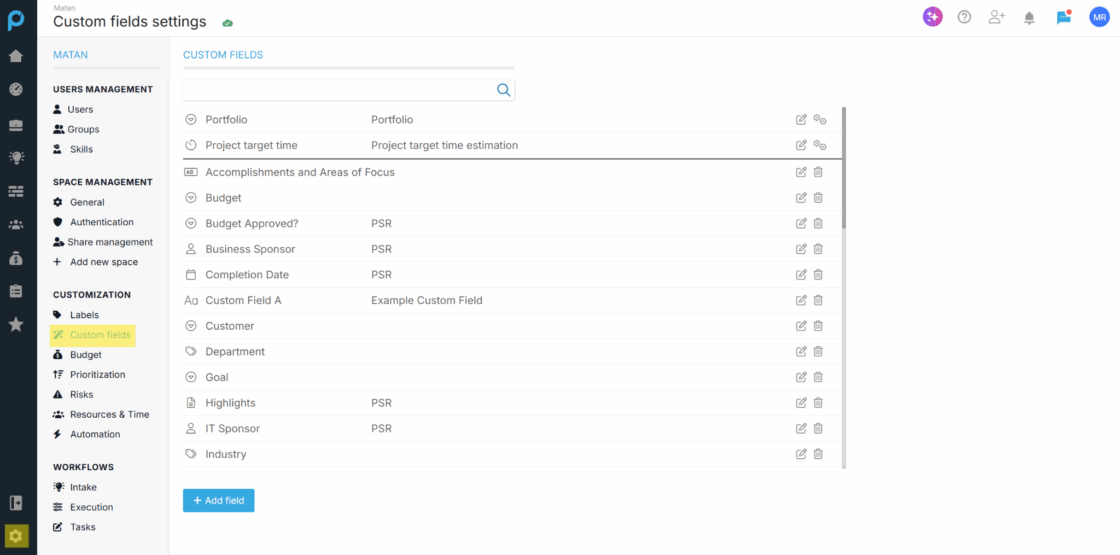
- Go to Settings (⚙️ icon) > Customization > Custom Fields
2. From Any List View
(Available in Project, PPM, or Task Report views)
Click the eye icon (👁) at the top-right of the table
Select “Show/Hide Columns”
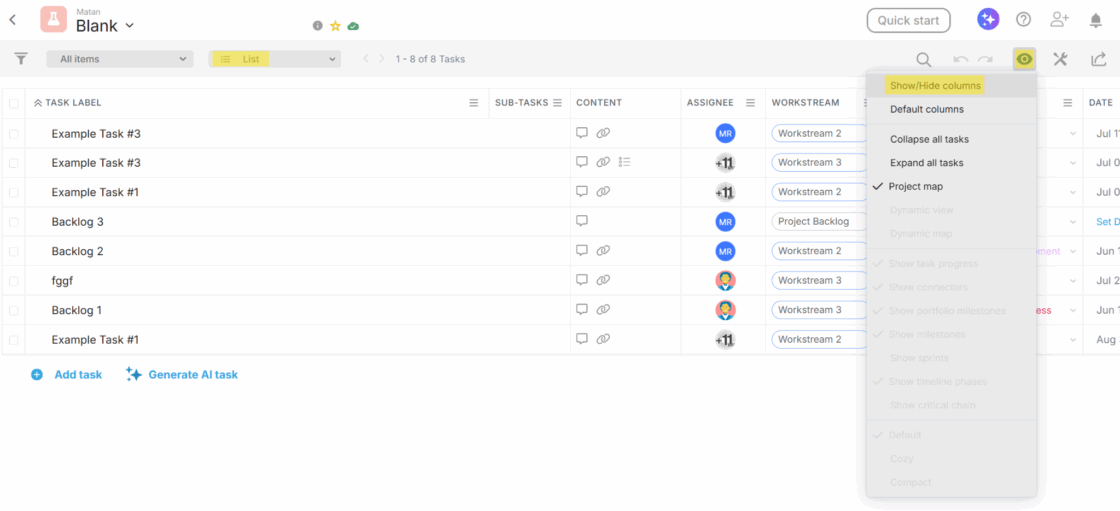
In the pop-up window, click “Add Field” (bottom-left corner)

This will open the Custom Fields Settings page.
➕ Creating the Custom Field
Once you’re on the Custom Fields page:
1. Click “Add Field”
Located at the top-left of the Custom Fields section.

2. Fill in the Details
- Name the field
Optionally, add a description
Define who can update the field by selecting relevant user roles
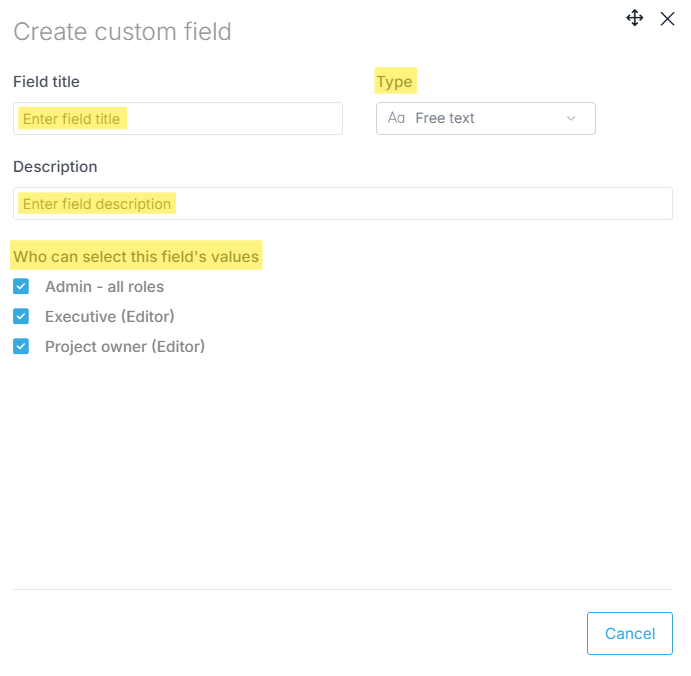
3. Choose the Field Type
You can choose from a variety of field types:

| Type | Description |
|---|---|
| Number | Allows numeric input. |
| Free Text | Short text input (1–2 words). |
| Text Box | For longer text entries or notes. |
| Rich Text | Supports formatting (bold, bullets, line breaks). |
| Choice | User selects one option from a list. |
| Multi Select | User can select multiple options. |
| User | Assign a user to the field. |
| Currency | Numeric input formatted as currency. |
| Date | Pick a specific date. |
| Other Types | Used for advanced or niche use cases. |
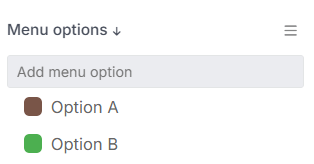
🔁 For Choice and Multi Select fields, you’ll be prompted to enter the list of options.
4. Click “Create Field”
Once configured, click Create Field to save. The new field will appear in your list of available custom fields.
📍 Where Custom Fields Appear
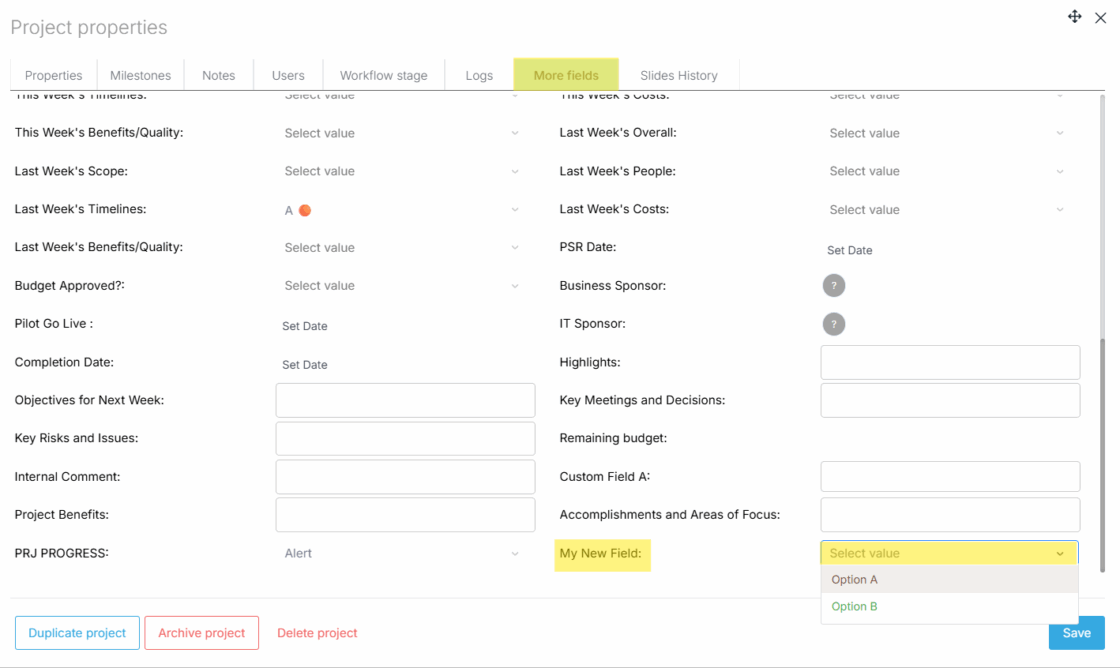
1. Task & Project Properties
- Custom fields appear under the More Fields tab in both task and project side panels.
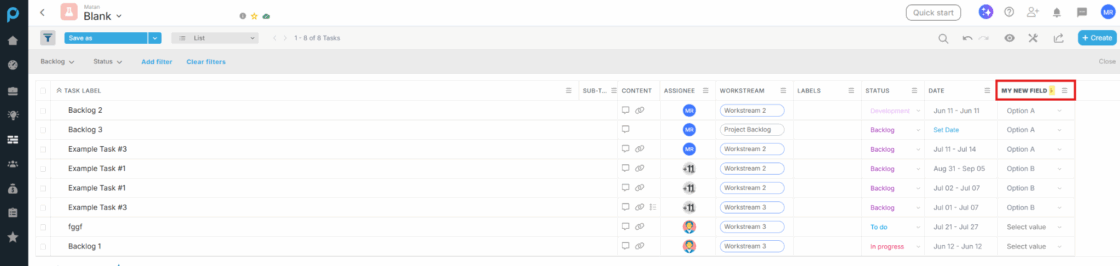
2. List Views
- Add them as columns for sorting, viewing, or editing directly in Project, PPM, or Task Report list views.
3. Filters
- Use custom fields to refine and filter your data in dashboards and reports.

Need Help?
For more help, feel free to watch our tutorial video or contact us anytime at [email protected].