Introduction
Proggio’s Timeline GPT is an AI-driven tool that redefines project delivery by creating intelligent timelines that enhance accountability through ProjectMap™.
Unlike traditional task-based tools, Timeline GPT transforms timelines into dynamic fulfillment engines — not just static visuals.
By using AI to generate, optimize, and monitor tasks, workstreams, and dependencies, it ensures projects move from conception to completion with clarity, efficiency, and measurable outcomes.
Getting Started with Timeline GPT
You can start using Timeline GPT directly from Proggio’s website — no signup required.
When you navigate to Proggio’s homepage, https://www.proggio.com, you’ll see the Timeline GPT chat box.

Here’s how it works:
- Type your project idea into the prompt box.
Example: “Plan the introduction of a mobile app for food delivery with development, QA, user testing, and marketing plan.” - Click the up arrow (↑) to start generation.
You are taken to a new page with a split layout:
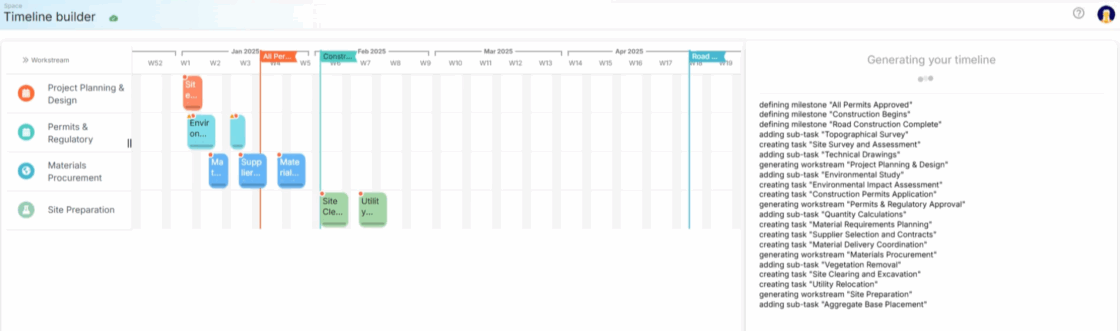
- Left panel: The ProjectMap™ timeline is built live — workstreams, tasks, subtasks, milestones, and dependencies appear as the AI works.
- Right panel: The AI window shows a live activity feed (e.g., ‘creating task…’, ‘defining milestone…’) and stays available for follow-up chat.
Pro Tip: Start with a clear, descriptive prompt for the best initial timeline.
Editing & Refining Your Timeline
Once your project has been generated, you’ll arrive at an editable project page where you can take full control.
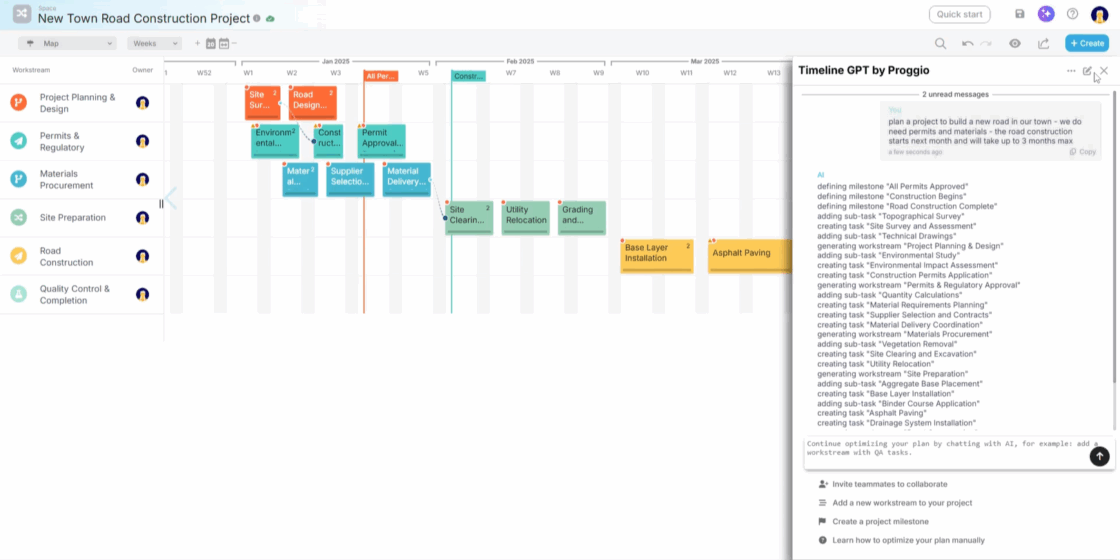
You can close the AI help window anytime to work manually — or keep it open to collaborate with AI in real time.
- Even if you close the AI chat window, you can reopen it anytime by clicking the colored stars ✨ icon in the top-right corner.
![]()
The AI chat (with full conversation history) will pop back up so you can continue refining your project seamlessly.
Manual Editing
You can make any change directly on your project timeline:
- Add / remove / edit workstreams, tasks, sub-tasks, milestones, or dependencies
- Update project and task metadata — for example, edit the project description under Project Properties or flag a task as risky from its Task Properties
- Switch views — instantly move between the ProjectMap™ (timeline view), Board view (Kanban), or List view (Spreadsheet-style) to see your project from different perspectives
For a more detailed view on how to manage your project in Proggio please refer to our dedicated tutorial at Managing Projects in Proggio
Chat with AI to Refine
The AI helper stays active so you can:
- Add new tasks, workstreams or milestones
- Remove unnecessary ones
- Extend or shorten timelines
- Or even restructure your entire plan on the fly
AI Suggestions Inside the Timeline
You can also use AI directly from within your timeline to generate ideas and additions:
Note that both options are hidden until the chat AI window is closed
- Add a Task Using AI: Hover over an empty space in a workstream until the Add Task option appears.
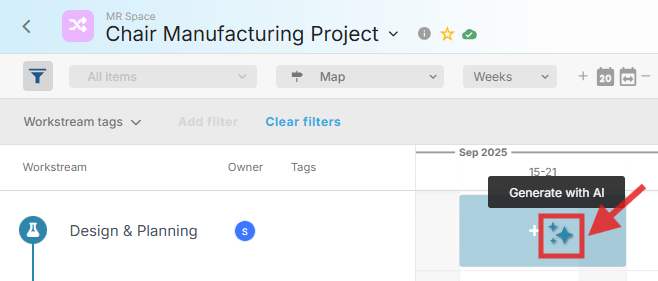
You’ll see two icons: a plus ➕ and a stars ✨ icon.
- Click the plus to manually add a task.
- Click the stars ✨ icon to open the AI helper, which will analyze your project and suggest relevant tasks.

If you’re not happy with the first set of suggestions, click Regenerate to get new ones, add a text prompt to adjust the generated tasks or simply click a suggested task to add it to your timeline. - After adding a task, you’ll see an option at the bottom of the AI helper:
“Add a sub-task to last created task.”
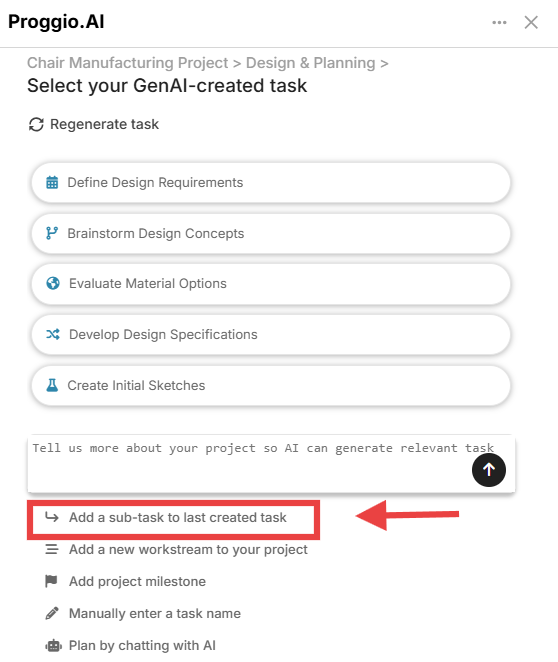
Clicking it will open another AI chat to generate sub-task suggestions under the parent task.
- Add a Workstream Using AI: At the bottom of your workstream list, click the stars ✨ icon Suggest Workstreams.
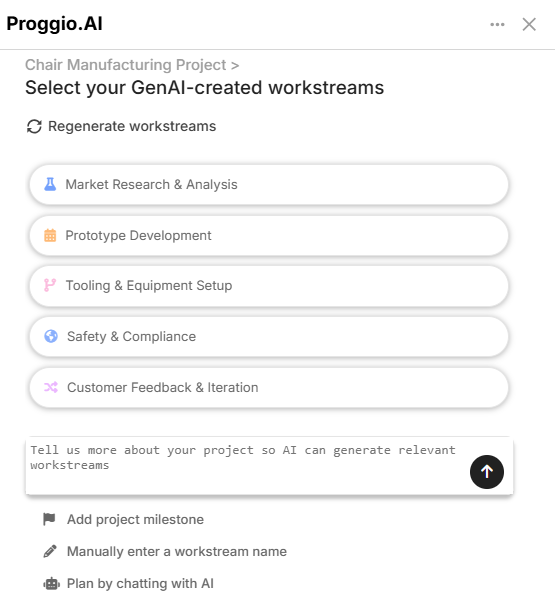
The AI helper will pop up again with tailored suggestions for new workstreams based on your project’s structure. As before, you can regenerate suggestions or click a preferred one to add it. After adding a workstream, you’ll get another prompt: “Add a task to last created workstream.”
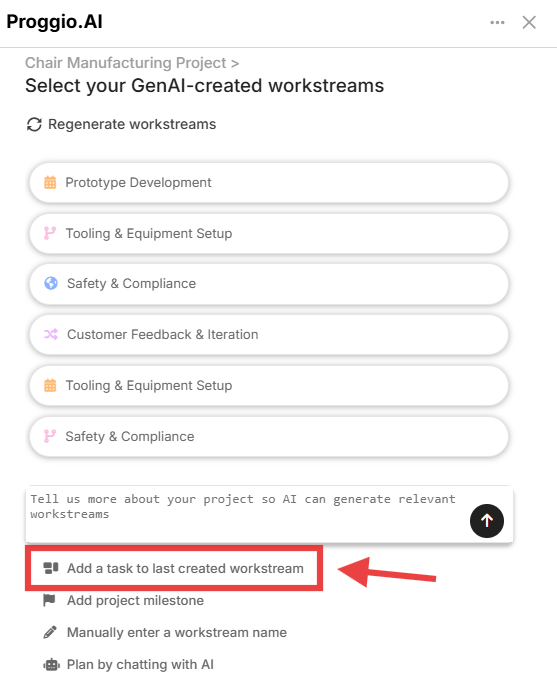
Clicking it will open the AI helper for suggesting tasks under that new workstream.
Pro Tip: Use AI suggestions to spark structure and inspiration — then fine-tune the results manually for precision.
The combination of AI intelligence and your expertise delivers the perfect balance between speed and control.
Saving Your Project for Future Use
To ensure you can access and refine your project later, you need to save it to your account.
- Locate the Save 💾 Icon:
Next to the top-right colorful stars ✨ icon, you’ll see a 💾 Save My Work button.
![]()
- Initiate the Save Process:
- Click the 💾 Save My Work button
- A Quick Start signup prompt will appear.

- Enter your email and a desired password, then click Submit.
- Access Your Saved Project:
- After signing up, you will be transported to Proggio’s full app containing the left context menu while still being on your created project’s page.
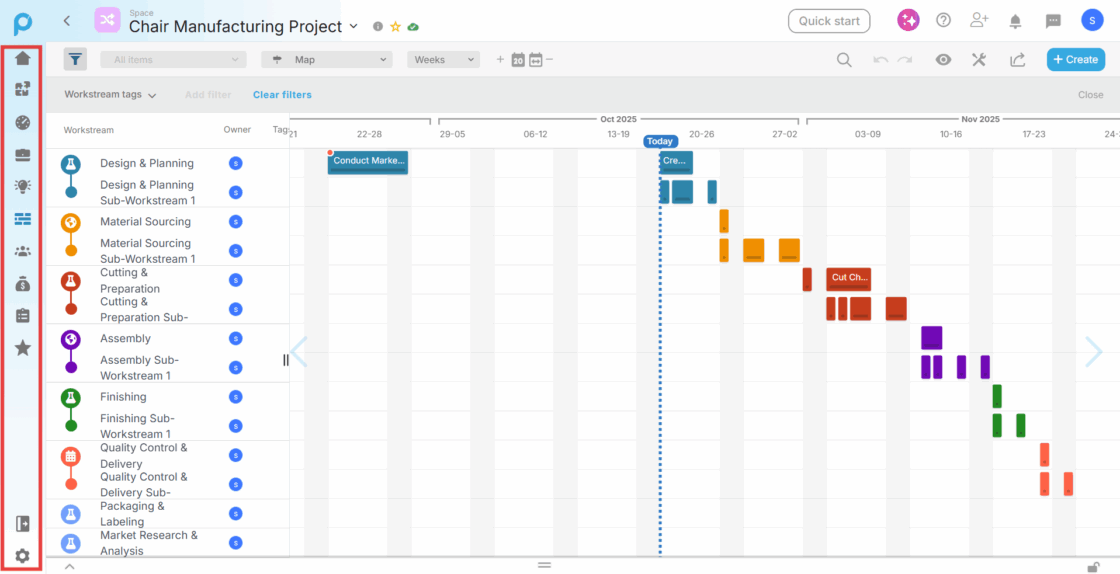
- On the left menu, you’ll see options to switch between modules: Home, Dashboard, Portfolio, Resource management, Budget, Task Report, Settings and the Timeline GPT 🧩 puzzle pieces icon.
- Creating New Projects (Registered Users):
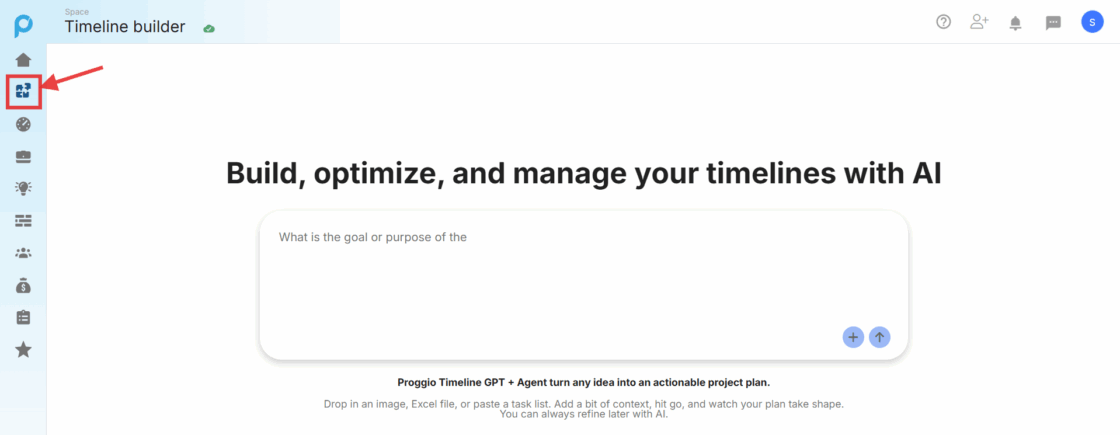
- Clicking the Timeline GPT icon opens a page with a large prompt text box, where you can create new projects using AI.
Registered users have additional capabilities, such as uploading files (Excel task lists, Gantt charts, workflow images) for AI analysis. The AI will convert the uploaded data into a ProjectMap™ with tasks, dependencies, milestones, and workstreams.
- Free users can still use the AI via text prompts, but file uploads are only available to registered users.
Full Access Features (Registered Users)
Once you register and sign in, you unlock the full power of Timeline GPT:
- Access Timeline GPT inside the Proggio app: Click the puzzle piece 🧩 icon in the top-left menu to open the Timeline GPT AI builder.
- Upload files to chat for AI analysis: Registered users can provide images, Excel files, or paste a task list of Gantt charts, workflow diagrams, or other project artifacts. Timeline GPT will analyze the data, extract workstreams, tasks, subtasks, dependencies, and milestones, and automatically build a ProjectMap™.
In the AI chat box bottom corner, click the ➕ icon to upload files.
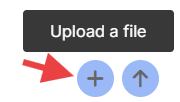
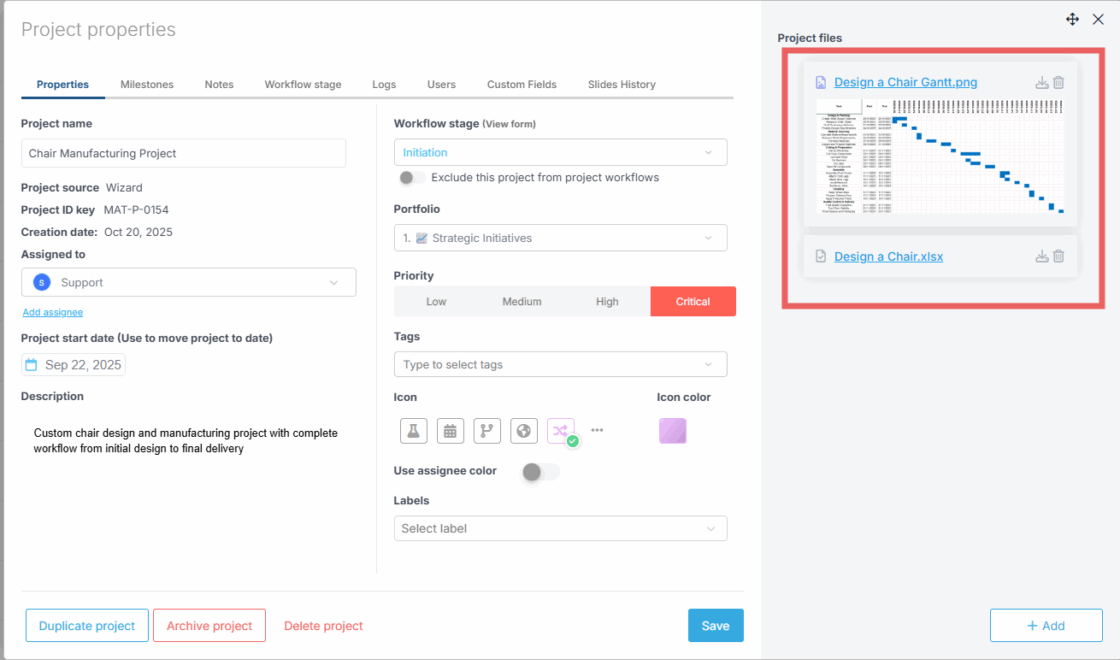
Once the project is created, the files you uploaded will be automatically attached to it. You can view them anytime under Project Files in the Project Properties panel
- Create and manage multiple projects: Registered users can build a portfolio containing multiple projects, switch between them seamlessly, and update each project individually while keeping AI assistance available.
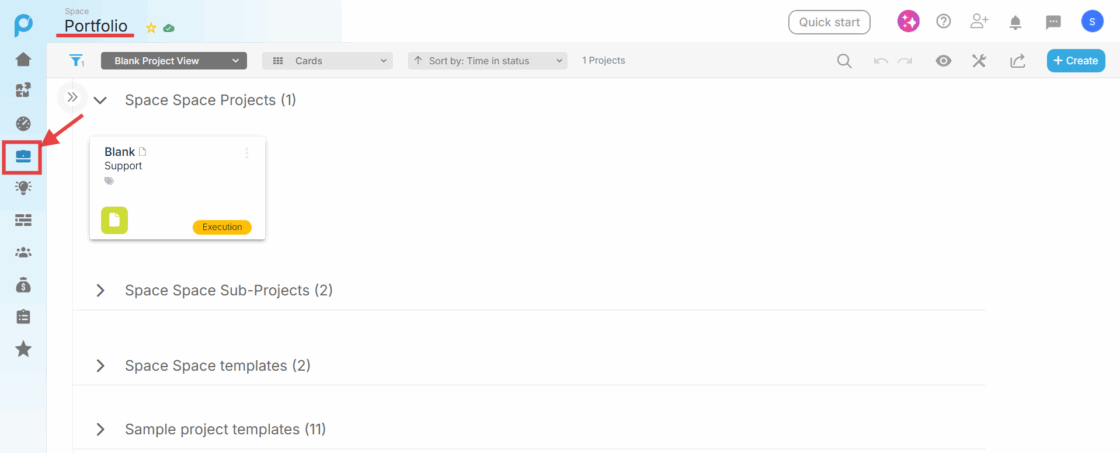
You can navigate to the Portfolio view from the left menu to see all of your projects by clicking the briefcase 💼 icon.
- Invite collaborators: Share your projects with team members by inviting users to collaborate. Assign tasks, track progress, and ensure everyone is aligned.
For more information on how to invite new users, please refer to our dedicated tutorial Inviting and Managing Users in Proggio.
- Seamless AI support across projects: If you close the AI chat window or navigate to another project, simply click the stars ✨ icon in the top-right corner.
The chat assistant will reopen, retaining its history for every project, so you can continue refining your timeline without losing context.
Pro Tip: Combine uploaded files with a short text prompt (e.g., “Add QA steps and marketing milestones”) to generate a richer, more actionable timeline.
You can also iteratively refine suggestions until your project fully matches your vision.
Final Tips & Best Practices – Using Timeline GPT Effectively
Timeline GPT works best when you actively engage with it throughout project creation.
Remember: To get the most out of Proggio’s Timeline GPT –
- Be clear and descriptive with prompts: Include phases, deliverables, teams, and rough timelines when possible. The more context you provide, the more accurate the AI-generated project will be.
- Follow the AI feed in real time: Watch milestones, tasks, subtasks, and workstreams as they appear on the timeline. This helps you verify that the AI is structuring your project correctly.
- Iteratively refine your project: You can continue chatting with the AI to restructure, add, or remove tasks and workstreams. Even after the AI finishes generating the project, you can manually edit or expand it.
- Use AI to generate suggestions on-demand: Hover over empty spaces in the timeline to add tasks or workstreams. Click the stars ✨ icon to receive AI-generated suggestions. You can regenerate ideas or choose the ones that best fit your project.
- Keep AI accessible across projects: Closed the AI window? Click the stars ✨ icon at the top right to reopen the chat with full history. This allows you to continue refining any project in your portfolio.
Pro Tip: Combine manual edits with AI suggestions.
For example, you can flag risky tasks, adjust dependencies, or add project metadata while still letting AI propose optimal task sequencing and workstream structures.
Need Additional Help?
For more help, feel free to contact us anytime at [email protected].