Introduction
Task management is all about short term execution. As soon as the longer term planning process is done, we are breaking the short term into tasks, assigning tasks to people and tracking task progress.
With Proggio, tasks are managed in the context of projects and the portfolio. It allows better collaboration with the different stakeholders, who easily understand how they contribute to your project portfolio.
Using filters and sorting to customize your view
Clicking the ‘List’ / ‘Board’ buttons on the top right corner to switch between the different modes. Depending on your role in the project, you can select to view only your own assignments or choose to monitor All Tasks across everyone in your team.
Switching from Board to List view and vise-versa, will keep the same filtered data displayed.
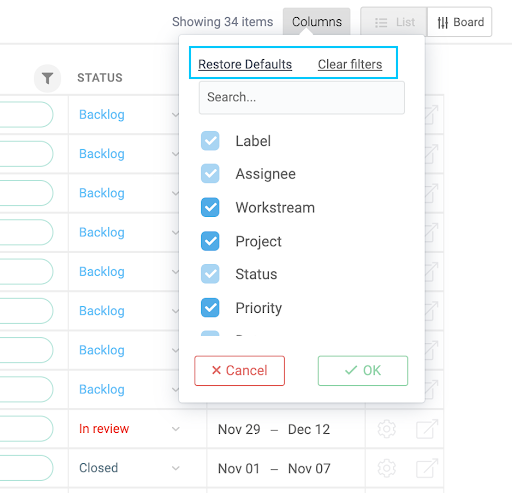
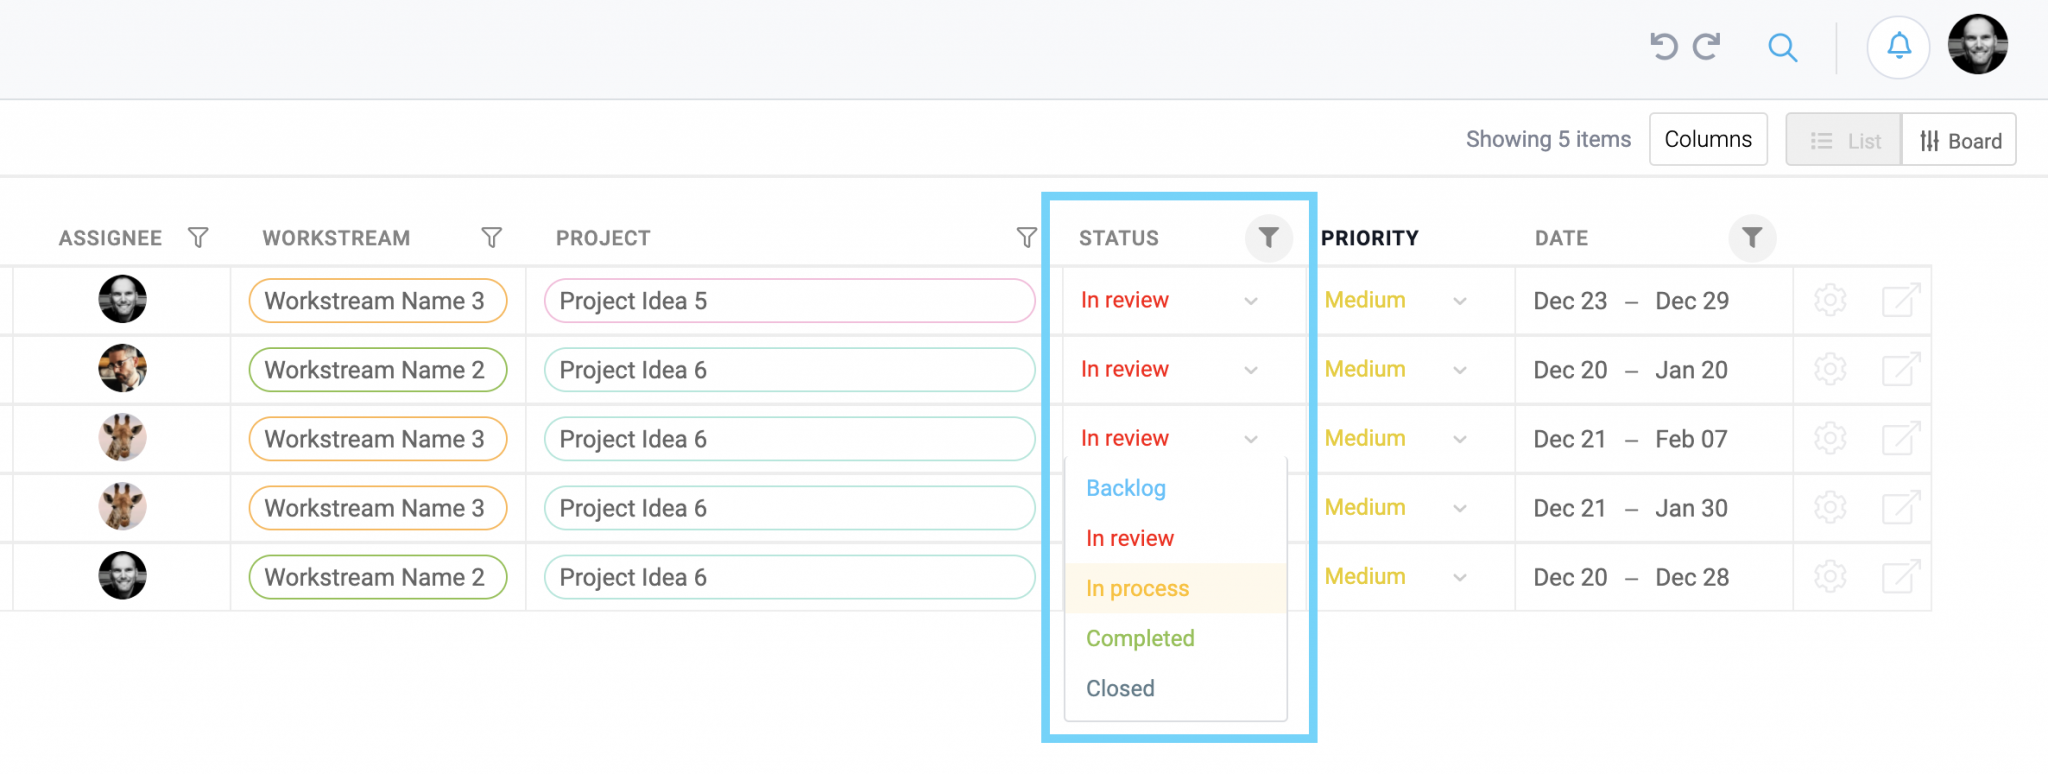
Use the “Columns” button (when using a list view) or “+ Add filter” (in Board view) to add more fields and sorting options to your view. Each can be used as a filter whenever you need to focus on specific pieces of the information.
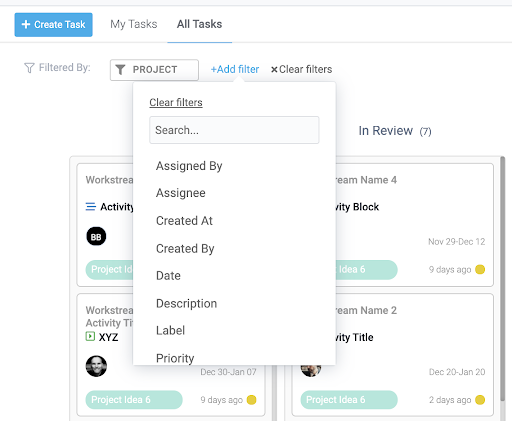
ProTip: Add a ‘Date’ filter to focus on a specific time frame and choose ‘Week’ from the displayed options. This allows you to view just the upcoming or active assignment for the upcoming week. Add the ‘Assignee’ filter to have a more focused list of items when reviewing your team’s work.
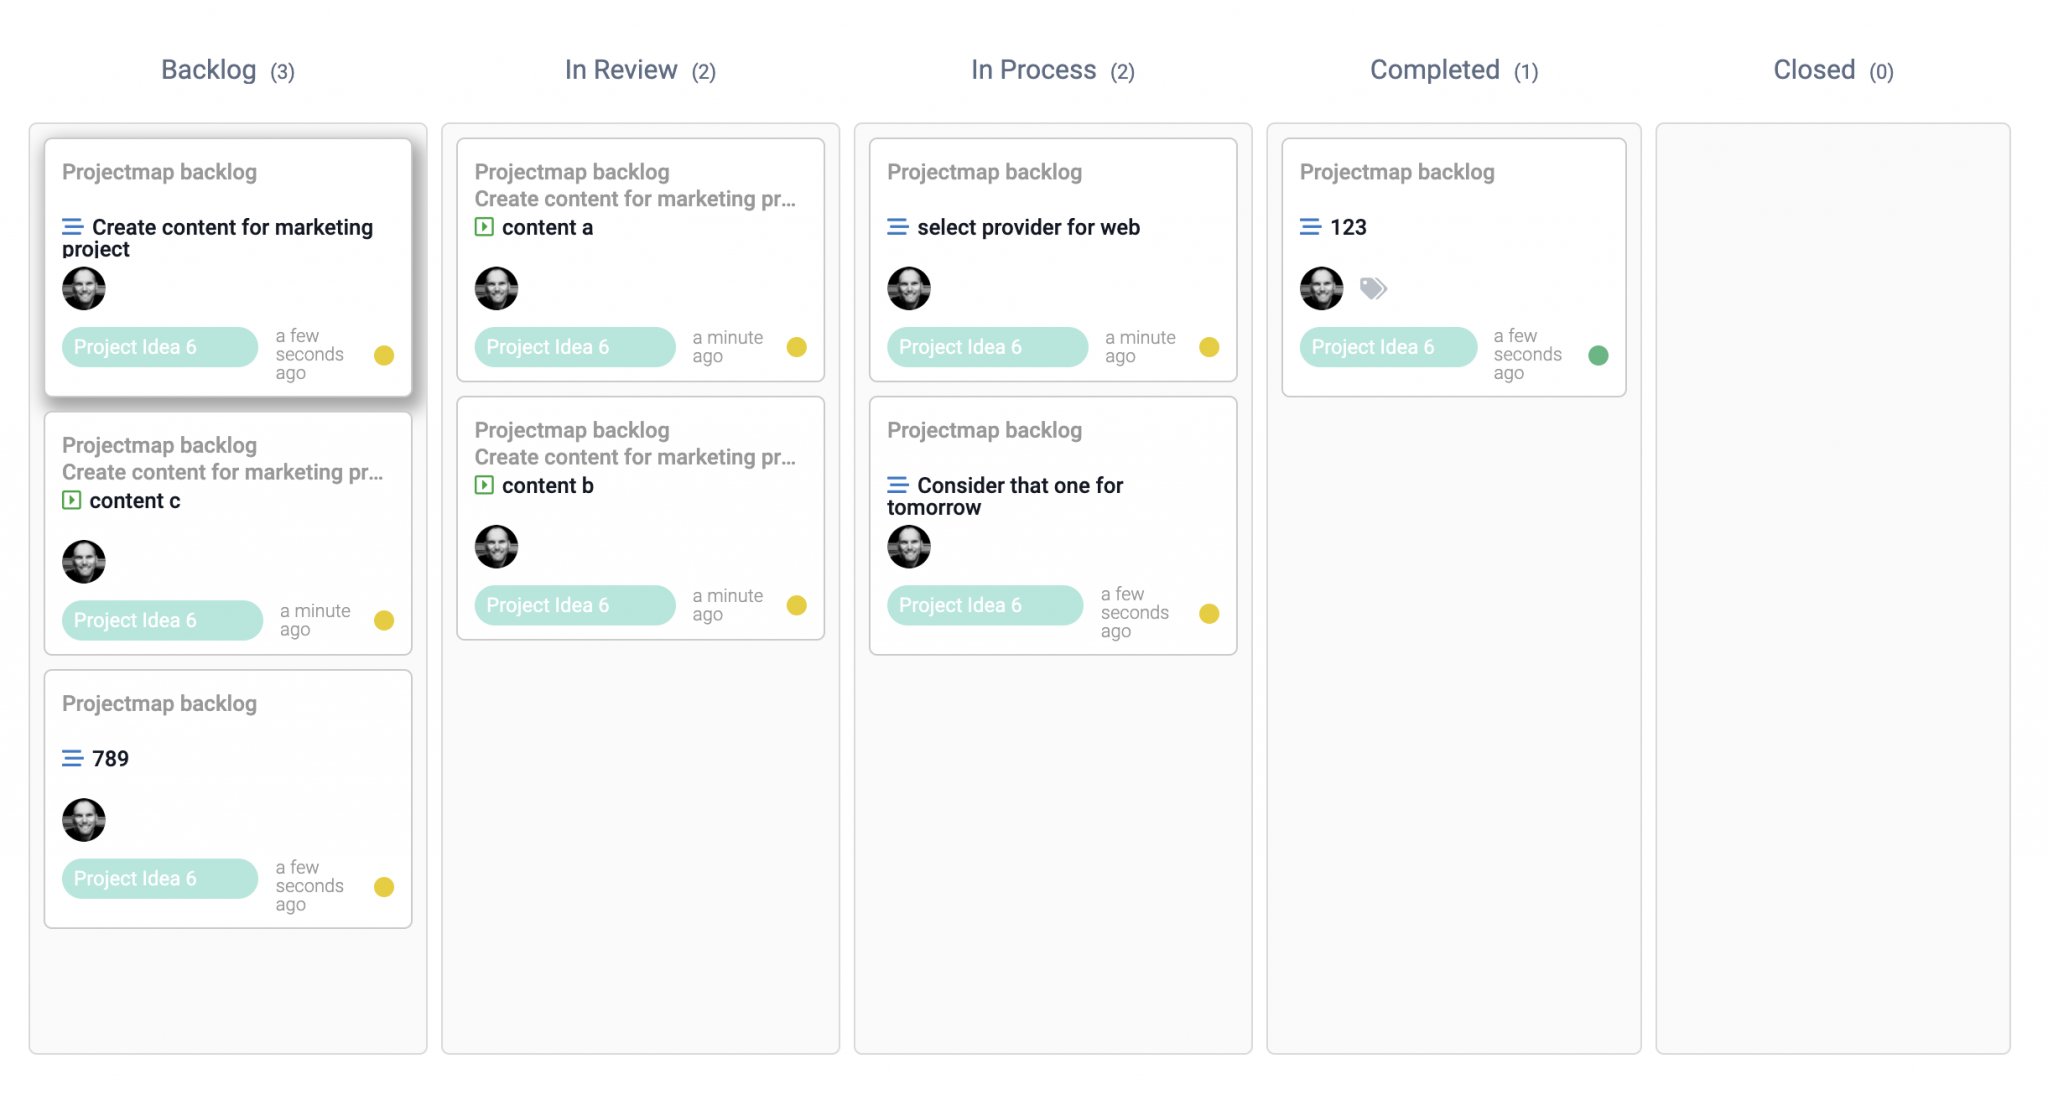
Project Task Board View
In Board view, each assignment, whether it’s an Activity or Task is displayed on a card. The cards are populated on the board view swim lanes according to the status of the assignment
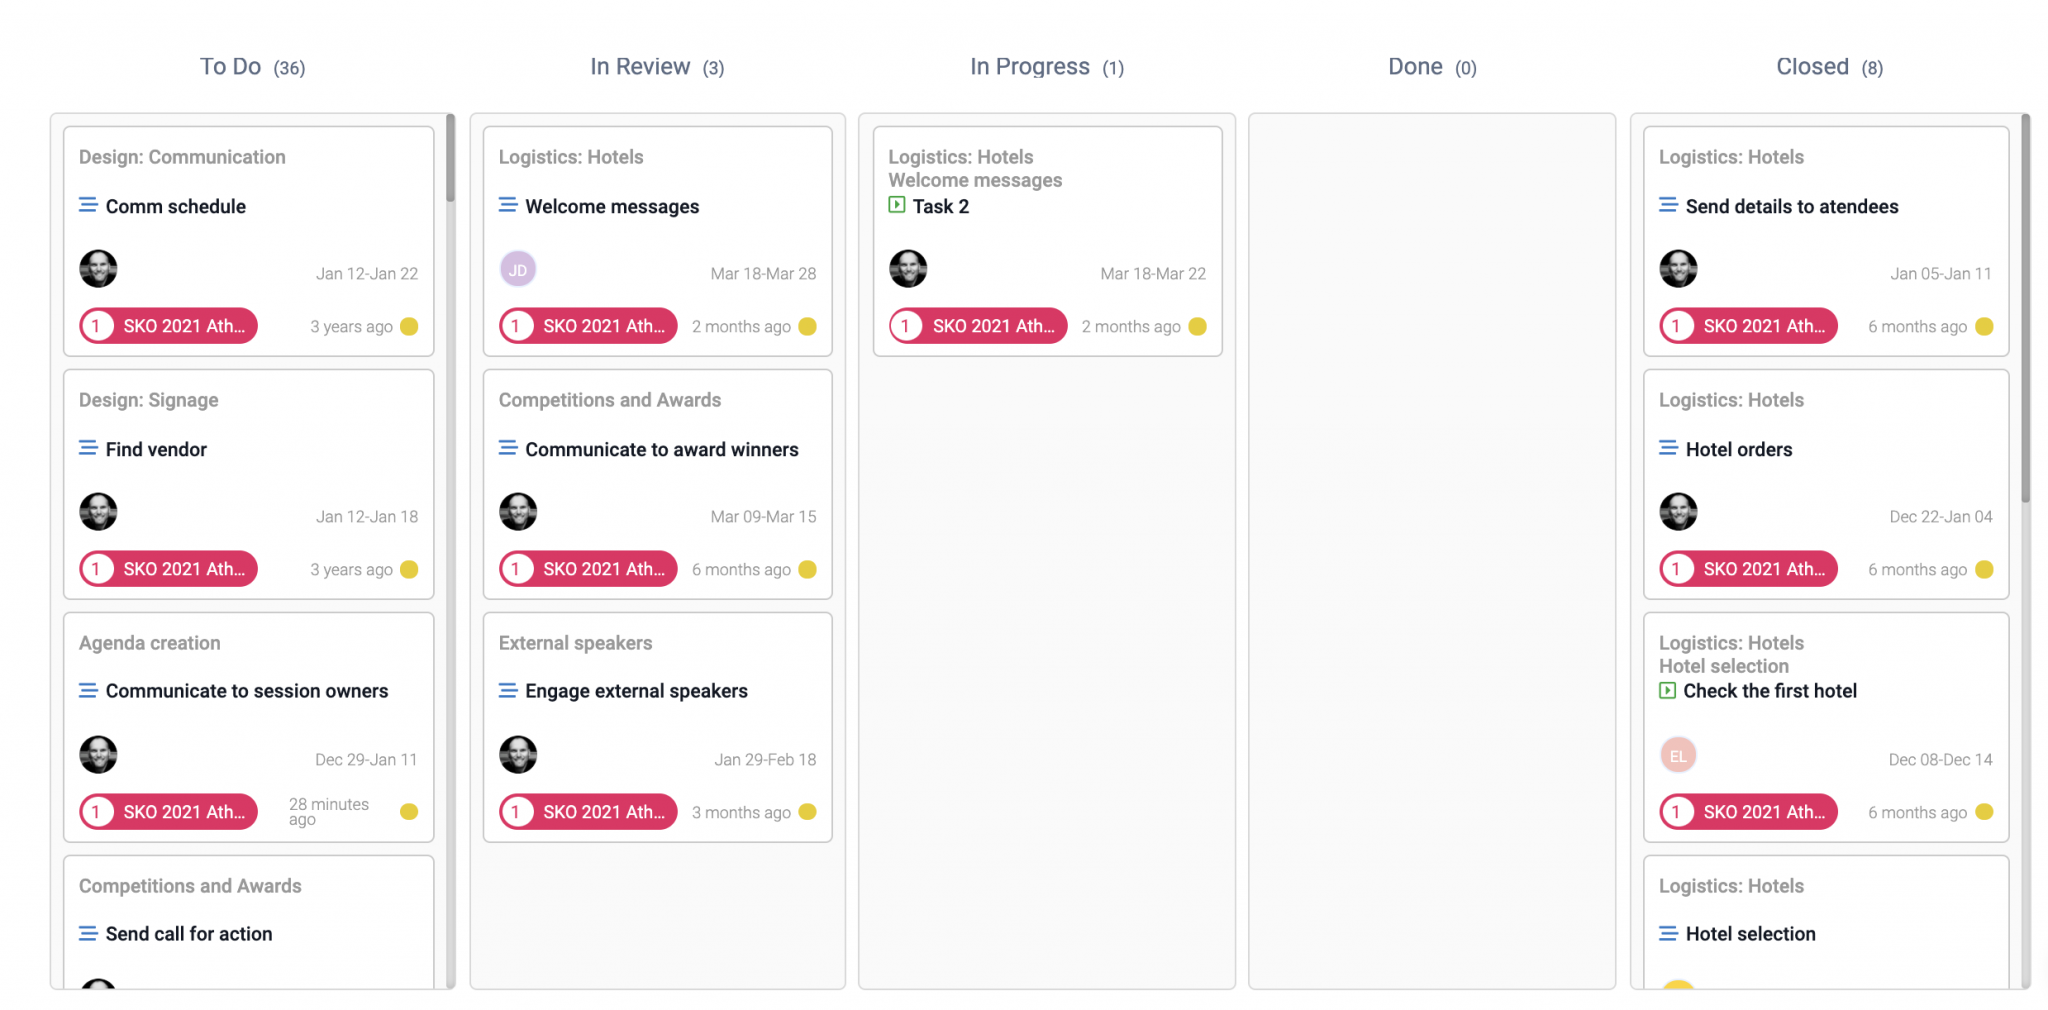 Each card holds relevant information to give you more context with the project. Such as:
- Name of the assignments
- Name of assignee
- It’s due date
- It’s priority
- How long it’s been sitting in its current status
- When applicable, show the assignment’s tag and project’s rank
- It’s parent activity and/or Workstream within the project timeline
To distinguish between tasks and activities, an activity is represented by 3 blue lines and a task is represented by a green play icon.
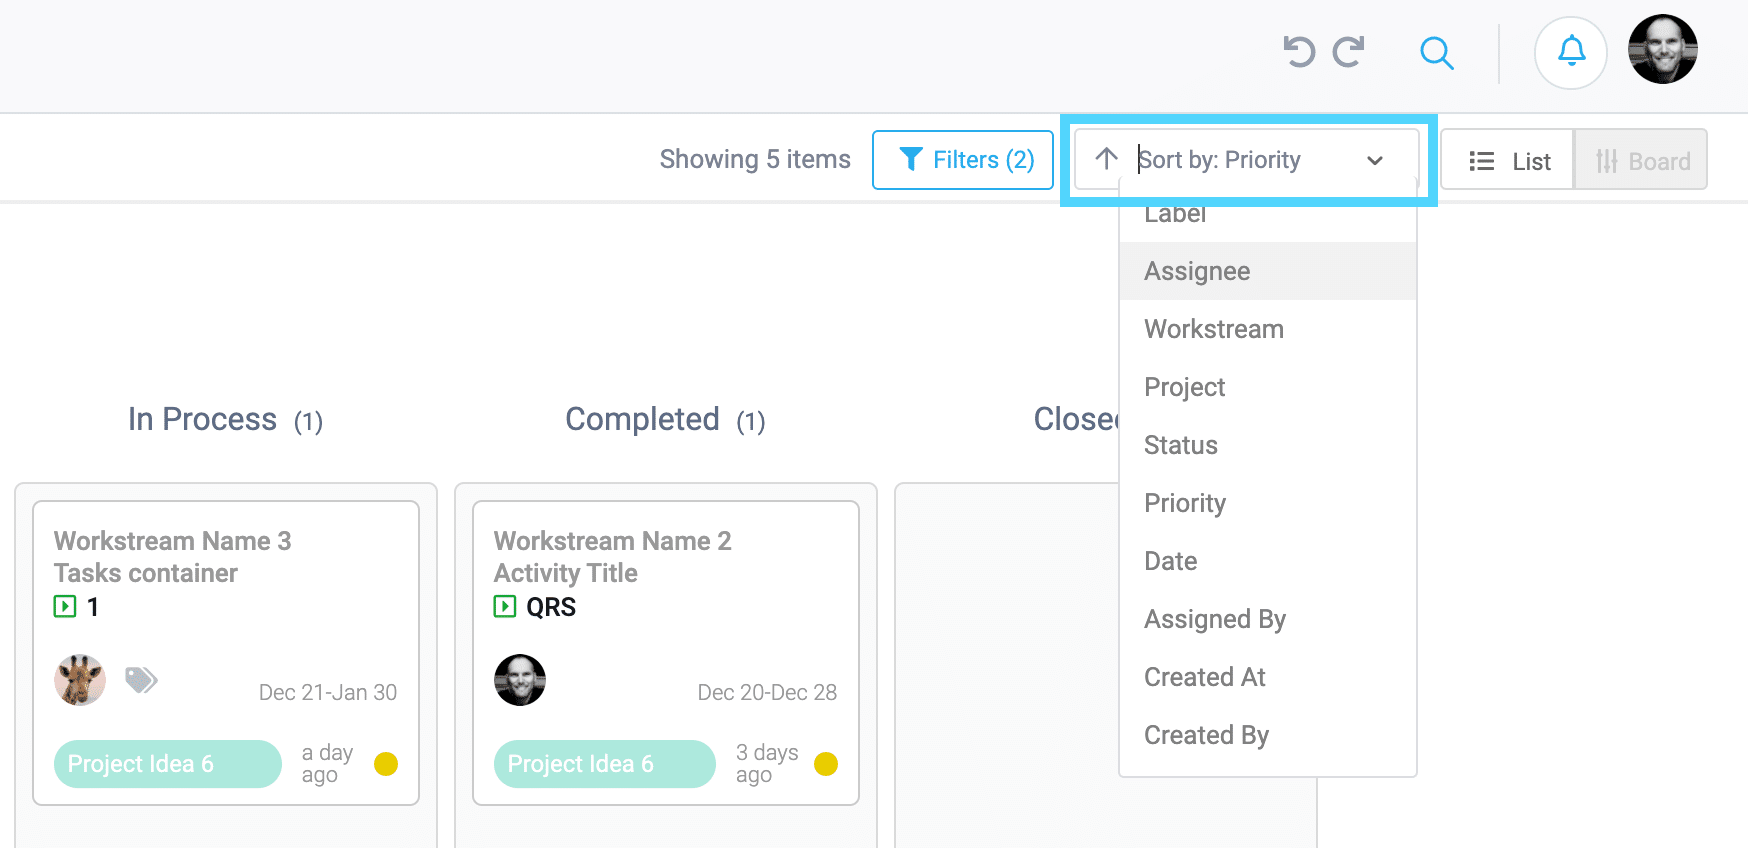
You can sort the information on the board according to any of the available options in the ‘Sort By’ drop down menu. Click the small arrow to sort in a descending or ascending order. If needed, you can also sort by dragging the cards manually.
Updating Progress
To update progress, simply drag the card to the right status on the board.

Depending on your preferences, you can also choose to do this in list mode by selecting the status from the status drop down.
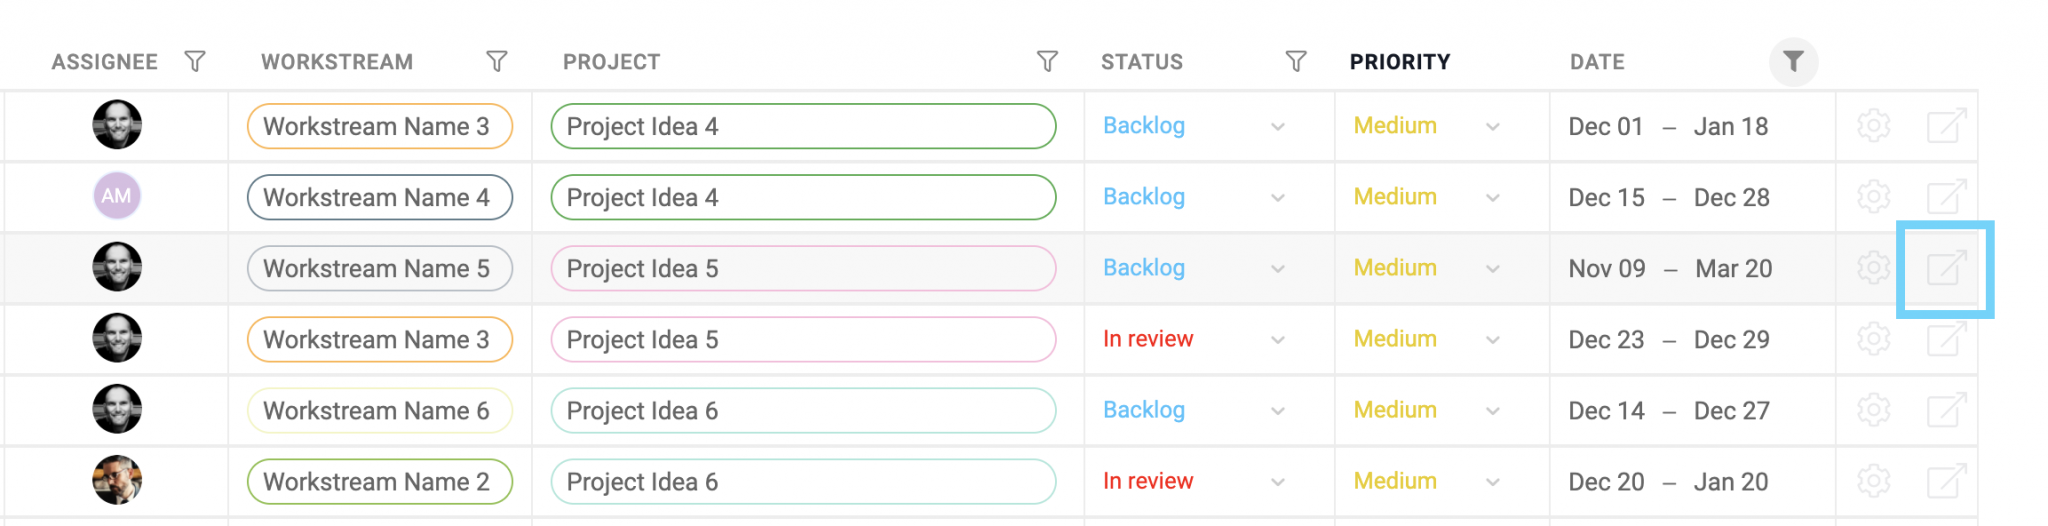
In list view, click the Settings icon to inspect more details about an activity.
In Board view, right click a card and select settings.
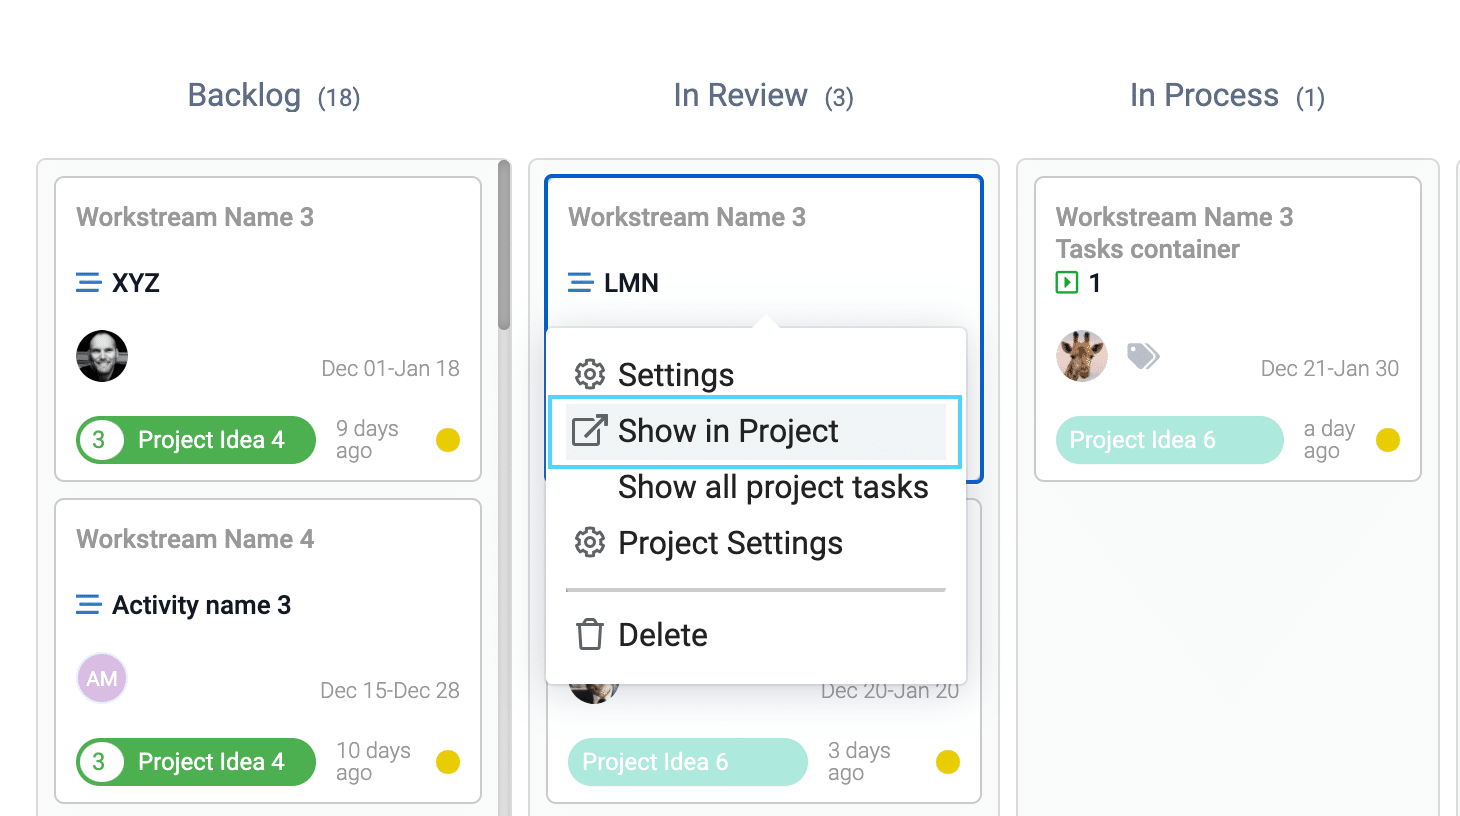
Managing tasks in context: “Show in Project” feature
Tasks are better managed when the context of the task assignment and the overall project structure are clear. The task context is not always clear when going through a list of ‘To Do’ items or when scrolling through cards on a board. Task context is best presented with a timeline.
In order to see the task location over a project timeline, right click any task card and click “Show in Project”.
In list view, click the icon on the furthest right side in the list to view a task in project from list view

The ProjectMap™ automatically centers on the activity containing the task we are looking for to give you a quick orientation of where to place your focus.
Adding Backlog tasks to an existing Project timeline
You can add tasks to your project timeline as backlog items, and choose to schedule them later on. Until then, you don’t necessarily want to incorporate them in the project timeline. Lets see how this works –
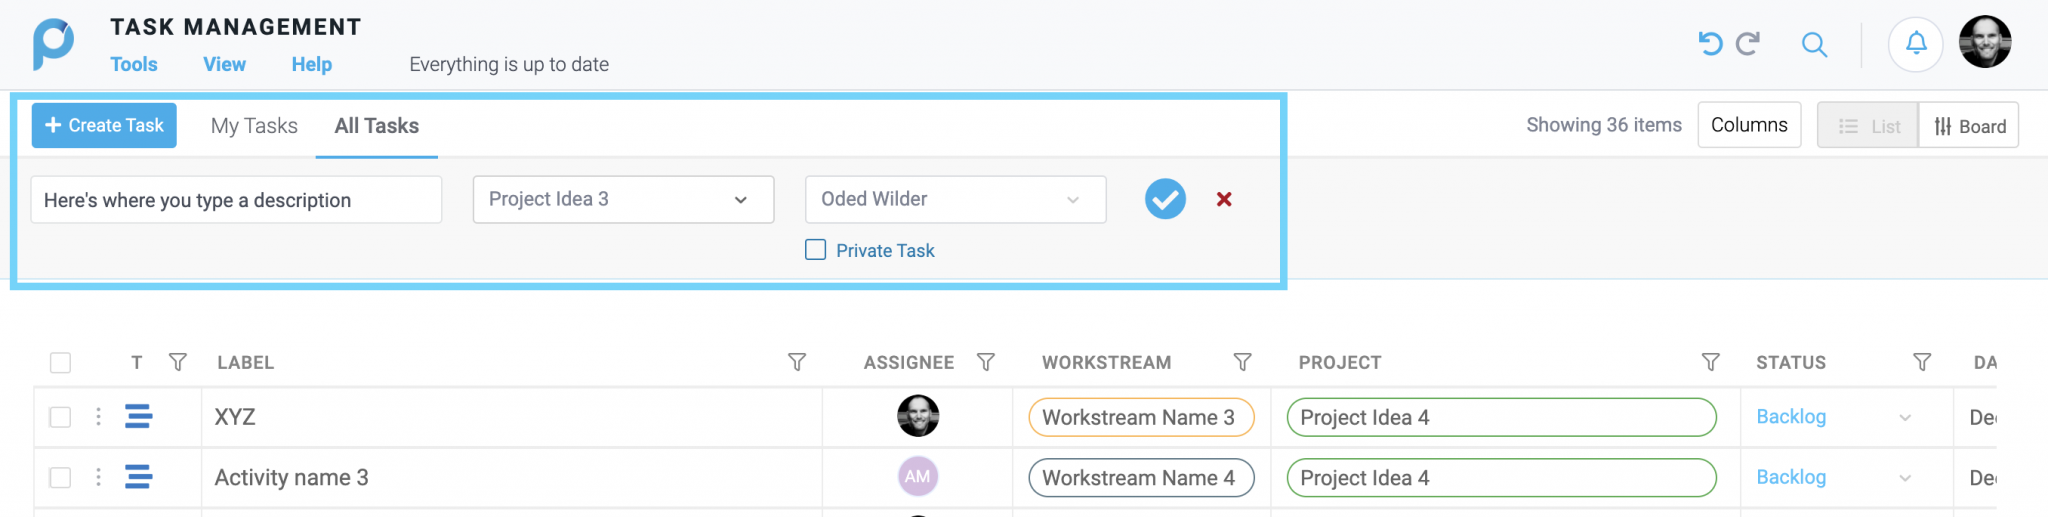
Click the create task button and write a short description of what it is. Select the project the assignment is associated with and also identify the person who should be assigned to it.
Here’s a short list of things to know when creating backlog items:
- By default they are created as ‘ProjectMap™ backlog’. To view them in Board/list, use the ‘Date’ column/filter and select to view ‘Unscheduled’ from the list.
- Projects backlog assignments carry no start / end dates
- By default they are assigned to you but you can reassign to anyone in your workspace.
- The task will automatically fall into the first status state defined in your workspace.
- If no date provided, tasks are assigned a new workstream which is called ‘ProjectMap™ Backlog’
Backlog assignments can be managed or executed by you or someone in your team in parallel to your project timeline. You don’t necessarily need to plan them into the project just yet. Other than not having a set due date and not being accounted for the total workload in resource planning – backlog items can still be managed pretty easily. The person who is assigned to these tasks can start working and updating progress.
Throughout the process of executing these activities, you might end up adding more items to the marketing efforts which will eventually become too complicated to manage without the timeline. Now, it will make more sense to incorporate these within your project plan.
If you work in ‘Board’ view, right click any of the unscheduled tasks and select ‘show in project’. This will automatically redirect you to the project plan and open the ‘Project backlog section within the split screen.

Drag and drop the relevant assignment onto the map and organize it in a way that will make most sense with your project plan. You might want to create a new workstream for these assignments so that you can place them all within the same category or context.
Now that you’ve set your backlog activities on the project timeline, you can manage their progress and see that it’s on track against their due dates.