Introduction
In Proggio, we take a wide view of projects — from building a portfolio, through planning and tracking a single project, and into task management. This article focuses on Task Management in Proggio.
Get Work Done, in Context
Task management focuses on short-term execution. Once long-term planning is done, tasks are broken down, assigned to team members, and tracked.
With Proggio, tasks and subtasks are managed within the context of projects and portfolios, enabling better collaboration and allowing stakeholders to see how their work contributes to the bigger picture.
Opening the Task Report View
You can access the Task Report and manage tasks in several ways:
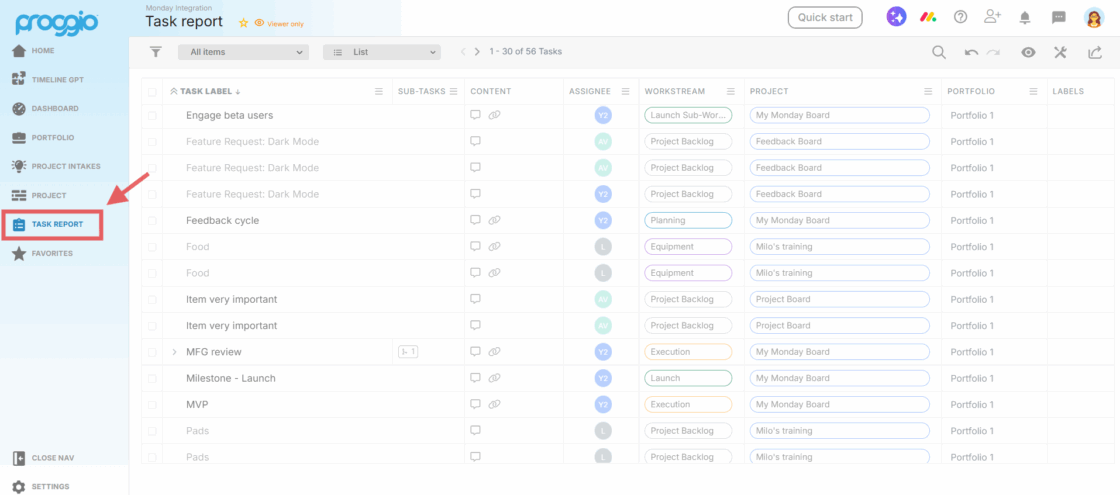
- Click the clipboard icon 📋 in the left panel menu to open the Proggio Task Report page.
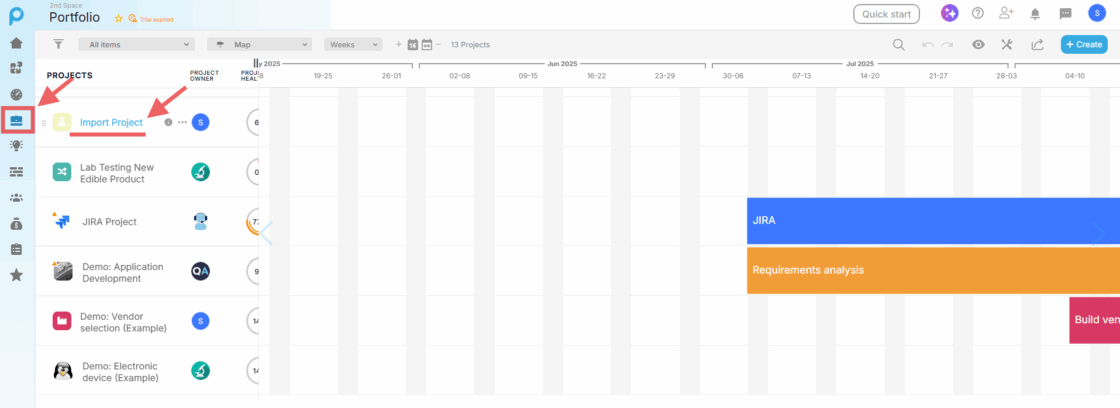
- From the Portfolio — click a project’s name to drill down to the project level and view that project’s tasks.
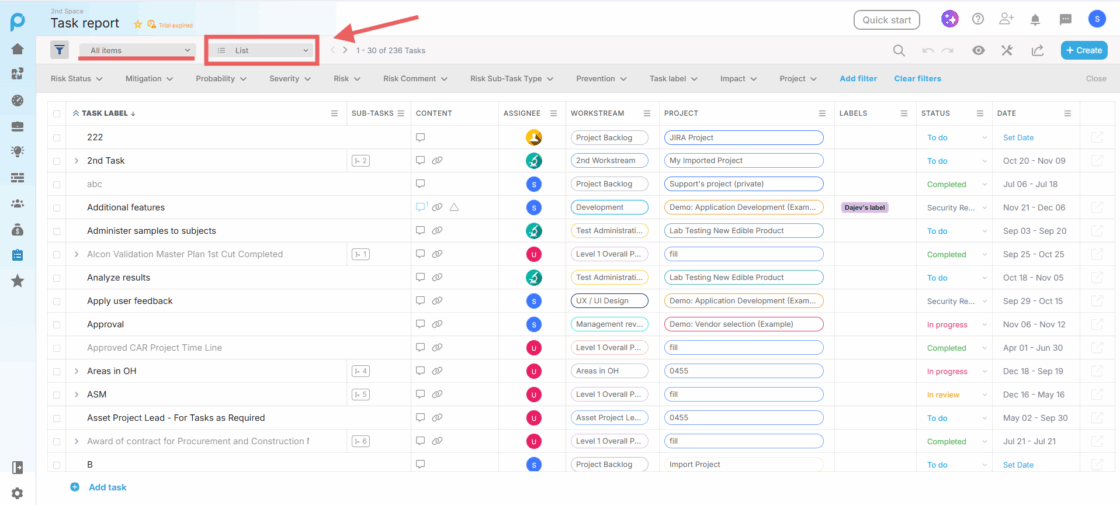
- In the Task Report, by default, you’ll see a List view of all tasks your user is permitted to see across the portfolio.
- When viewing a specific project, the project will open in the same view as the portfolio view you navigated from. For example, if you were in the portfolio List view and selected a project, the project will also open in List view.
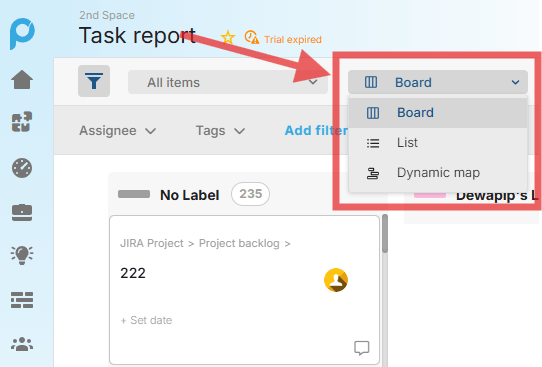
Proggio will also remember the last view you used (List, Board, or Map) and automatically display it the next time you navigate to that view. - You can apply filters to display only the relevant tasks.
- You can toggle between List (Table), Board (Kanban), or Map (Timeline) views.
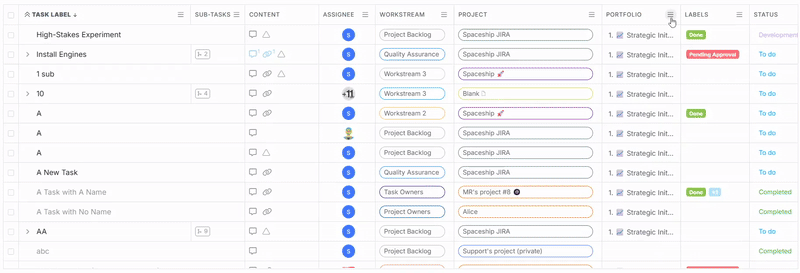
- In the List view, you can add or remove columns to only display the columns that you need to see.
After selecting the desired filters and layout, you can save your customized view for future use:
- Click the Saved Views dropdown.
- Select Save As, give your view a name, and save it.

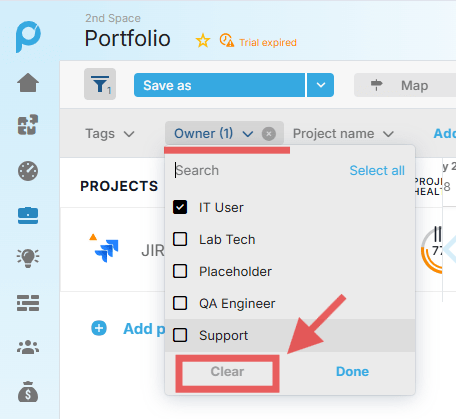
Pro Tip: If something seems missing, check your filters. Click any active filter, select Clear and Done to remove it.
Board, List, and Dynamic Map Views in Practice
Board View
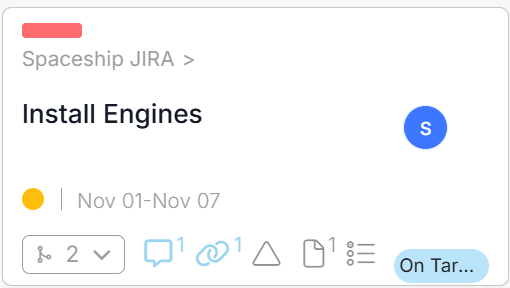
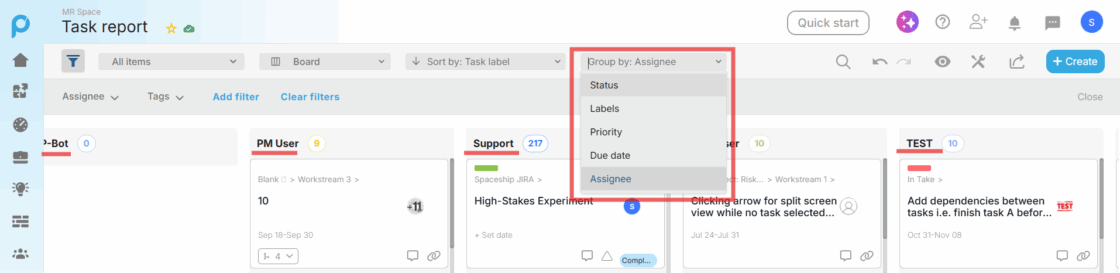
In the Board view, tasks are represented as cards arranged on a Kanban-style board.
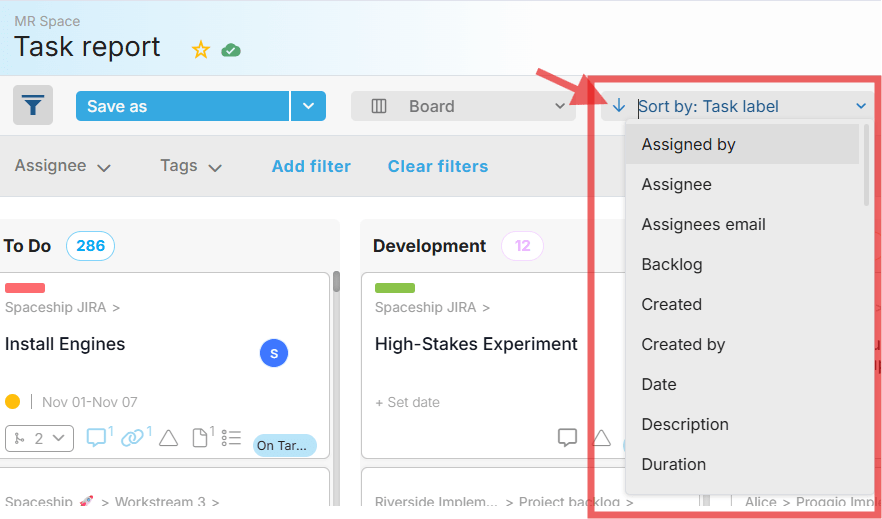
You can sort the cards by any option available in the Sort By dropdown menu.
Click the small arrow next to the menu to sort in ascending or descending order.
You can also manually drag cards to reorder them within a column.
List View
In the List view, all tasks are displayed in a structured, spreadsheet-style table similar to Excel.

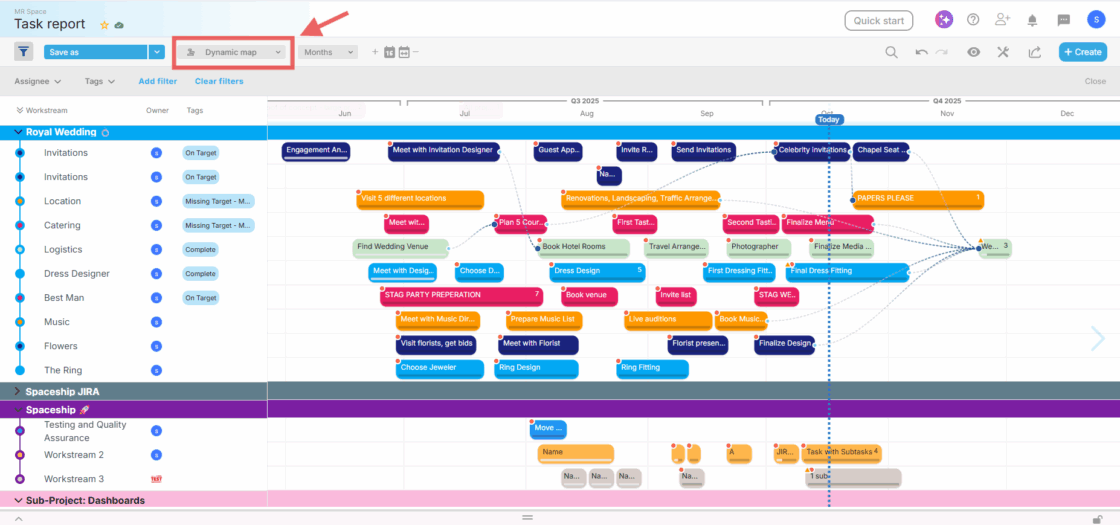
Dynamic Map View
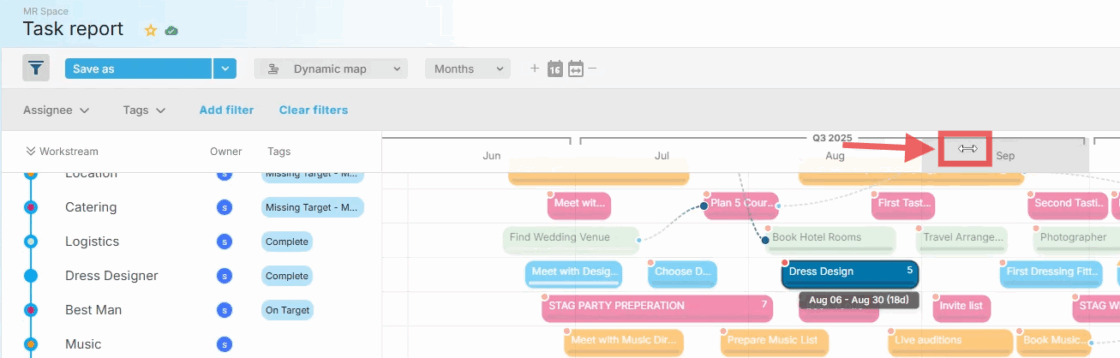
Using filters, sort options, and customizing your views
Filters
Click the filters icon and select Add filter to apply sorting options to your view.
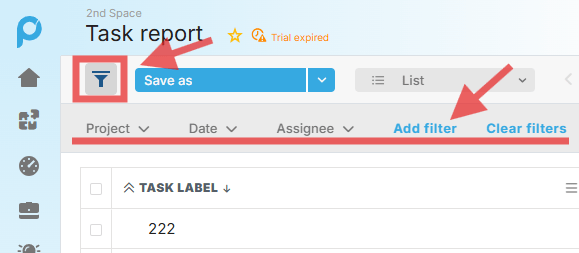
The selected filters will appear just below the view selector.
Each used filter will be highlighted and display a number indicating how many values are selected within it.
Filters can be used whenever you need to focus on specific pieces of information and can be combined with as many filters as needed to drill down to only the relevant data.
Show/Hide Columns in a list
When using the List view, use the eye icon and select Show/Hide Columns.
![]()
From the pop up menu tick the desired fields to display and untick the unneeded ones.

Combined with filters, this helps ensure you only see data that’s relevant to you.
Switching between Board and List view will keep the same filtered data displayed.
However, switching to another module, Dashboard for example, will reset the selected filters and columns — it is recommended to save your customized views.
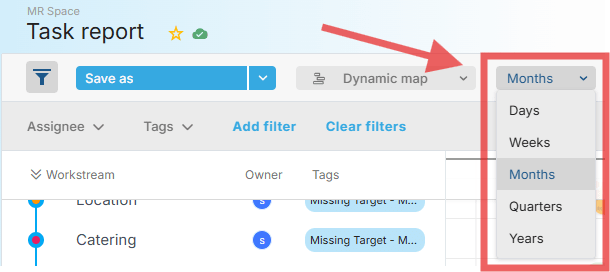
Pro Tip: Add a Date filter to focus on a specific time frame and choose Week from the displayed options.
This allows you to view just the upcoming or active assignments for the next week. Add the Assignee filter to narrow the list even further and focus on your team’s work.
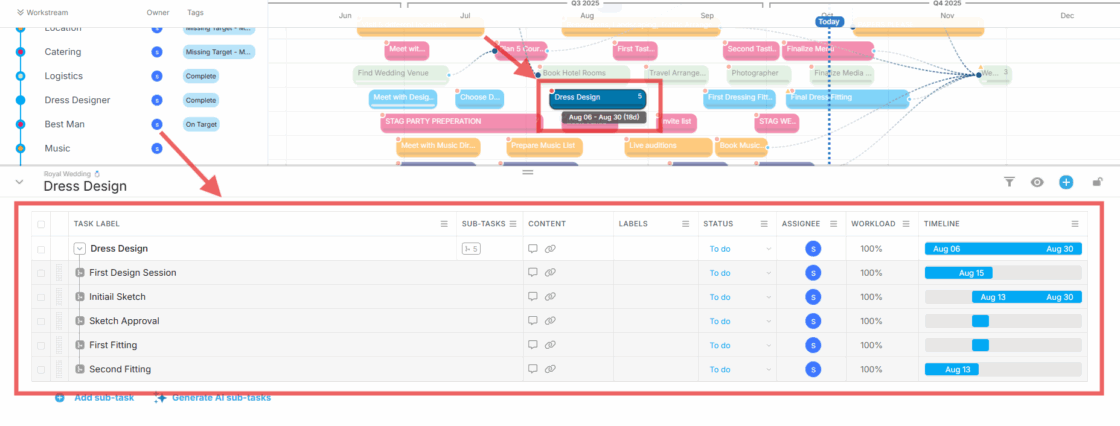
Managing Tasks in Context – Using the “Show on Project Map” Feature
Tasks are easier to manage when you can see them in the context of the overall project structure.
When viewing tasks in a List or Board view, the context of each task is not always clear, especially when scrolling through multiple cards or items.
A timeline view provides the best context for understanding how a task fits into the project.
To see a task on the project timeline:
- Board view: Right-click a task card and select Show on Project Map.
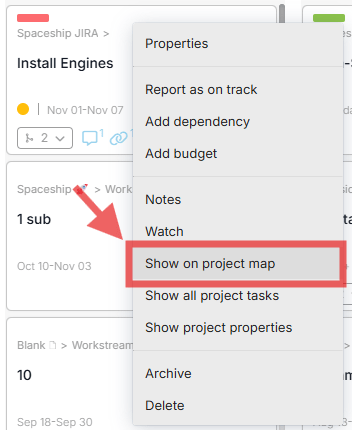
- List view: Click the icon on the far right side of the task row to view it on the Project Map.

The ProjectMap™ will automatically center on the selected task, giving you a quick orientation and helping you focus on the relevant part of the project.
Pro Tip: Use Show on Project Map to quickly identify tasks dependencies, understand task priority, and see how each assignment contributes to the overall project timeline.
Adding Backlog Tasks to an Existing Project Timeline
You can add tasks to your project timeline as backlog items and choose to schedule them later.
Until then, they don’t need to be incorporated into the project timeline.
To learn more about backlog tasks – including how to add them, schedule them, and manage them effectively – please refer to our dedicated tutorial:
Update Tasks in Bulk
If you want to update multiple tasks at the same time, follow these steps:
- Navigate to the Task Report List view.
- Apply filters to display only the tasks you want to update.
- From the left side, tick the checkboxes for all the relevant tasks.
- At the top left of the list, you’ll see the bulk options.
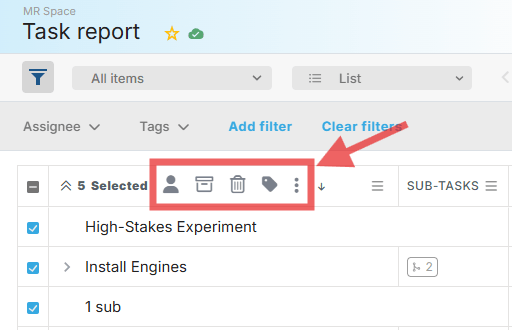
Here you can:
- Change the assignee
- Archive tasks
- Delete tasks
- Add tags
- Click the three dots for more options, including:
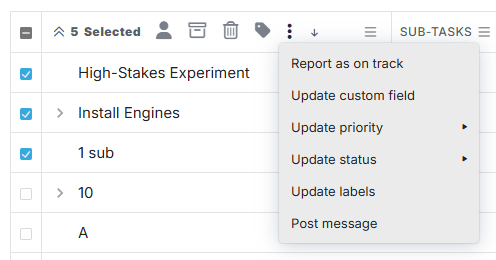
- Report tasks as On Track
- Update custom fields (triggers a pop-up to select which custom field to update)
- Update priority
- Update status
- Update labels
- Post a message on all tasks
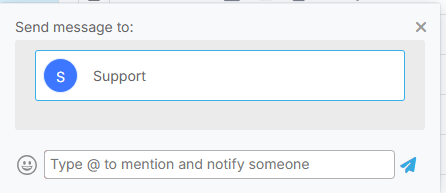
Pro Tip: For productive communication across multiple assignments and assignees, you can send messages on multiple tasks in a single click:
- Use the Date filter to sort tasks by a specific time range (e.g., upcoming next week or overdue).
- Select the relevant tasks and check their checkboxes from the left side.
- Click the three dots in the bulk update menu and select Post Message to send a customized message to all assigned users. This ensures everyone is aware of their assigned work.
Need Help?
For more help, feel free to contact us anytime at [email protected].