Project prioritization is highly advantageous for organizations wanting to know where to focus their time, money, and resource efforts…and where not to.
In this article, we are going to show you how to set up and use your project prioritization.
To learn more about how your organization could benefit from project prioritization, click here.
How to Implement Project Prioritization in Proggio
Project prioritization in Proggio is customizable and easy to set up. Follow these 4 steps to get the most out of it:
- Define the organization’s business drivers and the weight of each one
- Define impact statements and grades for each business driver
- Select impact statement values for each business driver to rate each project
- Rank the organization portfolio, and focus on what really matters
Step #1: Define the organization’s business drivers and assign their weights.
It all begins from making a thoughtful decision about the organization’s business drivers, and the weight value assigned to each one.
Some examples of business drivers are:
- Market share increase
- Costs reduction
- Complexity
- Duration
- Levels of risks
- Expected monetary outcome/profit
- Resources
- Expected market share
- Technology barriers
- Level of expertise
- Infrastructure
It is important to note that only Space Admins have access to configure the business drivers. Let’s see how it works…
From the application, select Settings icon (bottom left) > Prioritization:

The application comes with default prioritization options that are fully customizable for your organization’s needs. In this screenshot example above, one of the business drivers is “Cost reduction” and it gets a weight of “7,” which means the organization currently values “Cost reduction” the most out of the other items.
Step #2: List and grade impact statements for each business driver.
The definitions of impact statements are aimed at creating a single set standard for all projects within a Space. Now that the business drivers are set, it is time to click on each one to define and grade its impact statement(s). Defining impact statements is critical to make sure that different stakeholders agree on how business drivers are valued.

Adding or removing impact statements, and assigning grades are easy. In this example, the organization decided to measure “Market Share” with 3 options that comprise the impact statement. The first option has an impact of 5, the second of 10, and the third carries a grade impact of 1. If the business driver’s overall (value) weight is low, even if it has an impact statement with a high grade, the high grade will have a limited impact on the overall project score.
Once these steps are complete, the organization has a baseline for project prioritization.
Step 3: Select impact statement values for each business driver to rank and prioritize each project.
Each project can be rated according to the definitions done in steps #1 and 2, and finally, get a project score, allowing it to be ranked within the company portfolio.
You can define who can rank projects based on their roles.
Since rating the project’s impact statements affect the overall rate of the project later, switch to “Rank” or “Prioritizing” a single project, which can be done from the project itself, by opening the Tools icon > Prioritization > Select impact statement grade from the drop-down arrow > Save.


In this example, the combination of the business drivers and the impact statements resulted in a total project score of 17 points. The calculation is done by multiplying each business driver’s weight by the impact statement grade. Hence, if the weight of “Cost reduction” is 7, for example, and it gets an impact statement of “More than $1K” with a grade of 1, this business driver will contribute a score of 7 (7 x 1) to the overall project score (as seen in the final score column).
Another option is to rank multiple projects all at once from the project portfolio list mode.
From the Navigation Panel > Portfolio > List view > View (eye icon top right) > Show/Hide columns > Add the prioritization columns and the Rank and Score fields.

Step 4: Organize the projects in the portfolio based on rank. Focus on what really matters.
After you have rated the projects a score will appear. If you’re interested in ranking the projects according to the score, you can select the auto-rank feature.
It is important to note that only Space Admins have access to configure the ranks of projects. To do so from the portfolio view list mode > Tools icon > Auto-ranking > Select “Yes”
From this point, you can then organize the project list by their rank. To do so, click on the hamburger menu > Select sort by ascending or descending values
In this view, all values are also editable in place, and the project score will be updated automatically.
Now based on the ranks, you can instantly see which projects are worth focusing on based on your organizations’ business drivers…and which are not. This can save your organization valuable time, money, and resources from being wasted on projects that are not worthy.

In this example, a company has 7 projects that have been ranked according to agreed business drivers. The project called “Phase 2 Biotech” appears to be the most important project, with the highest score of 52. Project “Electronic device India” ranked as the least important project with a score of 17.
You can always change the rank of an item manually even after running the auto-ranking feature, in case there are other reasons for upgrading or downgrading a project’s value. Keep in mind that such edits will be overwritten the next time the user runs the auto-ranking function.
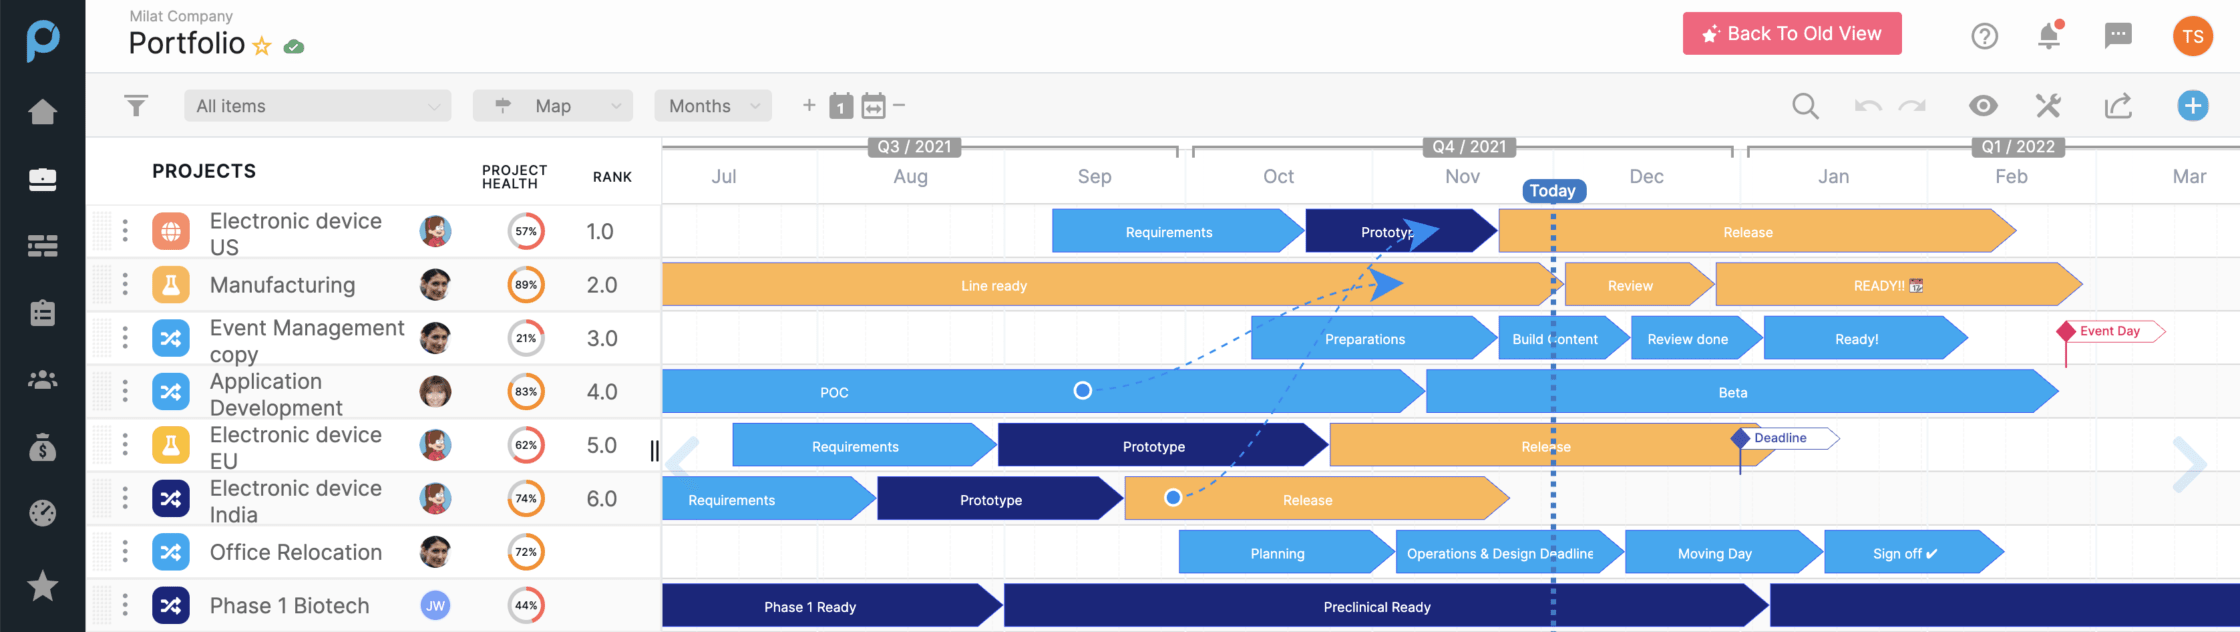
Finally, you can present your ranked projects where it is most important – over the Portfolio view. From the Portfolio view > Select the Map view > Eye icon > Edit columns > Select Rank field > Open the project names window by sliding the divider to the right > View the Rank column

Additionally, you can narrow the focus, even more, to have the Portfolio map view only reveal the projects that have been ranked.
To do so Filter icon > Select Rank field > Rank will appear in the filter row > Click on Rank dropdown > Select relevant rank values that you want to focus on.

To further focus your portfolio perspective, you can then reorder the list of projects based on the ranks by grabbing each project and dropping them in the order you wish to see them. You can also move the rank column over to the right by right-clicking on Rank and moving it to the left. (See below.)

From this perspective, you can quickly and easily track and monitor the projects within the portfolio, while ensuring that those which are ranked highly are progressing towards their milestones on time.