Overview
Dynamic Maps are powerful tools that allow you to visualize your projects and portfolios in a dynamic, interactive map view. You can customize these views using various filters and save them for future reference. Whether you want to focus on a specific project or get a bird’s-eye view of your entire portfolio, the Dynamic Map feature has you covered.
Key Features
- Project-Level Dynamic Maps:
- Custom Filters: Select specific criteria to focus on certain aspects of your project.
- Interactive Map View: Switch from a standard view to a dynamic map view for a more visual representation of your project’s status and progress.
- Portfolio-Level Dynamic Maps:
- Portfolio Overview: Get a comprehensive view of all your projects within a portfolio.
- Filter Selection: Use various filters to customize the map view to your needs.
- Saved Views:
- Private Views: Save your customized dynamic map views for personal use. These views are only accessible by the user who created them.
- Public Views: Save views that can be accessed by other users within the portfolio.
How to Use Dynamic Map
Creating a Dynamic Map for a Specific Project
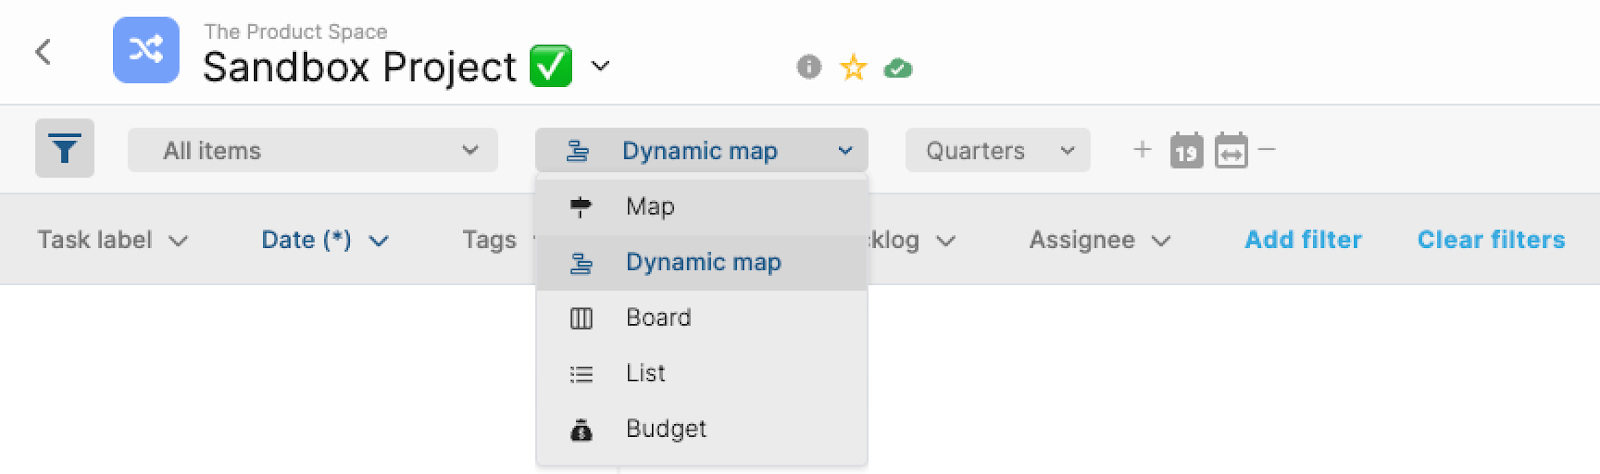
- Select Your Project:
- Navigate to the project you want to visualize.
- From the “View” drop-down menu click on the “Dynamic Map” option.
- Apply Filters:
- Choose from a variety of filters to customize your map view. Filters may include task status, team members, deadlines, and more.
- You can also select the filters in “List view” and once filters are selected, switch to the dynamic map view to see your customized project representation.
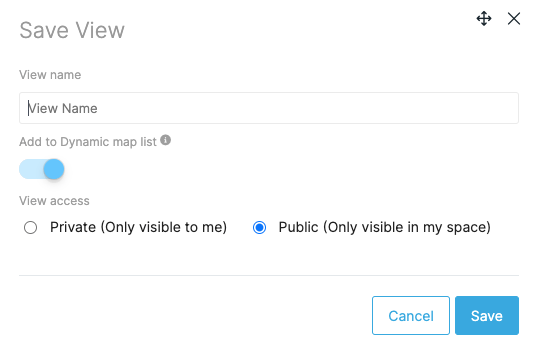
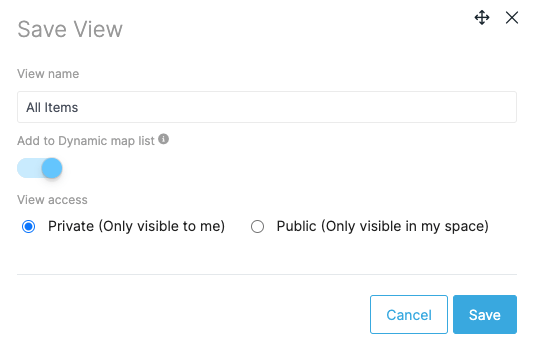
- Save the View:
- Click on the “Save View” button.
- Toggle on “Add to Dynamic map list”
- Choose whether to save the view as private (visible only to you) or public (accessible by other users).
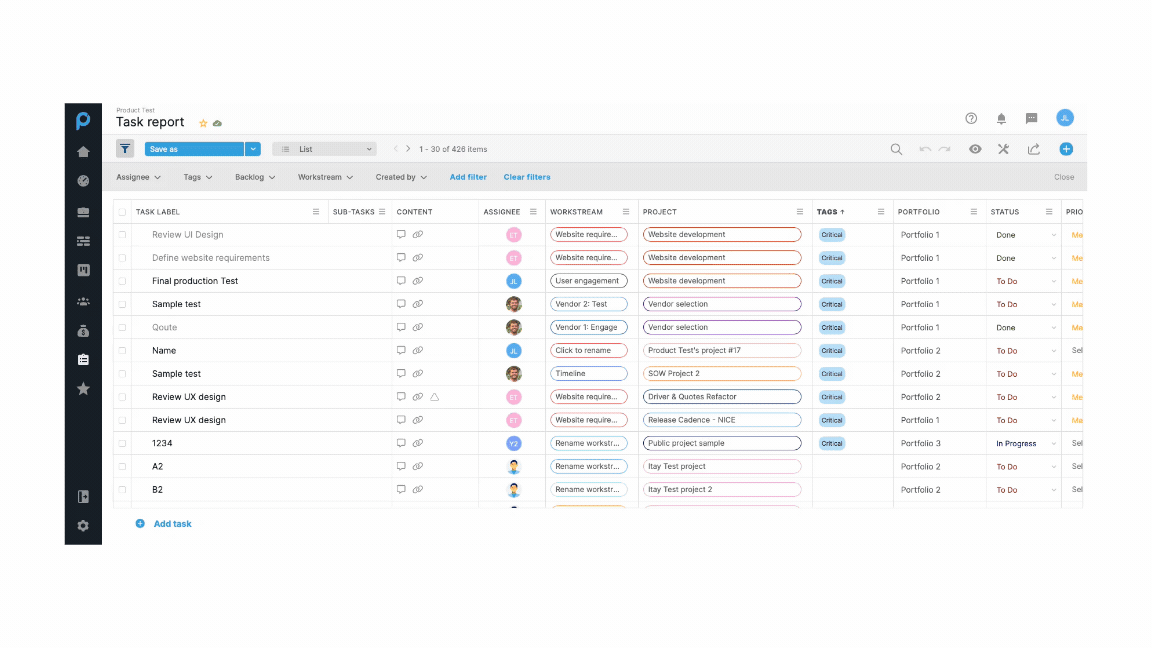
Creating a Dynamic Map at the Portfolio Level Using Task Report
- Access the Portfolio:
- Go to “Task report”
- Apply Filters:
- Select filters that apply to your portfolio. These may include project status, priority levels, resource allocation, etc.
- Switch to the dynamic map view to see an overview of all projects within the portfolio.

- Save the View:
- Click on the “Save View” button.
- Toggle on “Add to Dynamic map list”
- Choose whether to save the view as private (visible only to you) or public (accessible by other users).
Accessing Saved Views
Portfolio Dynamic Map:
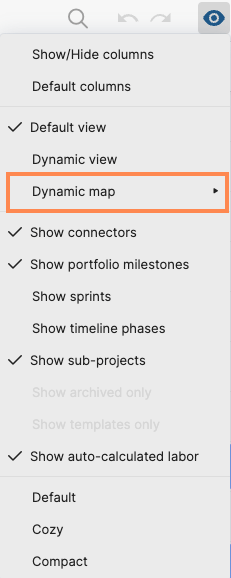
- Navigate to the Eye Menu:
- Go to the portfolio level.
- Click on the ‘Eye’ menu.
- Select Dynamic Map:
- From the dropdown, select from the previously created views.
- From the dropdown, select from the previously created views.
- Access Saved Views:
- You will see a list of all saved dynamic map views.
- Select the view you want to open, whether it’s a private or public view.
Project Dynamic map
- From the “View” drop-down menu click on the “Dynamic Map” option.
- Select from the “Saved view” list any view you wish to explore.
Editing Saved Views
User can edit existing views and add or remove them from the “Dynamic map” list as followed:
- Open “Saved views’ drop list.
- Scroll to “Manage views”
- Select the view you want to edit and click on the ‘pencil icon’
- Toggle on/off “Add to Dynamic map list”
- Click “Save”
Exiting Saved Views
Click on “Close dynamic map” button at the top op the screen to go back to previous view.

Conclusion
The Dynamic Map feature in Proggio is a versatile tool that enhances your ability to visualize and manage projects and portfolios. By utilizing custom filters and saving views, you can tailor the dynamic maps to meet your specific needs and streamline your project management process. Happy mapping!