Introduction
In Proggio, projects can be managed on dedicated Spaces, depending on the organization’s needs. Spaces can stand out from each other in several ways to allow the Project Manager higher planning, execution and monitoring capabilities of all projects. A Space can also be defined as the environment in which a Portfolio of Projects can be managed in sterile conditions.
Each user invited into a Space on Proggio, will have a defined role and set of permissions that are relevant to the work this person is assigned to.
If you have received an invitation to join a Space, by a colleague or your supervisor, this short guide will help you understand everything you need to know. By the time you complete it, you’ll be able to show your work and help achieve project goals.
Accepting the invitation
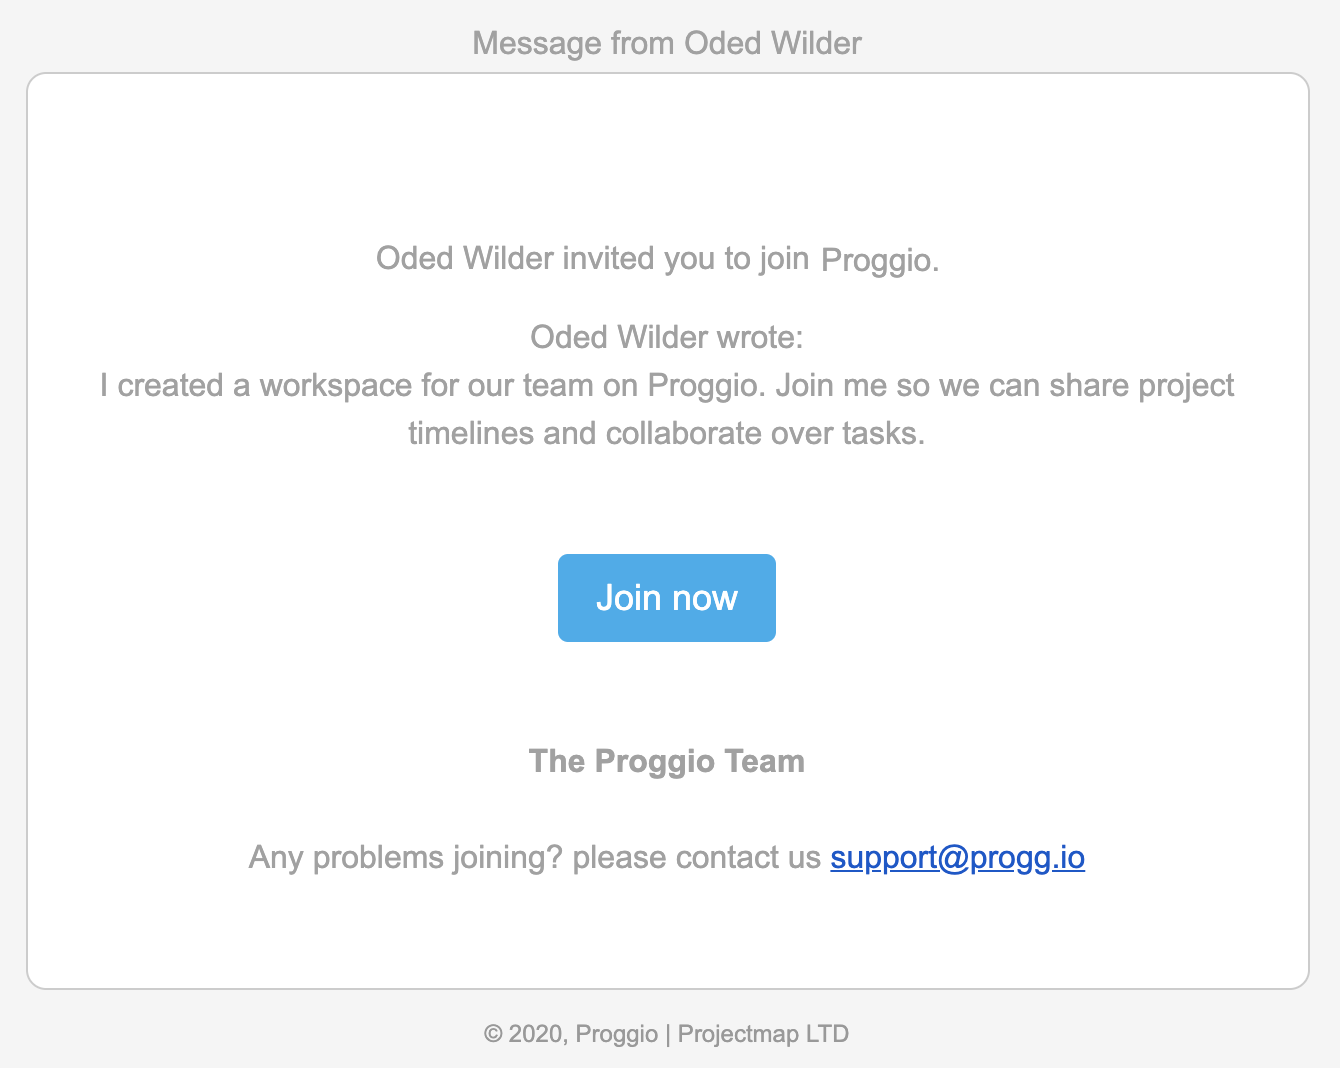
Look for invite email from Proggio – Click to Join
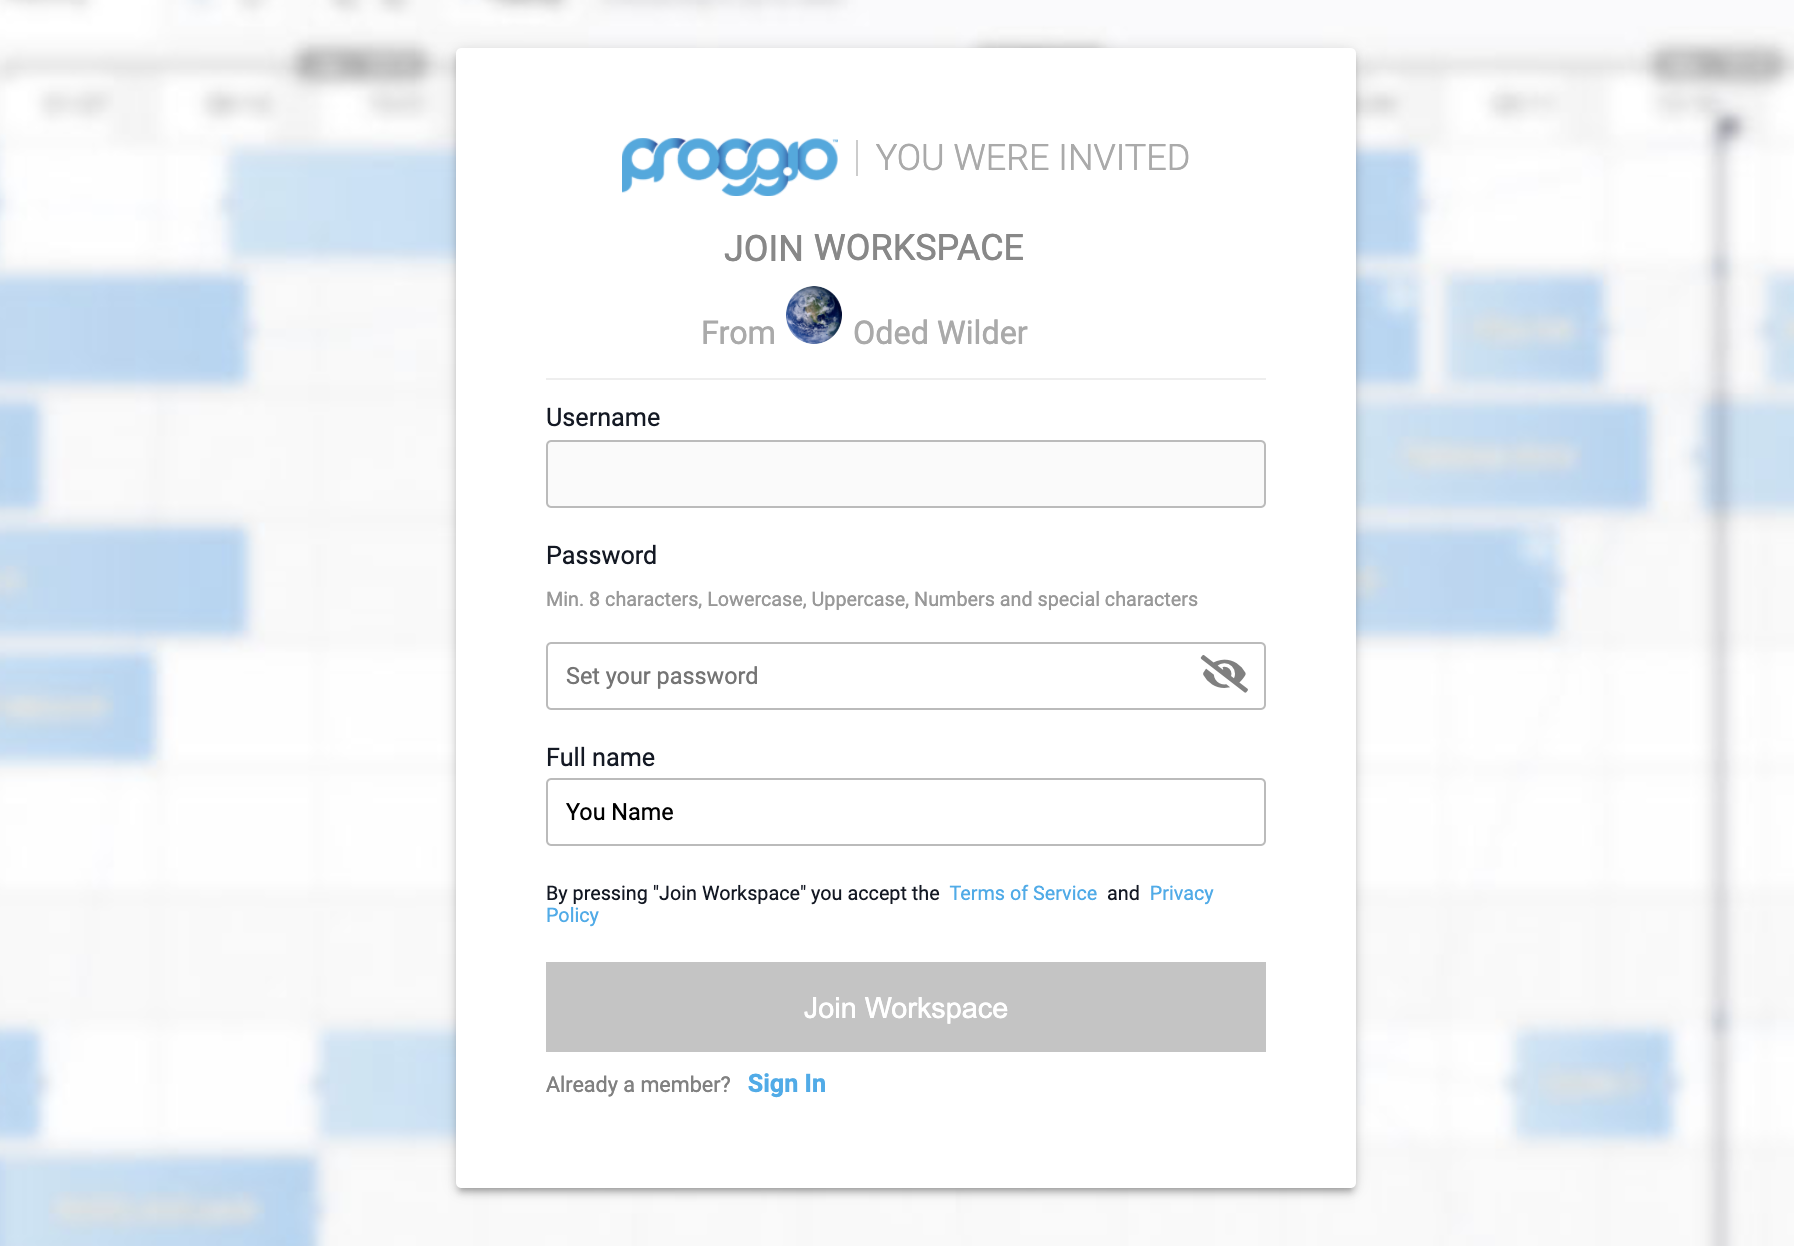
 Set your login credentials and click ‘Join Space’
ProTip: Save time by reducing clicks. Allow your browser to save the password and bookmark the application page to your favorites.
First time you login to Proggio:
Depending on your Space role and the inviter’s selection, you’ll be redirected to either Task management or the actual Project plan. This is meant to help your orientation.
From anywhere in the tool, clicking your avatar on the top right corner of the screen will show you the name of the Space you’re currently logged into. This is also where you can access additional settings of the account.
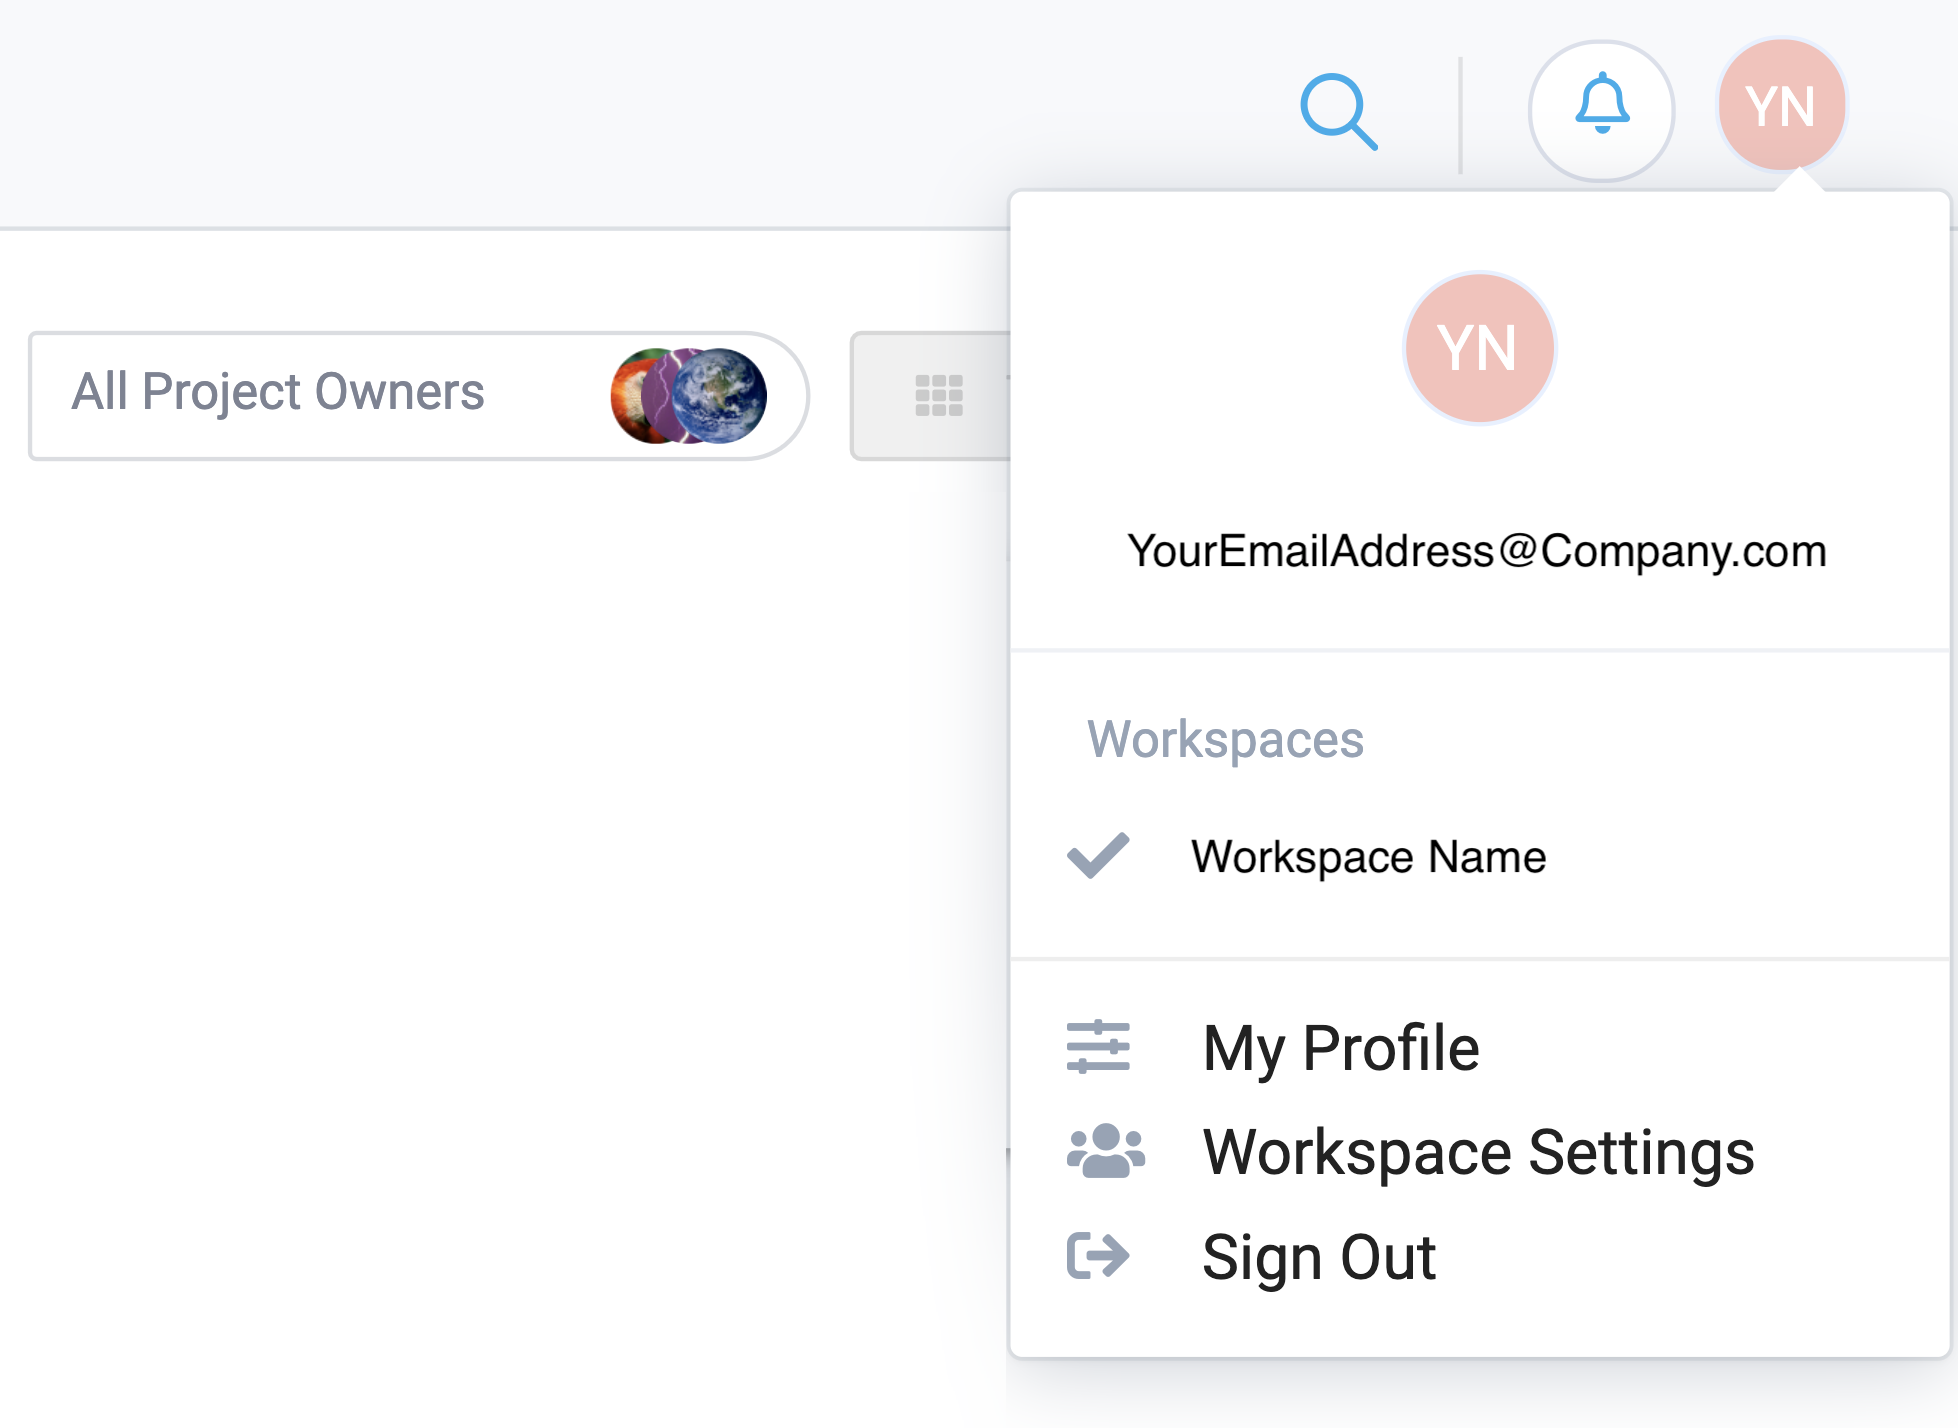 If applicable, and depending on your subscription plan, this is also where you switch between Spaces.
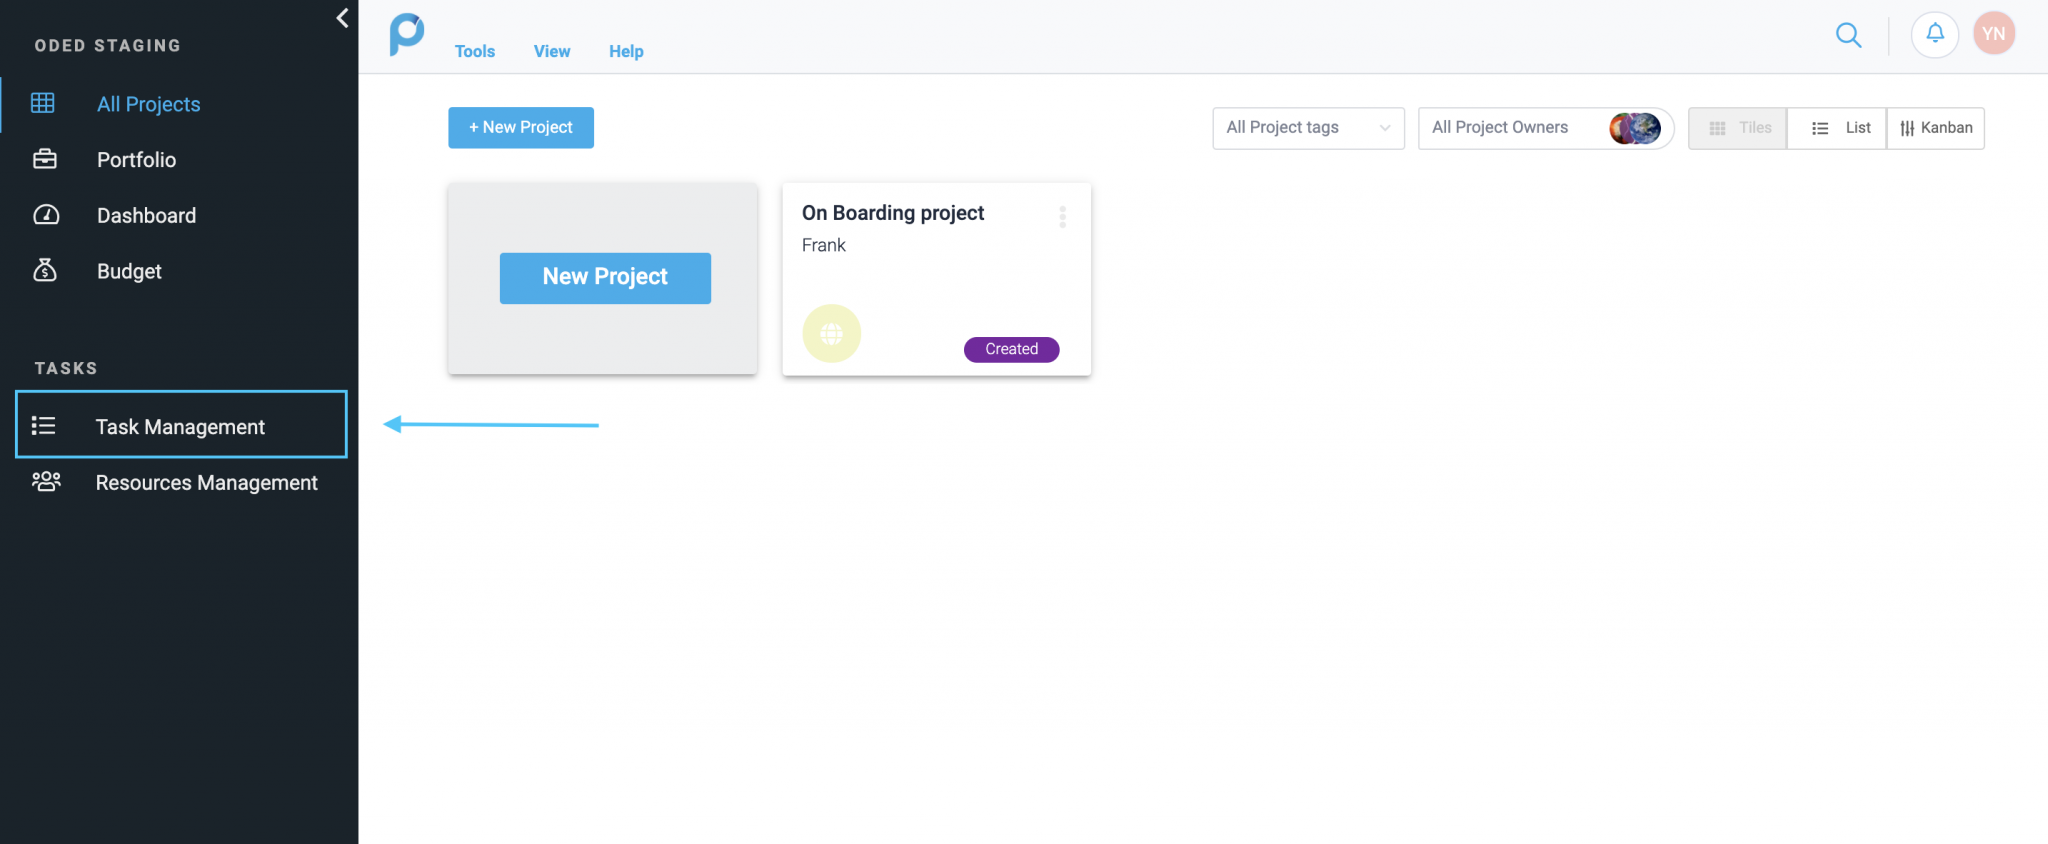
Now, let’s navigate to the Task Management to locate the work that was assigned to you. From the left side panel, click on ‘Task Management’.
Managing tasks with ease
Task management is all about short term execution. As soon as the longer term planning process is done, we are breaking the short term into tasks, assigning tasks to people and tracking their progress.
In Proggio, tasks are managed in the context of projects and the portfolio. It allows better collaboration with the different stakeholders, who easily understand how you contribute to the overall project portfolio.
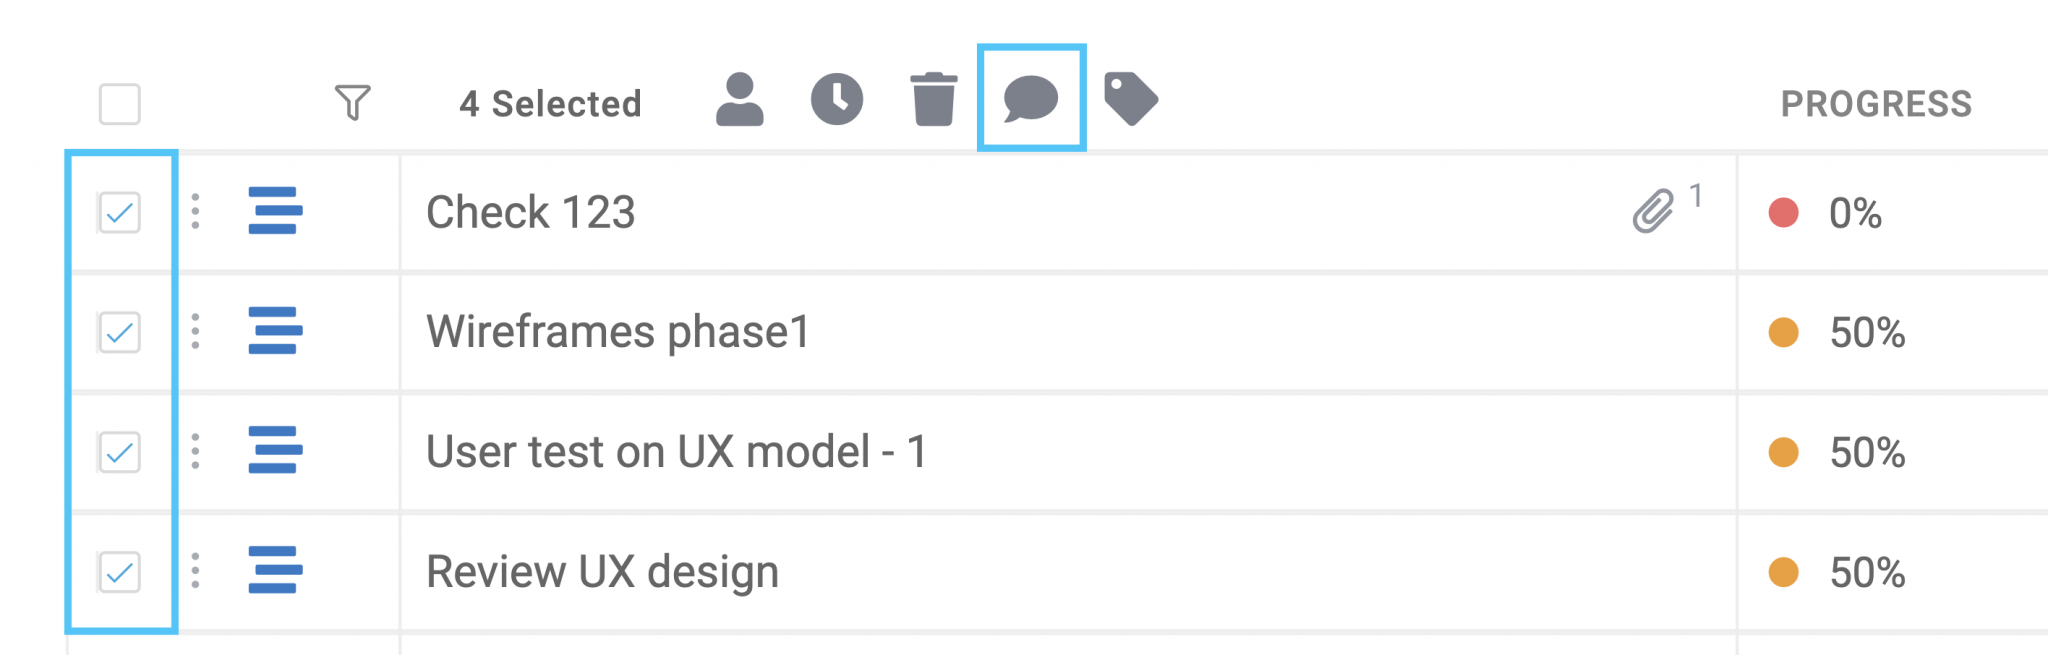
Click the ‘List’ / ‘Board’ buttons on the top right corner to switch between the different modes. Depending on your role in the project, you can select to view only your own assignments or choose to view ‘All Tasks’ across everyone in your team.
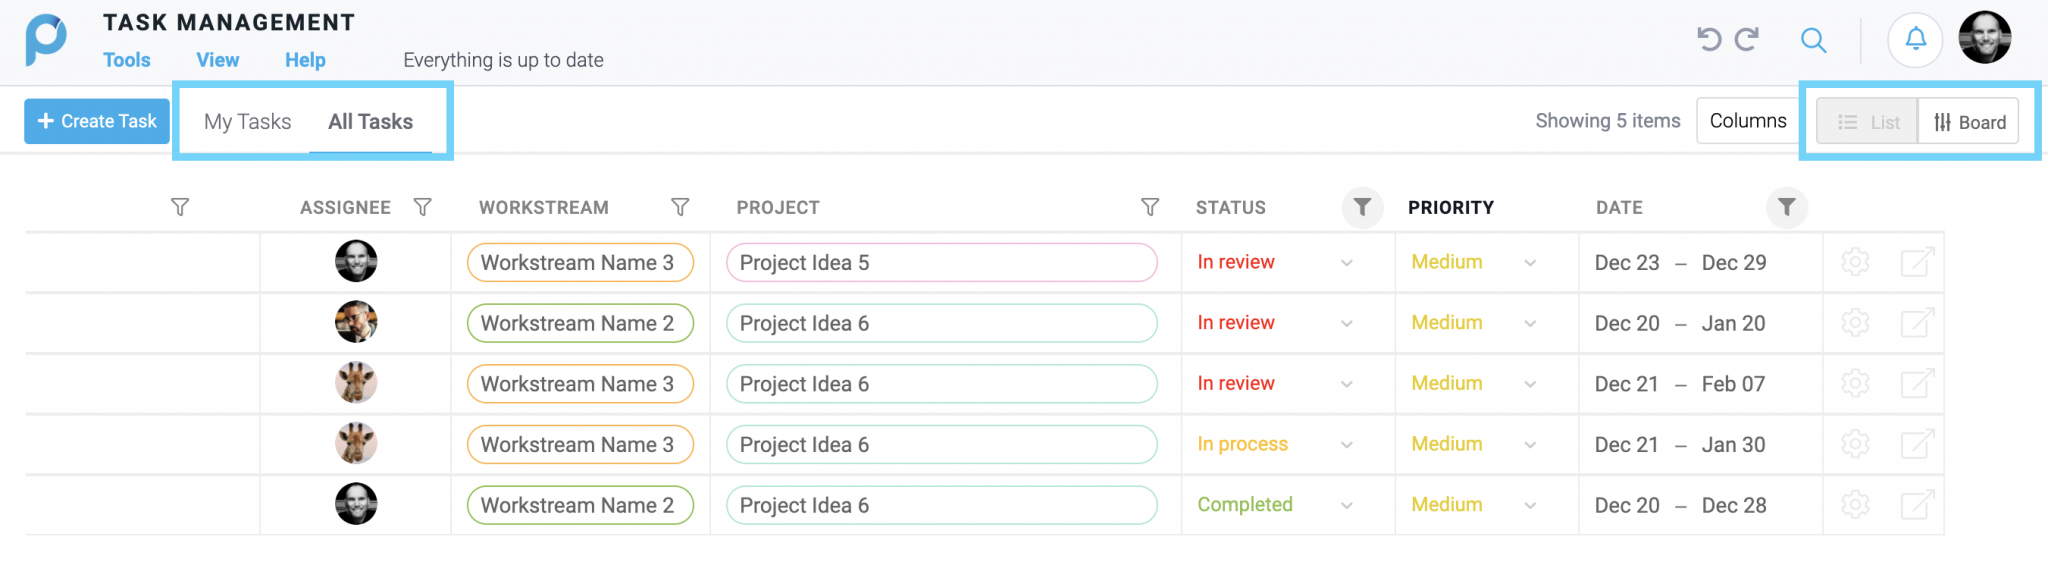 Switching from Board to List view and vise-versa, will keep the same filtered data displayed.
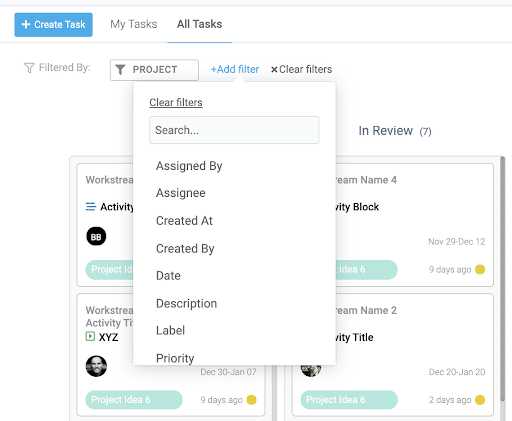
Use the “Columns” button (when using a list view) or “+ Add filter” (in Board view) to add more fields and sorting options to your view. Each can be used as a filter whenever you need to focus on specific pieces of the information. Working in ‘List’ mode, will allow you to filter relevant information directly from the column header – similarly to how a regular spreadsheet works.

ProTip: After you select to view your own assignments, add a ‘Date’ filter to focus on a specific time frame and choose ‘Week’ from the displayed options. This allows you to view just the upcoming or active assignment for the upcoming week. Add the ‘Assignee’ filter to have a more focused list of items when reviewing your team’s work.
Reporting Progress
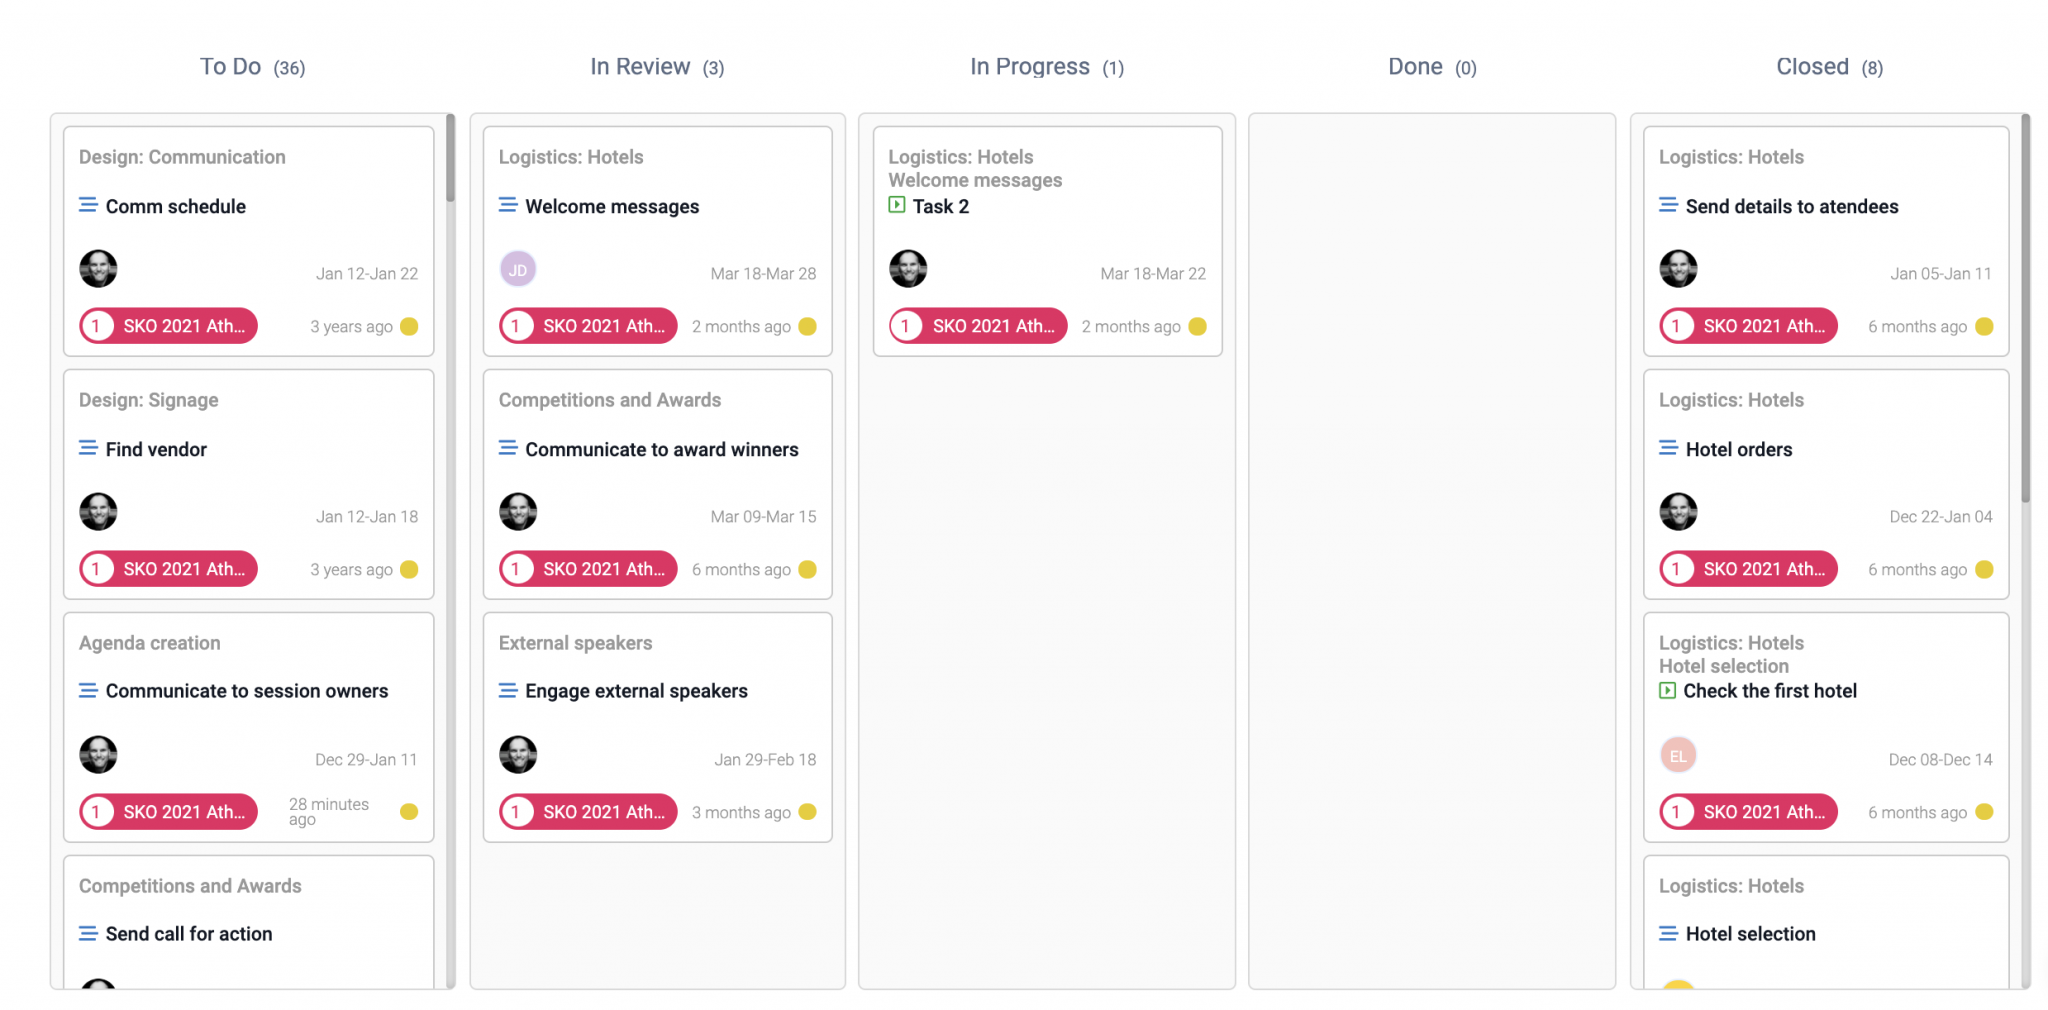
To update progress, simply drag the card to the right status on the board.
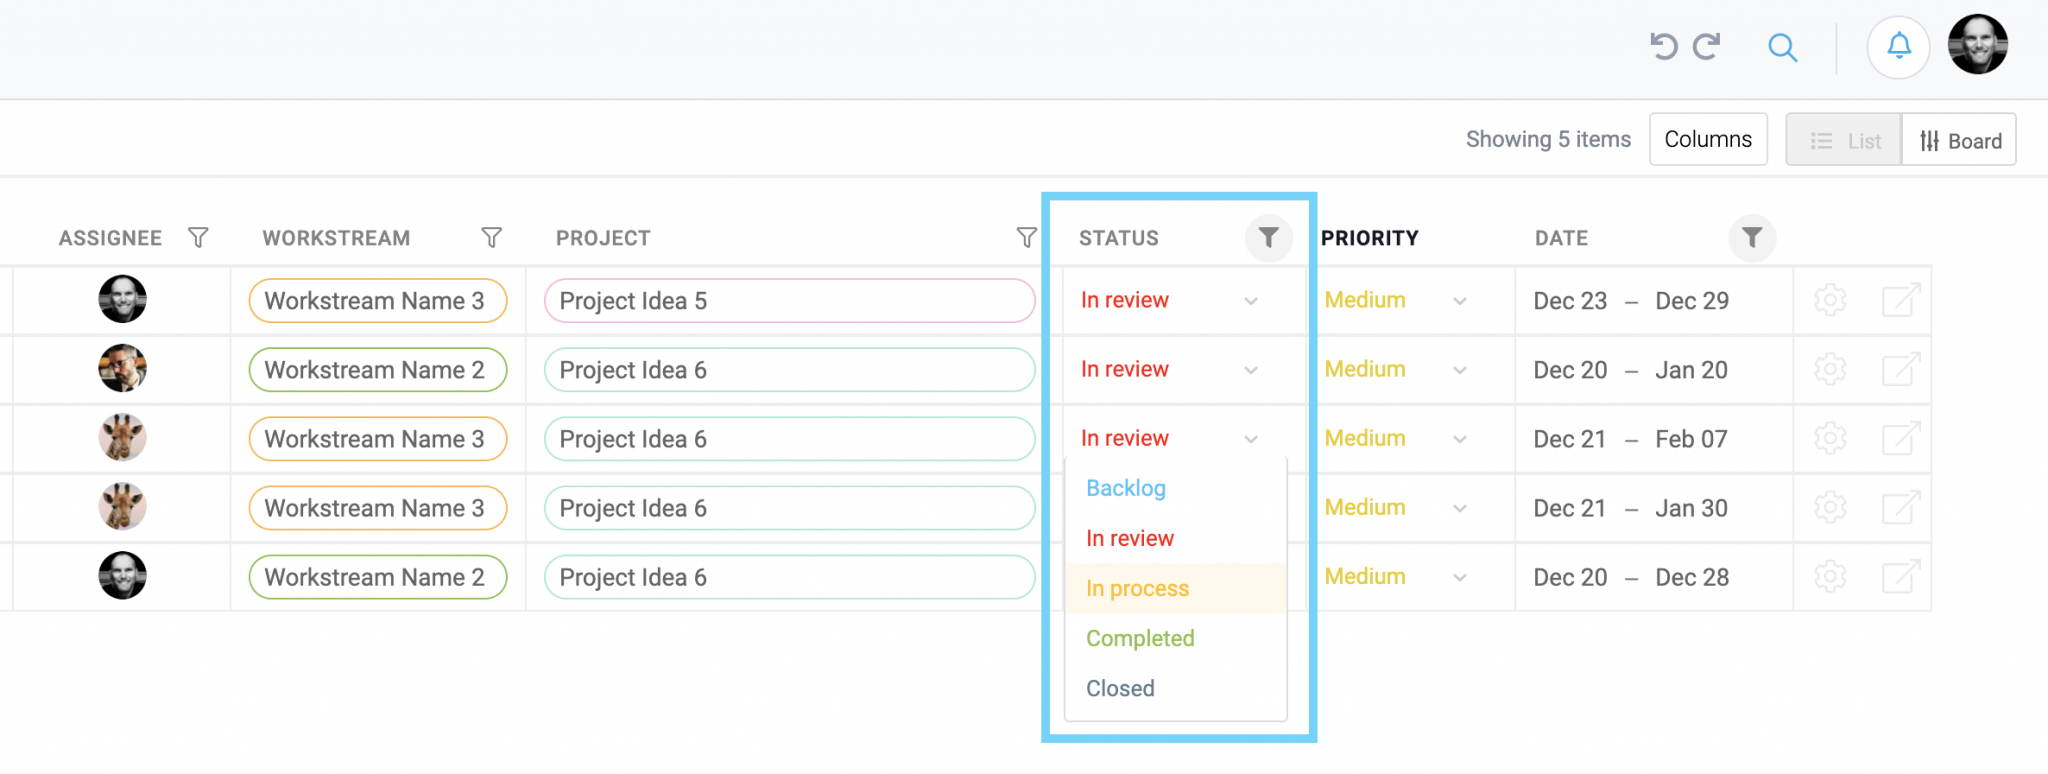
 Depending on your preferences, you can also choose to do this in list mode by selecting the status from the status drop down.
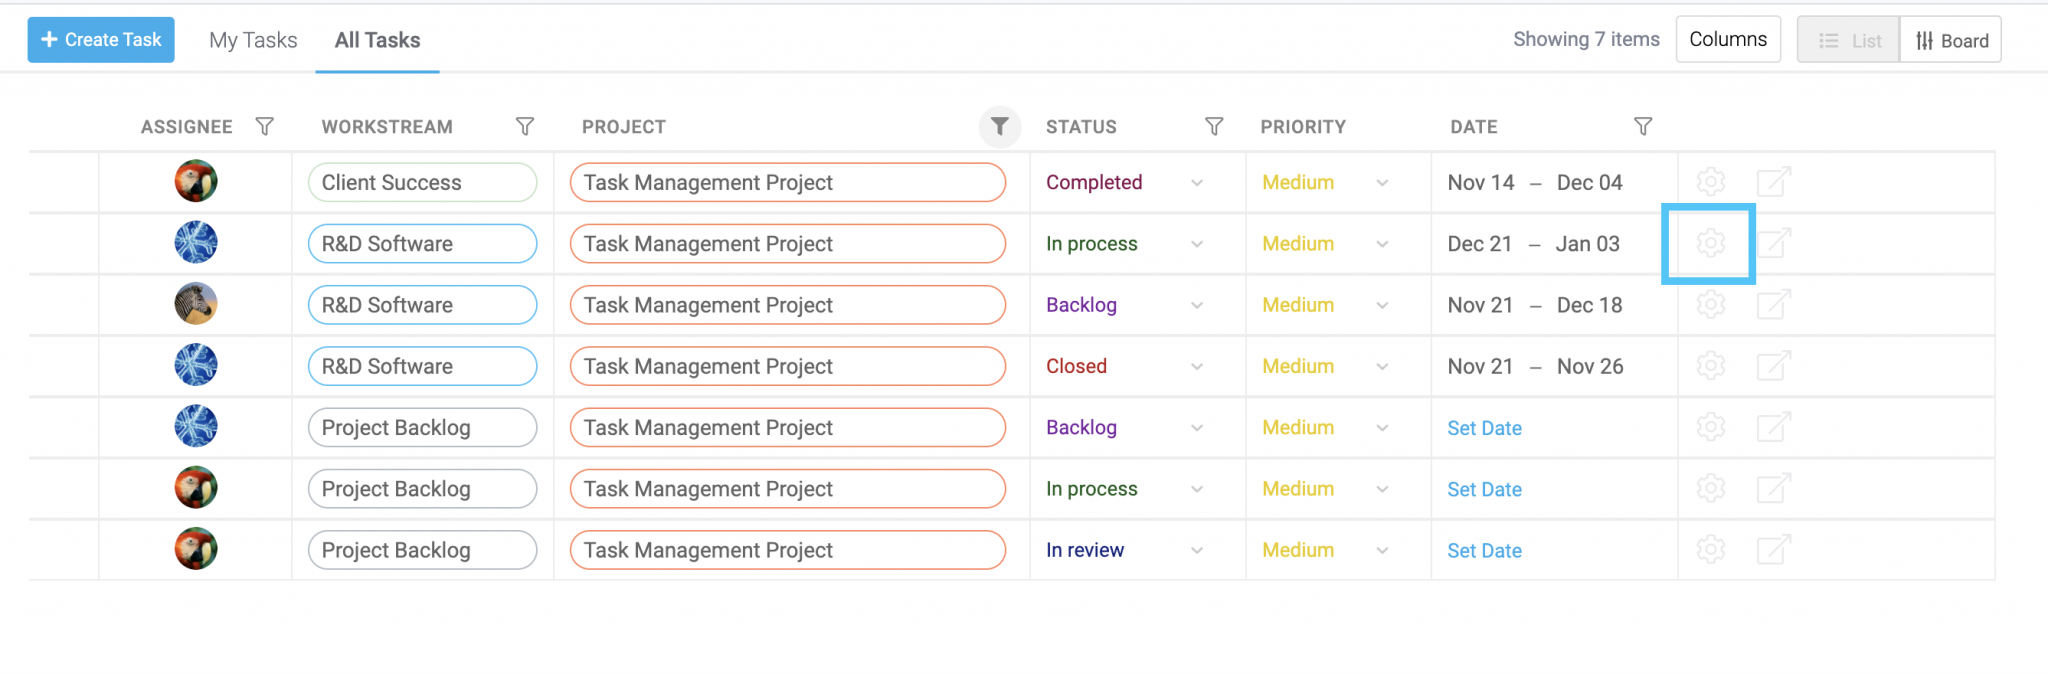
 In list view, click the Settings icon to inspect more details about an activity.
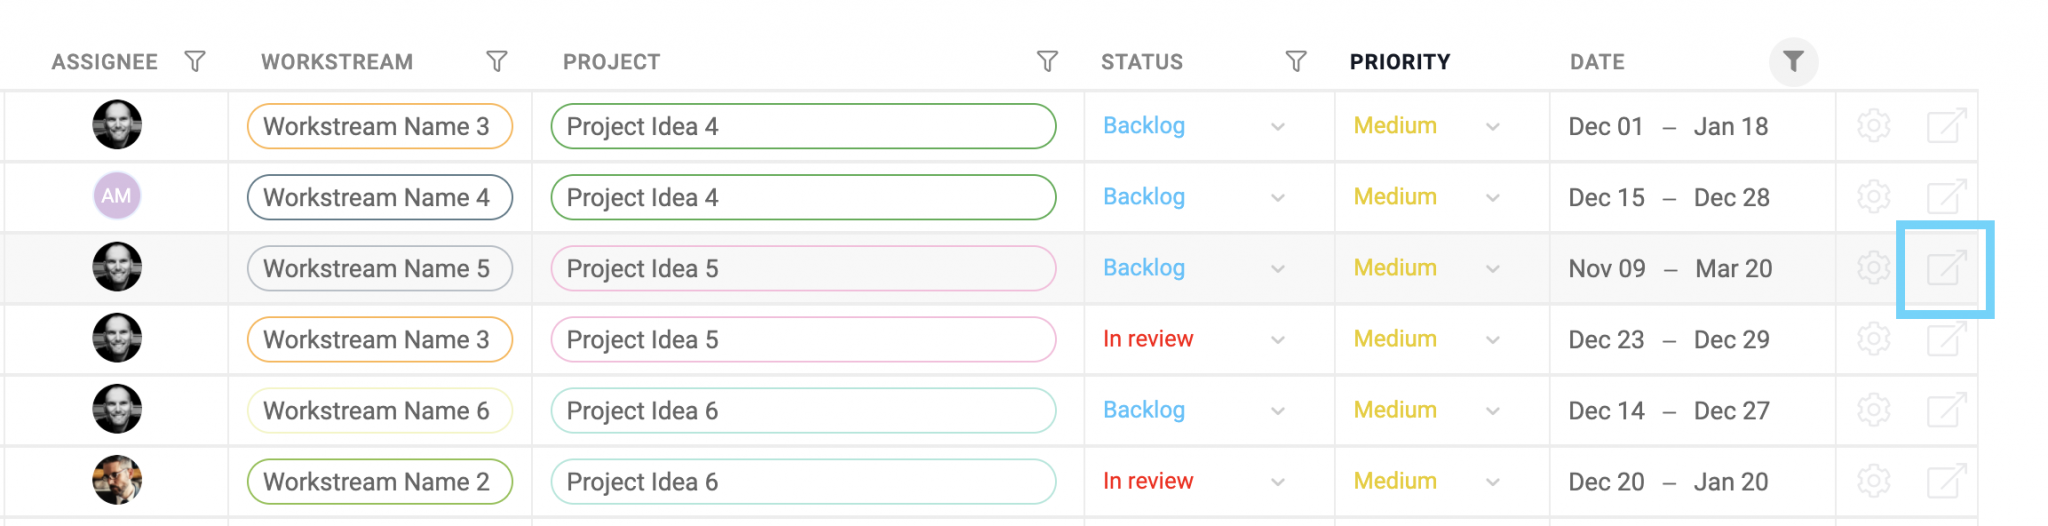
 If applicable, click the icon next to it to see the assignment on the Project timeline.
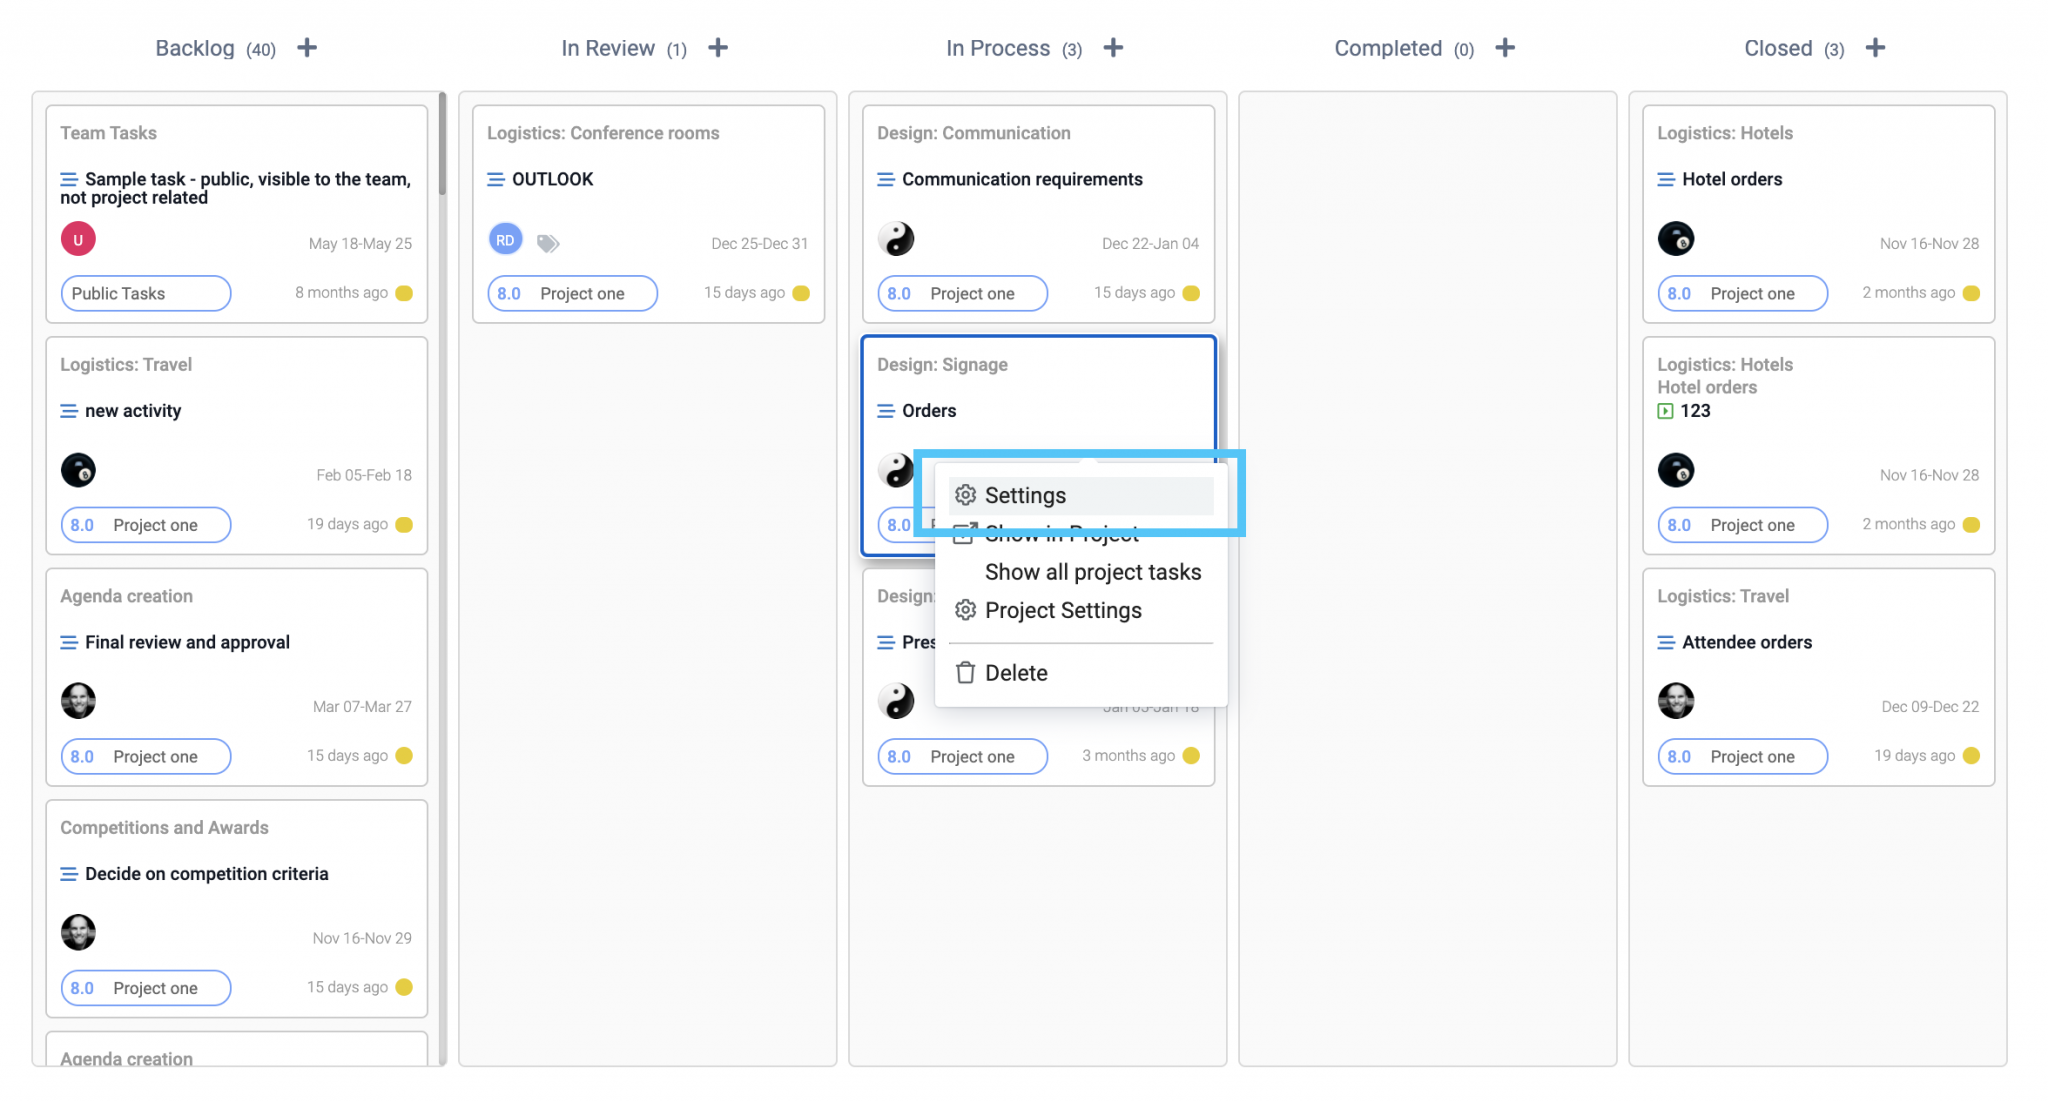
In Board view, right click a card and select settings.
Additional Activity Information
Access the Activity settings to edit additional information.
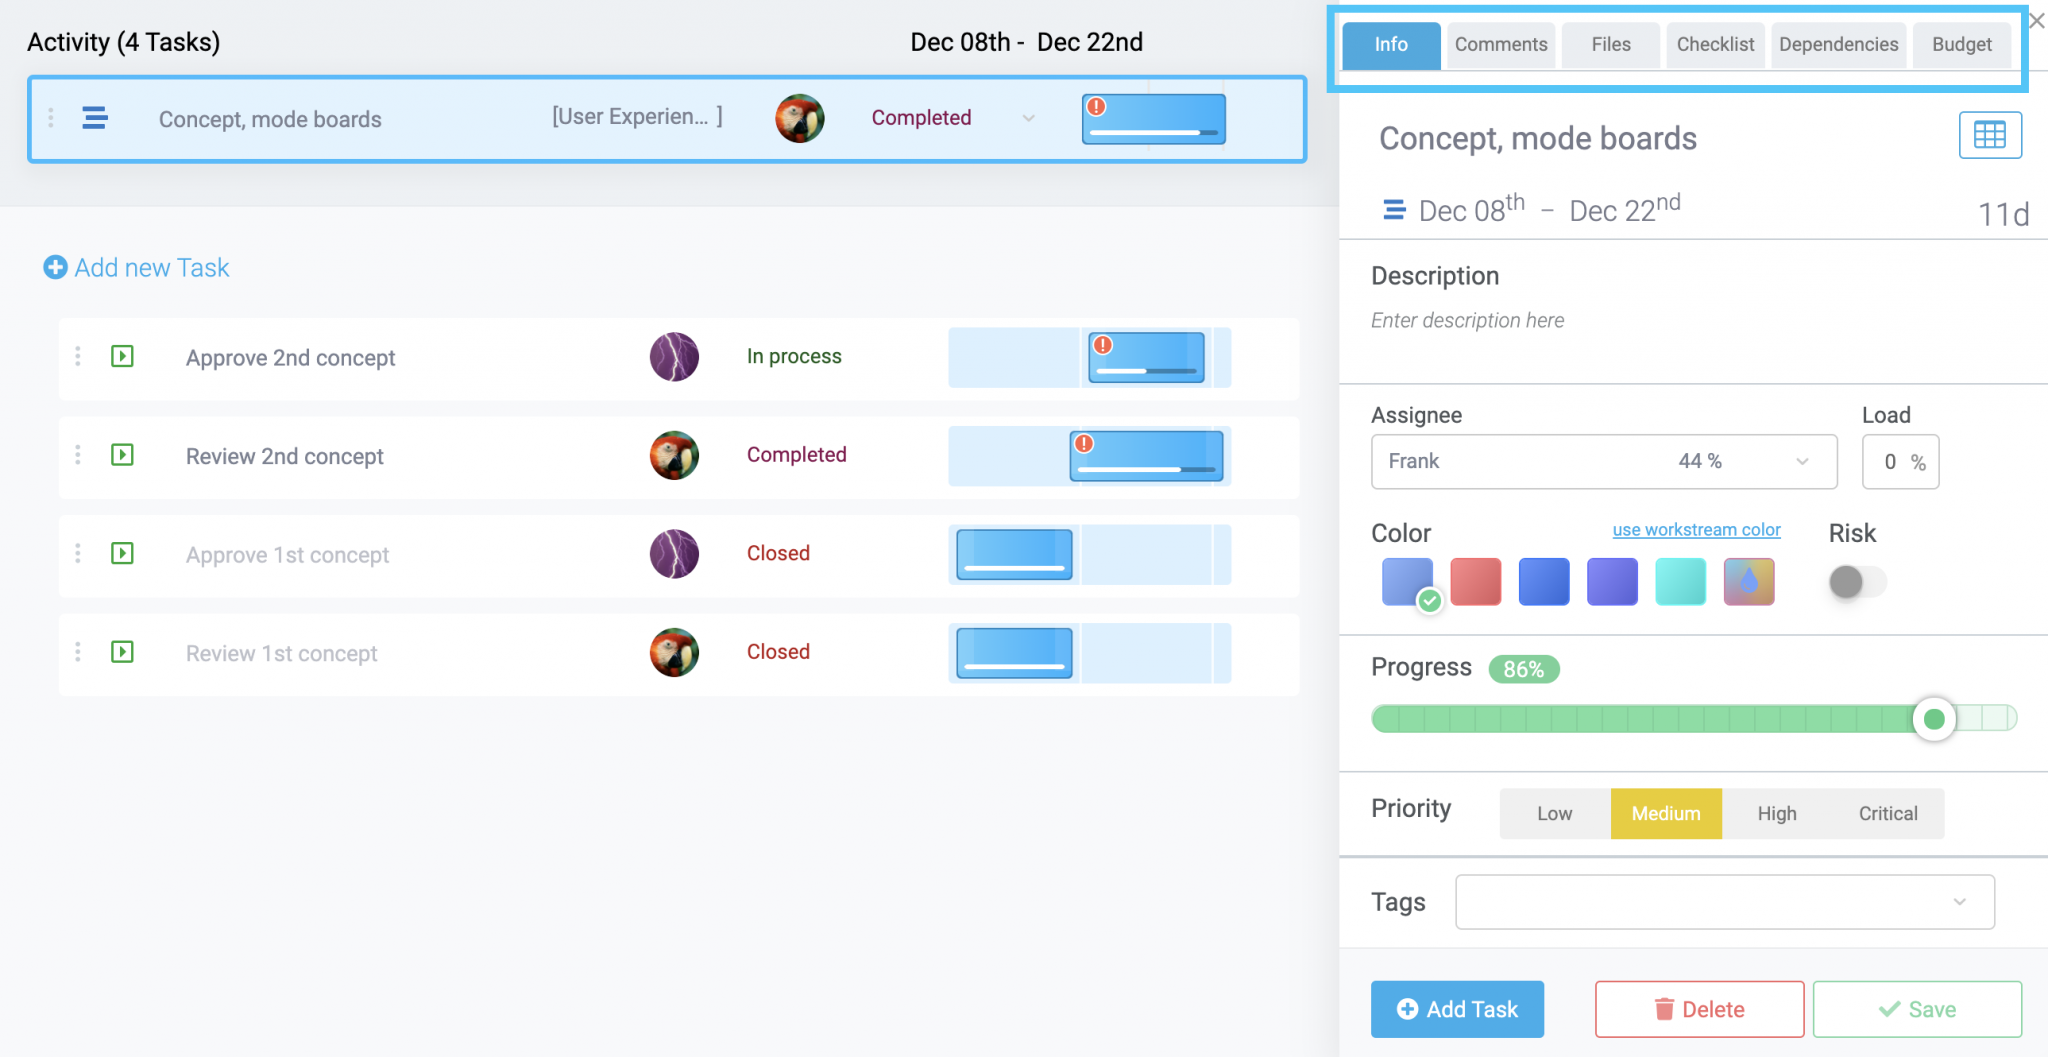
Info tab:
- Change the Start, End dates or duration of the assignment.
- Include a short description of the assignment.
- Reassign it to anyone in your Space.
ProTip: Next to each resource, notice the % showing you the actual workload already planned for that member, for the point in time the task is scheduled for. This will help you know each member’s availability when assigning work to them.
ProTip: If you can’t find a specific member in the drop down, make sure:
- The person accepted the invitation to join the Space or project.
- The person has access permission to the project.
- Visual customization of color scheme.
- Set Priority.
- Create Tag filters.
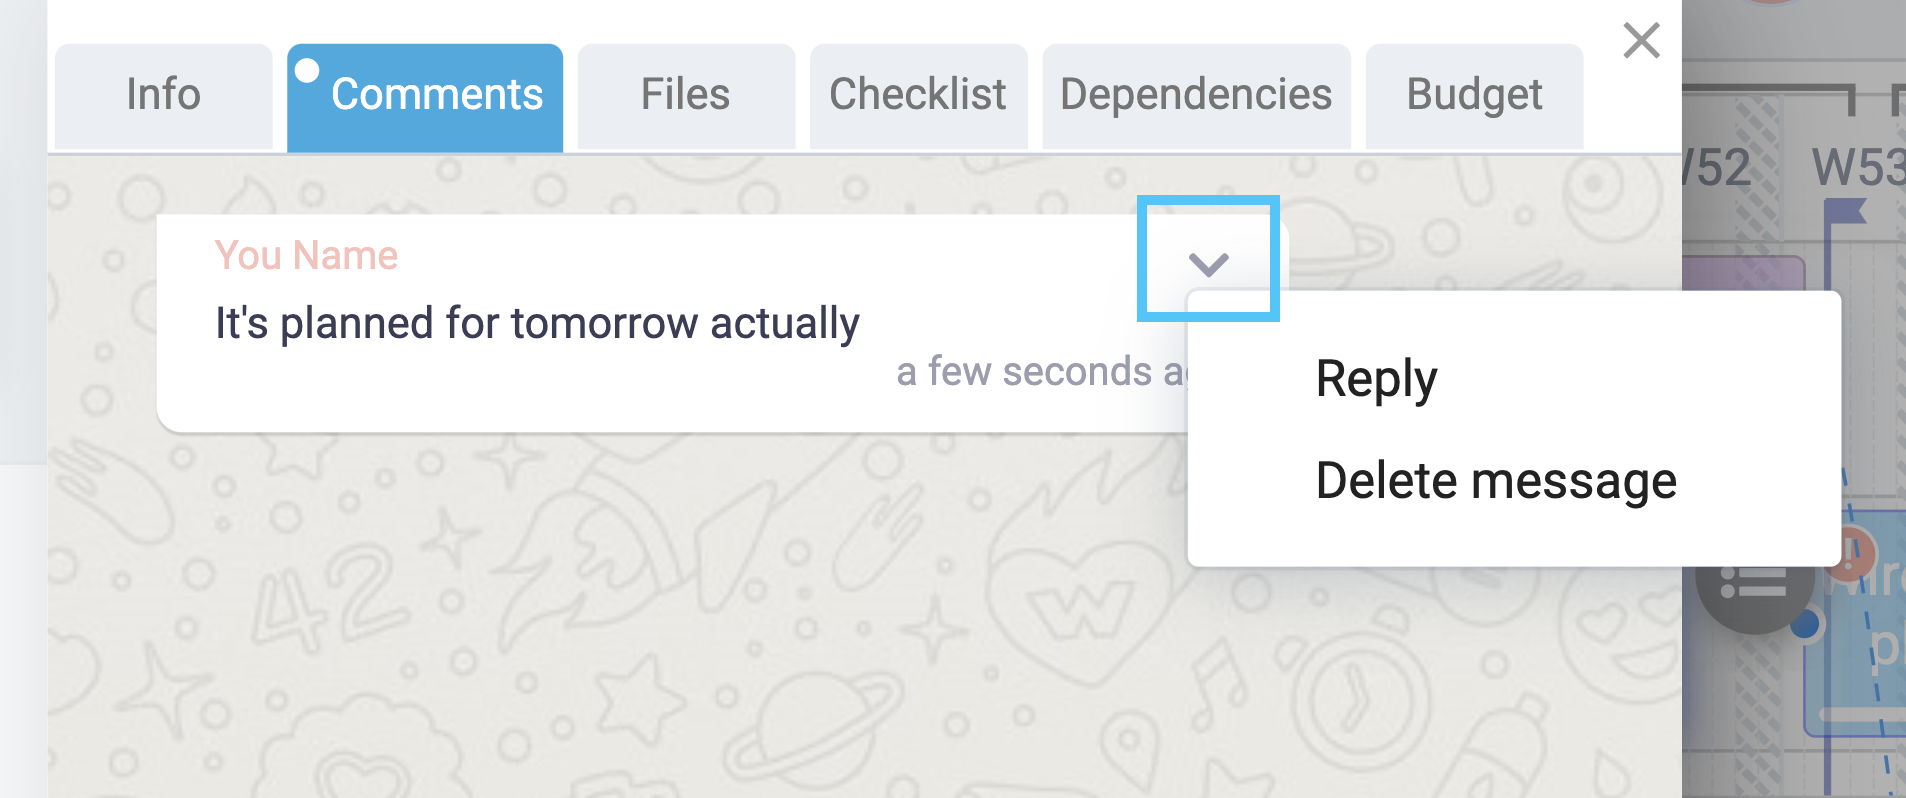
Comments Tab:
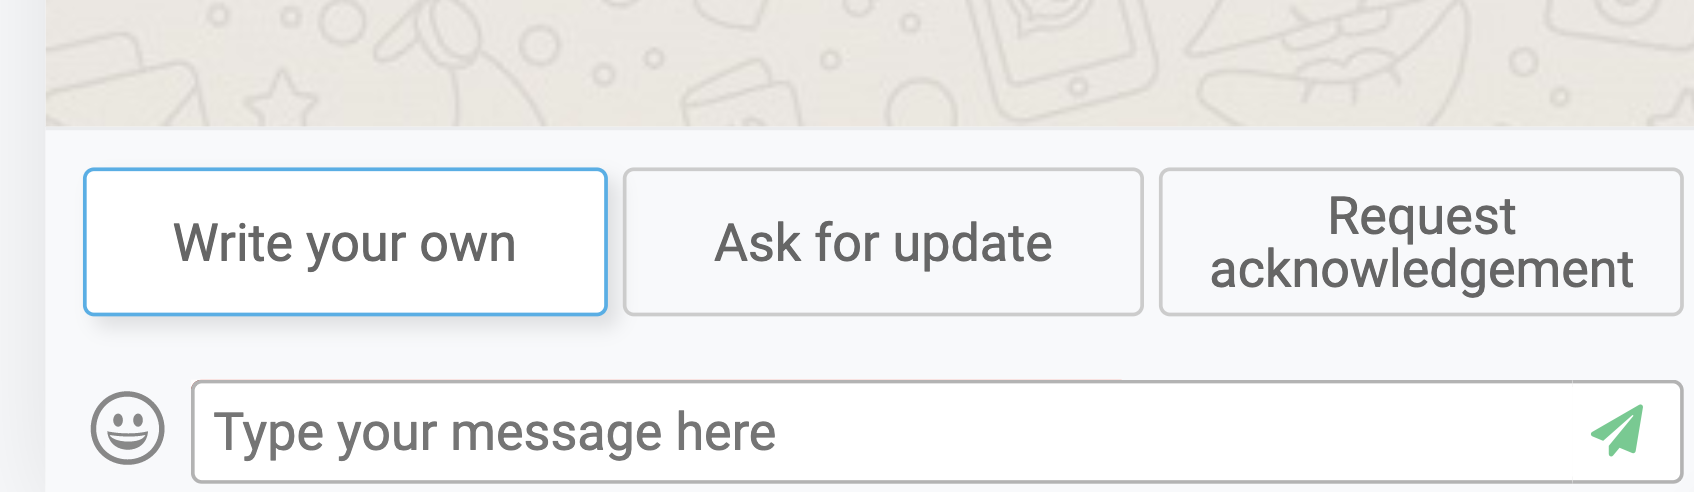
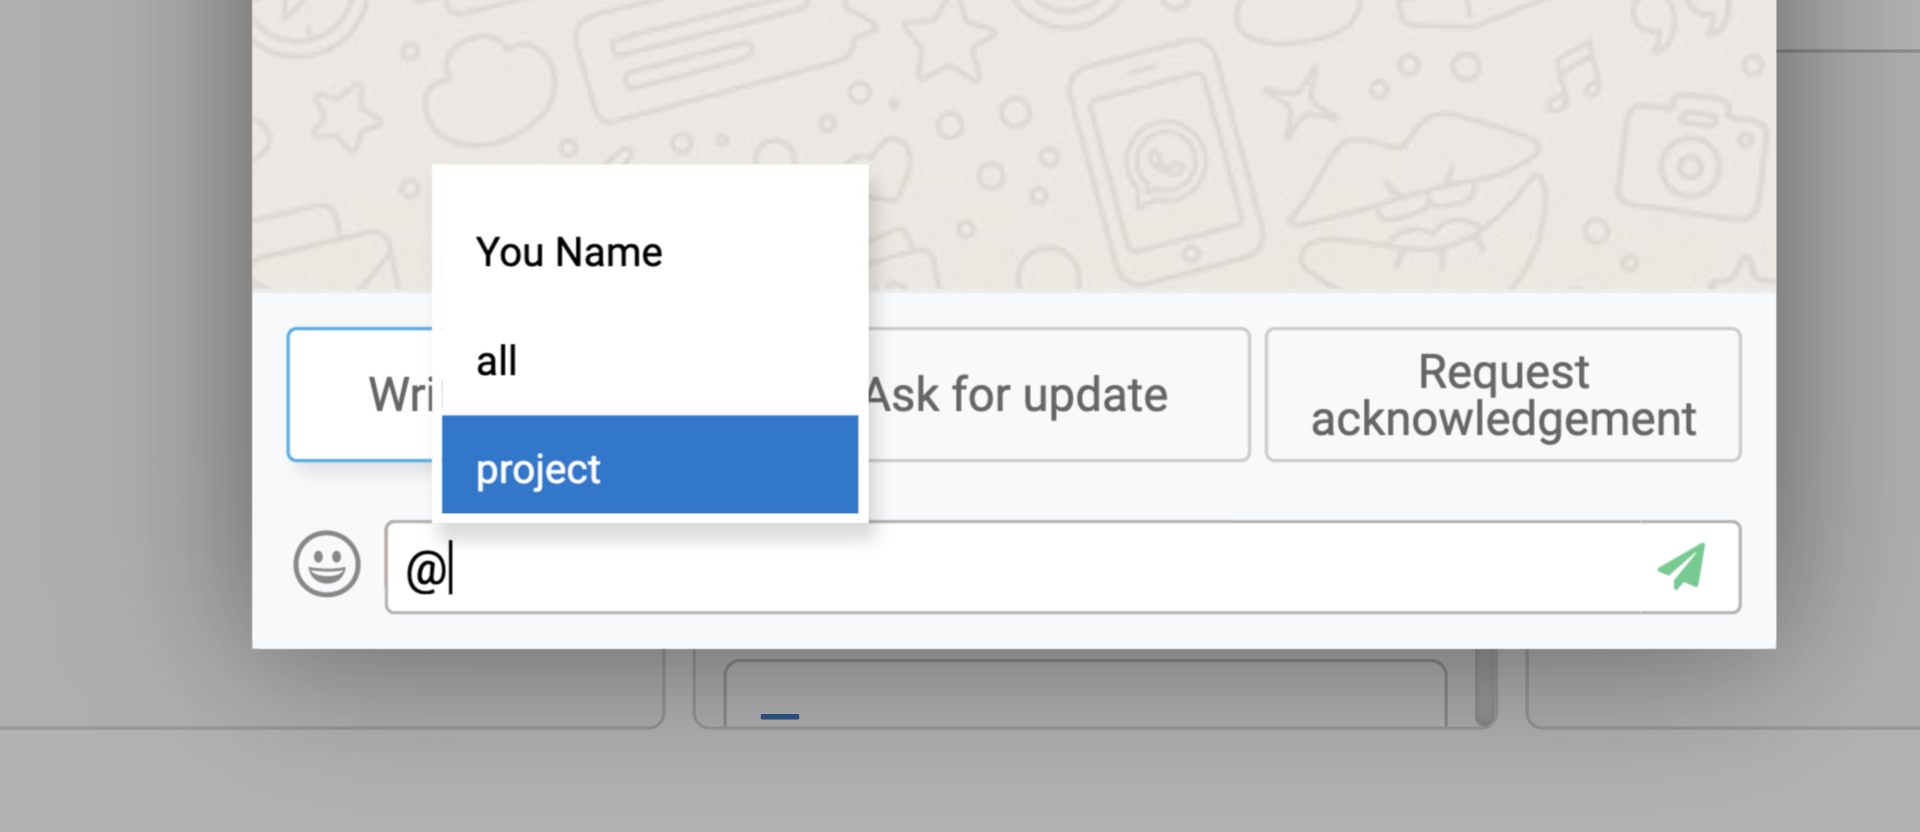
Create a discussion with your team from within any activity in the project. Use the ‘@’ sign to address a specific team member. This feature allows you to communicate and respond to a single comment or member by composing your own message or selecting the predefined ‘Ask for Update’ / ‘Request acknowledgement’.
ProTip: Use ‘@Project’ to address all contributors in a project or use ‘@All’ to address all members within the Space.
ProTip: Communicating with several people across multiple tasks can be easily done from the List view in Task Management. Select the box next to the assignment, followed by clicking the chat icon on the top of the list.
Files Tab:
Attach supporting materials to activities / tasks from your local machine or network and also attach a link to a shared drive if you’d like to preserve your organization’s default permissions.
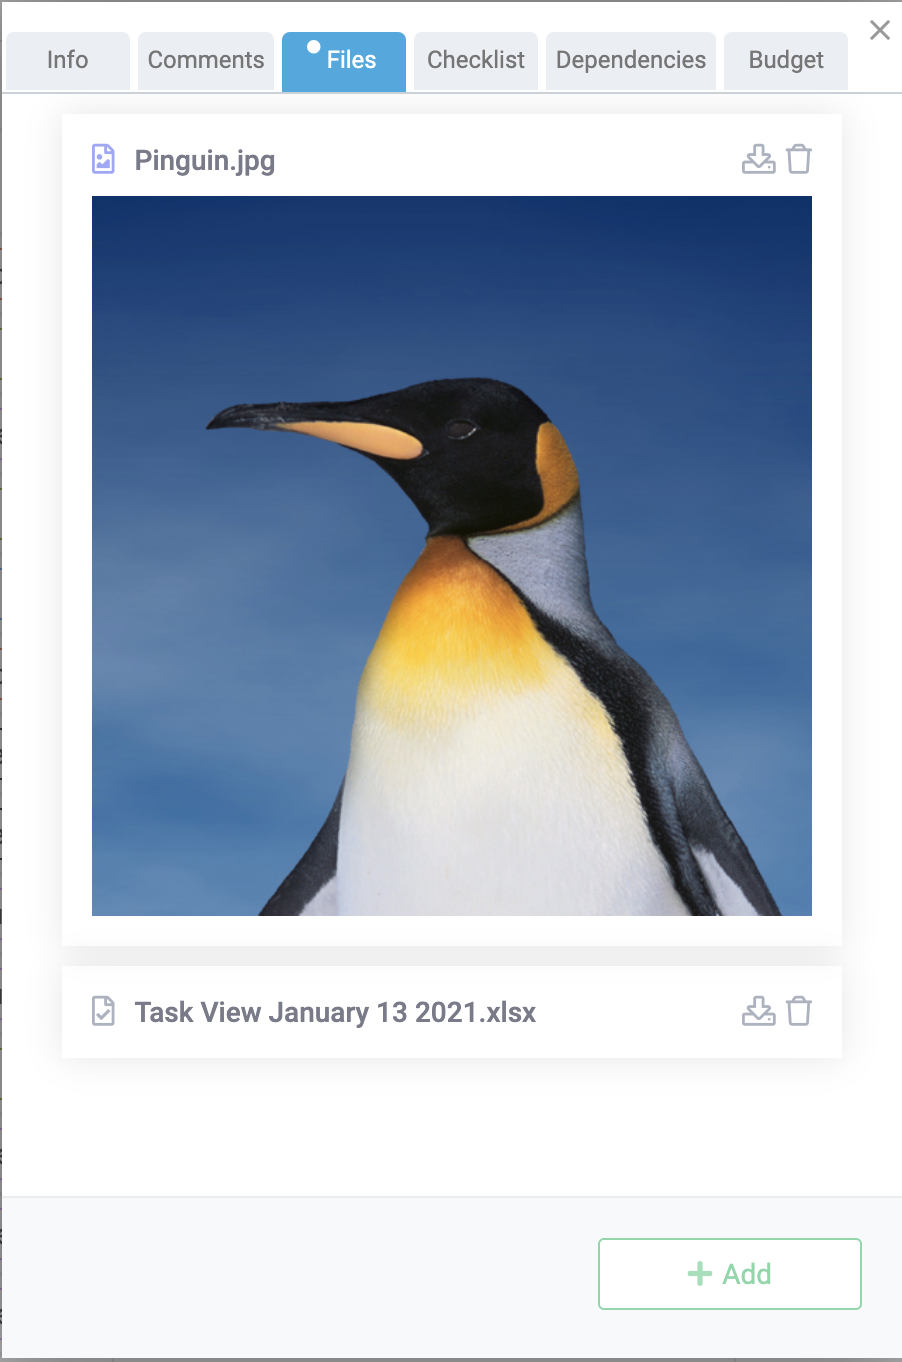
ProTip: Searching for a specific attachment in one of the many project’s tasks? Go to the Project’s Settings (Tools > Project Settings) which serves as a central repository of all project’s attachments.
Checklist Tab:
Using checklists can be very helpful when additional guidelines are needed to complete an assignment. Using Checklists ensures that the assignee will know what needs to be done when reaching the assignment.
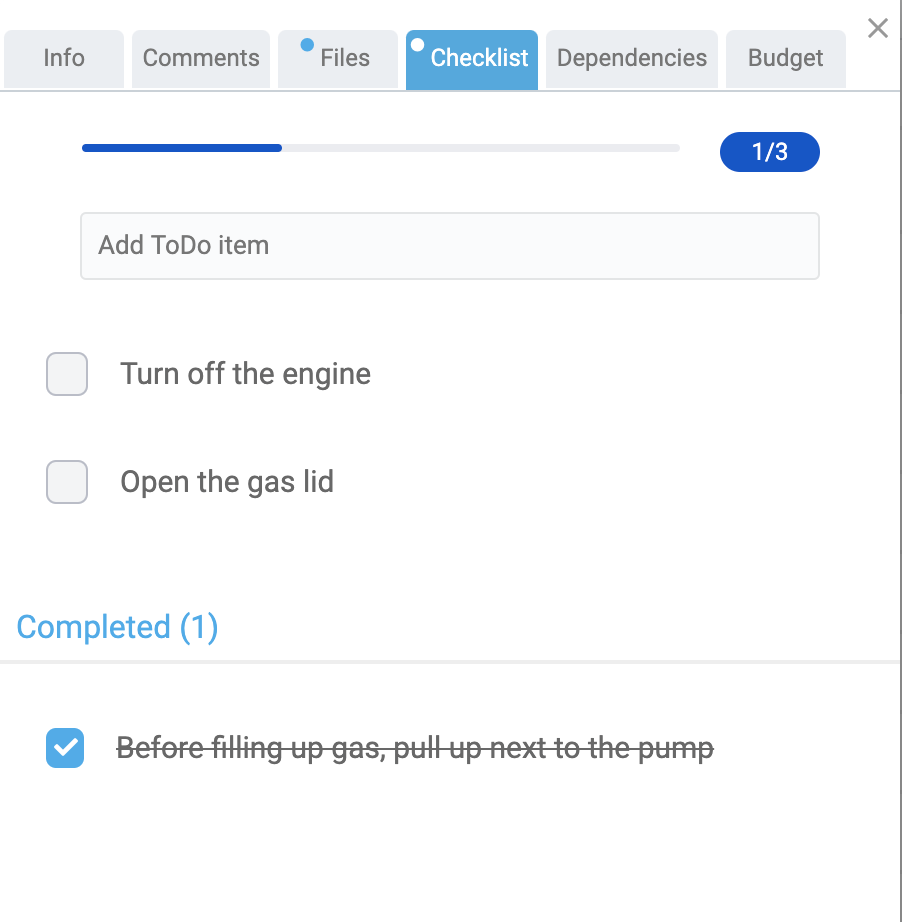
Pro Tip: An Activity or Task that contains a checklist, cannot be 100% completed before all items in the checklist are marked off. This is a great mechanism for project owners (or managers) to guide their resources on how to complete certain tasks.
Now it’s officially time to start working! ????